Blackstone Grill How to Use: Step-by-Step Setup to Cook
A Blackstone griddle is one of the most versatile outdoor cooking tools you can own, but the first cook can feel intimidating. The surface smokes, food sticks, and the burners behave differently than a traditional gas grill. The good news is that the learning curve is short once you understand the setup, seasoning, heat control, and shutdown process as a connected system.
This Blackstone grill how to use guide walks through the complete step-by-step setup to cook. You’ll learn how to assemble the unit safely, build a nonstick surface, manage multiple heat zones, cook your first meal cleanly, and protect the griddle between uses. In practice, most early mistakes come from skipping one small step—not from lack of cooking skill.
What Makes a Blackstone Different From a Standard Gas Grill
A Blackstone is a flat-top griddle, not a traditional grate-style grill. Instead of food sitting over open grates, everything cooks directly on a solid steel surface. That one design difference changes how heat, fat, and cleanup work.
On a standard gas grill, juices drip through the grates and vaporize. On a Blackstone, those juices stay on the surface, creating better browning and a crisp exterior while keeping food moist. The solid steel plate also means you can cook foods that would fall through grates: eggs, pancakes, fried rice, chopped vegetables, and delicate fish.
Most models have multiple independently controlled burners running front to back or left to right. This layout creates true heat zones on one surface. You can sear burgers on one side while warming buns on the other. The grease management system directs excess oil and debris to a rear or side cup, which keeps the cook surface cleaner during long sessions.
The trade-off is that a flat top requires seasoning and more immediate cleanup. You’re essentially maintaining a large carbon-steel or cold-rolled-steel cooking surface. That sounds like work, but once it’s seasoned, a Blackstone releases food well and becomes easier to clean after each use.
Identify Parts, Tools, and Safe Placement Before You Start
Before lighting anything, get oriented with the parts and place the griddle in a safe, level spot. A common mistake is assembling the cart in one location, then discovering it’s too close to siding or too unlevel for the grease to drain.
Key Parts to Identify
Lay everything out and compare it to the manual’s diagram. While layouts vary by model, most Blackstone griddles include:
- A steel griddle top or cooktop
- A cart, cabinet, or stand assembly
- Burner tubes and control knobs
- A regulator hose for propane models
- A grease cup and grease chute or tray
- Side shelves and a hood or hard cover on many current models
- An ignition button, sometimes powered by a AA battery
Tools Worth Staging Before You Start
You don’t need a large toolkit, but having the right items nearby prevents mid-build frustration:
- Adjustable wrench or a 7/16-inch to 1/2-inch wrench set
- Phillips screwdriver and socket set for legs and shelves
- A bubble level
- Paper towels and a spray bottle with soapy water
- Long-handled metal spatula and scraper for later
- An infrared thermometer for accurate surface readings
Placement Rules That Matter
Set the griddle outdoors on a flat, non-combustible surface. Keep at least 24 inches of clearance from siding, railings, and overhead structures. Avoid enclosed patios, garages, or low awnings where heat and grease vapor can collect. Wind matters too: a steady breeze can steal heat from the burners, so position the griddle with its back or side panels facing the wind when possible.
In practice, leveling is one of the most overlooked steps. If the surface tilts even slightly, grease pools in one corner instead of flowing to the drain. A grill mat under the wheels protects composite decks and makes cleanup around the unit easier.
Assemble and Connect Fuel Safely
With parts identified and the site chosen, build the frame first and connect fuel second. Ignition should always be the last step.
Build the Cart and Mount the Top
Assemble the legs, shelves, and base according to the manual. Keep bolts loose until the frame is squared, then tighten them fully. Once the stand is rigid, set the griddle top into place and confirm it doesn’t rock. If your model uses a rear grease system, install the cup and bracket before adding the cooktop.
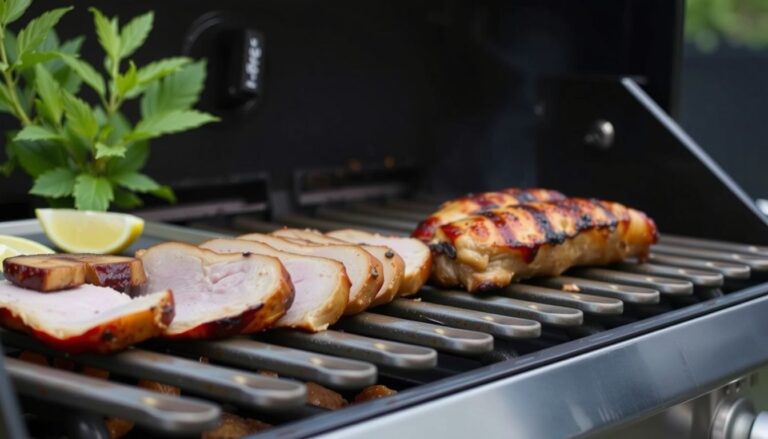
 A Blackstone flat-top griddle with burners, control knobs, and the steel cooktop positioned correctly for setup.
Because layouts differ across the current lineup, check the model-specific assembly guide on the official Blackstone support site before you begin if anything looks unfamiliar.
Connect Propane Correctly
For propane models, hand-tighten the regulator’s Type 1 or QCC1 nut onto the tank valve. Keep the tank upright and secured on its tray. A tank that tips or sits at an angle can allow liquid propane into the regulator, which creates dangerous flame surges. Open the valve slowly—a fast release can trip the regulator’s excess-flow safety and cause weak, unstable flames.
For natural gas units, use only the manufacturer-approved hose and quick-connect fitting. Never adapt a propane grill to natural gas with random fittings; pressure and orifice sizing are not the same.
Leak Test Before Lighting
Turn all burner knobs off, open the gas valve, and spray soapy water on every connection from the tank to the regulator and manifold. Growing bubbles mean a leak. Shut the gas off, retighten the fitting, and retest until no bubbles appear. This takes two minutes and prevents a serious fire hazard.
After the leak test, light one burner and look for a steady blue flame with minimal orange flicker. Weak ignition often traces back to battery orientation or burner ports that aren’t aligned with the electrode.
Season the Griddle Top for a Nonstick, Rust-Resistant Surface
Seasoning is the most important setup step for a Blackstone. It transforms raw steel into a dark, slick, rust-resistant cooking surface by polymerizing thin layers of oil under heat. Skipping it—or doing it poorly—is the main reason food sticks during the first cook.
How to Season a New Blackstone Griddle
Start with a clean, dry cooktop. If there’s factory residue or dust, wipe it with warm water and a small amount of mild soap, then rinse and dry completely. Any moisture left behind can cause flash rust within minutes.
Then follow this sequence:
- Preheat all burners on medium-high for 10–15 minutes. The steel will begin to darken.
- Apply a thin film of high-smoke-point oil—flaxseed, canola, avocado, grapeseed, or Blackstone’s seasoning oil all work.
- Spread it edge to edge using tongs and a folded paper towel. The layer should look satin, not wet.
- Let the oil smoke until the surface looks dry, then repeat for three to five total cycles.
- Turn the burners off and let the griddle cool naturally before cooking.
A properly seasoned top shifts from brown to deep black over time. That darkening is normal and desirable.
Seasoning Mistakes That Cause Sticky or Blotchy Surfaces
Thin beats thick every time. If you can see puddles or streaks, you’ve used too much oil, and the surface may turn sticky. Seasoning on low heat won’t fully polymerize the oil. Butter and olive oil burn at too low a temperature and leave gummy residue. Also, don’t skip the corners and edges—they’re where rust tends to start first.
After cooking smash burgers, scrape the surface, wipe a teaspoon of oil across the warm top, and let it heat for two minutes. That quick maintenance season keeps the surface consistent between weekend cooks.
Preheat and Control Heat Zones for Consistent Cooking
A Blackstone doesn’t cook like a single-burner pan. It behaves more like a commercial flat-top line, where different areas run at different temperatures. Learning to build heat zones is what separates crisp, evenly cooked food from burnt outsides and raw centers.
Preheat the Right Way
Preheat with the lid open on hooded models. Ten minutes is a realistic baseline, but cold weather and wind can add time. The goal is stable heat before food hits the steel. On many propane models, the surface reaches roughly 450°F to 500°F on high, 350°F to 400°F on medium, and 250°F to 300°F on low.
Use an infrared thermometer instead of trusting knob position alone. If you don’t have one, flick a few drops of water onto the surface: fast, dancing beads mean high heat, while a slower sizzle points to medium.
Build Three Practical Zones
- High zone: Searing steaks, smash burgers, and crisping hash browns.
- Medium zone: Pancakes, stir-fries, grilled sandwiches, and eggs.
- Low/hold zone: Warming buns, finishing thick cuts, and holding cooked food without overcooking.
A common mistake is running every burner on high. That burns off your seasoning, dries out food, and leaves you with no landing zone. Expect the back edge to run slightly hotter on some units due to airflow and burner placement.
If you’re searing beef, choosing first-timer steak selections that are thin and forgiving makes heat management much easier while you learn the surface.
Cook the First Meal Step-by-Step
Once the griddle is seasoned and preheated, cooking becomes a rhythm: light oil, stage food, flip once, and rest. The goal is even browning without scraping away the new seasoning.
Oil the Surface Lightly
Add 1 to 2 teaspoons of high-smoke-point oil and spread it with folded paper towels held by tongs. The surface should look satin, not wet. Too much oil puddles, smokes heavily, and can leave sticky patches that feel gummy after cooling.
Load Food in the Right Order
Put the longest-cooking items on first. Proteins go down before vegetables, and quick warm-through items like buns and tortillas go on last. Respect the zones: keep a cooler area open for holding food so nothing over-browns while the rest finishes.
Flip With Intention
Let food release naturally. If a burger or steak sticks, it usually needs another 30 to 60 seconds before it’s ready. Use a metal spatula with a straight edge to get full contact under the food. Repeated pressing squeezes out moisture and tears the developing crust—press once for smash burgers, then leave it alone.
For smash burgers, oil lightly, place 2 to 3-ounce balls on the hot zone, smash for about 10 seconds, season, and wait for the edges to crisp. Flip once, add cheese, then move the patties to the cooler side while onions toast and buns warm. For ground beef, follow safe burger temperature guidance and the minimum internal temperature recommendations from the USDA Food Safety and Inspection Service to ensure the patties are fully cooked.
Clean, Re-Season Lightly, and Store to Prevent Rust
Cleanup is fastest while the griddle is still warm. A quick routine protects the seasoning, keeps flavors clean, and prevents rust between uses.
Warm Surface Cleaning Sequence
- Scrape food debris and grease toward the grease trap using a flat scraper.
- Pour a small splash of water onto hot, stuck areas and scrape as it steams.
- Wipe the surface dry with paper towels. It should look clean and mostly dry.
- Add about a teaspoon of oil, wipe it into a thin sheen, and let it heat for two to three minutes.
- Turn the burners off, close the propane valve, and let the top cool completely before covering.
Never soak the griddle or leave standing water on it. Dish soap every time is also unnecessary—occasional soap is fine for a deep clean, but daily soap strips the seasoning.
Storage Tips
Wait until the surface is fully cool and dry before putting on a cover. Covering a warm griddle traps condensation and encourages rust. In humid garages, a breathable soft cover under a hard cover reduces moisture buildup. If dull gray patches appear, a warm wipe with oil usually restores the finish. If you’ve been cooking fish, that surface can hold odor longer than you expect—a thorough warm scrape and fresh oil layer help reset it before your next cook, while smoked fish cooking time offers a lower-odor alternative when you want a different method.
Best Foods to Cook First on a Blackstone
Once the griddle is ready, start with foods that reward high, even heat and teach you the surface.
Smash burgers are the classic first cook. They’re fast, forgiving, and show how direct surface contact creates a crust. Breakfast spreads—pancakes, bacon, eggs, and hash browns—also force you to manage multiple zones at once.
Beyond burgers, a Blackstone handles fajitas, fried rice, and cheesesteaks with minimal fuss. A flat-top pizza setup can rival a dedicated pizza oven when you manage the hood and surface heat correctly, so it’s worth trying a griddle-friendly pizza technique after your first few cooks.
Pork chops are another versatile option. You can sear boneless chops on the flat top and finish them thick and juicy with oven-finished chops, or prep a batch of slow-cooked pork chops for a low-effort weeknight meal. Bone-in chicken thighs are equally flexible, and our guide to chicken thigh doneness helps you nail the finish whether you sear, bake, or finish them under a hood.
Common Blackstone Mistakes and How to Avoid Them
Even experienced grillers make these errors when moving to a flat top. Use this quick reference before and after cooking.
| Mistake | What Happens | The Fix |
|---|---|---|
| Seasoning with too much oil | Sticky, blotchy surface | Apply the thinnest possible coat; repeat rather than over-apply |
| Skipping preheat | Food sticks and cooks unevenly | Preheat 10–15 minutes and confirm surface temperature |
| Running all burners high | Burnt seasoning, dried-out food | Build high, medium, and low zones |
| Crowding the cooktop | Steam replaces sear | Leave open space; cook in batches |
| Pressing meat repeatedly | Lost juices, torn crust | Press once or flip only when released |
| Covering a warm griddle | Trapped moisture and rust | Cool and dry completely before covering |
| Skipping the leak test | Fire hazard | Soap-test every connection before first light |
Frequently Asked Questions
How long does it take to season a Blackstone griddle for the first time?
Expect 30 to 45 minutes total. Preheat for 10 to 15 minutes, then apply three to five ultra-thin oil coats, letting each one smoke until dry. The surface will darken gradually. A full black finish develops over several cooks, not all at once.
Can I use a Blackstone griddle indoors?
No. Propane and most natural gas griddles are for outdoor use only. They produce carbon monoxide and significant heat. Electric tabletop Blackstone models exist, but always follow the manufacturer’s stated indoor or outdoor rating and ventilation requirements for your specific unit.
Why does food stick to my Blackstone?
Sticking usually means the seasoning is too thin, too thick, or the surface wasn’t hot enough before food went down. Preheat fully, apply a light oil sheen, and let food release naturally. If it sticks, wait 30 to 60 seconds longer before flipping.
Do I need to oil the griddle before every cook?
Yes, a light coat helps release and protects the seasoning. Use about one to two teaspoons of high-smoke-point oil and spread it thin. After cooking, wipe the warm surface clean and apply another micro-layer to protect against rust.
What temperature should a Blackstone griddle be for smash burgers?
Aim for roughly 400°F to 450°F on the hot zone. Preheat on high, lightly oil, then sear 2 to 3-ounce balls for a crisp edge. Use an infrared thermometer if possible, and keep a cooler zone nearby for buns and holding finished patties.
How do I clean a Blackstone after cooking?
While the griddle is warm, scrape debris into the grease trap, use a small splash of water to steam-clean stuck spots, and wipe dry. Finish with a thin oil sheen and let it heat briefly. Cool completely before covering to prevent rust.
Conclusion
A Blackstone grill is a system, not just a griddle. When you combine a level setup, a safe fuel connection, proper seasoning, controlled heat zones, and a fast warm-surface cleanup, the first cook feels predictable instead of stressful. Most problems—sticking food, uneven heat, rust—trace back to one skipped step.
Your next move is simple: assemble the unit, leak-test the gas line, season the top, and cook something straightforward like smash burgers or breakfast. Fire it up, follow the sequence, and the blackstone grill how to use process will quickly become second nature.

One Comment