How to Grill Chicken Drumsticks on Gas Grill Step-by-Step
Wondering how to grill chicken drumsticks on gas grill without burnt skin and undercooked meat? You can—by controlling heat zones, timing, and finishing temperature instead of guessing. The payoff is crisp, bite-through skin and juicy meat that pulls cleanly from the bone.
Look, drumsticks are forgiving, but they’re also thick and fatty, so they need a smart plan. You’ll set up a two-zone fire, season for browning, and cook mostly over indirect heat, then sear briefly to lock in color. A thermometer is your safety net; 165°F in the thickest part is the target.
Here’s what you’ll learn step by step:
- How to set up direct vs. indirect heat on a gas grill
- Seasoning and oiling methods that help skin crisp
- Exact cook times, flipping cadence, and when to sauce
- How to confirm doneness and rest for better juiciness
Practical example: if you’re grilling for a weeknight dinner, cook 10 drumsticks at 375–400°F indirect for about 25–30 minutes, then move them over direct heat for 2–4 minutes per side to finish and caramelize.
Before You Start: Gather Tools, Ingredients, and Set Up Two-Zone Heat
Now that you’ve got the core approach in mind, your next win is setup. When you’re learning how to grill chicken drumsticks on gas grill, the prep work is what prevents flare-ups, patchy browning, and that “done outside, raw at the bone” problem.
Start by confirming your grill is stable and predictable. A quick preheat and a clean grate do more than improve flavor—they reduce sticking and tearing, which can rip off skin and expose meat to direct flame.
Tools to have within reach (don’t make trips inside mid-cook):
- Instant-read thermometer (fast, accurate; essential for dark meat)
- Long tongs and a grill spatula (for safe turning and repositioning)
- Grill brush or scraper (clean grates right after preheat)
- Small bowl and brush (oil application; helps browning)
- Sheet pan or tray (raw-to-grill and grill-to-rest transport)
For ingredients, keep it simple and functional. You need drumsticks, a neutral oil (canola/avocado), kosher salt, and your seasoning blend or marinade. If you’re using a sugary sauce, hold it back until the end so it doesn’t scorch.
Set up two-zone heat on a gas grill so you can cook through gently, then crisp the skin. Preheat with the lid closed for 10–15 minutes. Then adjust burners to create one hot side and one cooler side.
- For a 2-burner grill: left burner medium-high, right burner low or off.
- For a 3-burner grill: one burner high (hot zone), middle low (buffer), one off (cool zone).
Look for a grate temp that’s roughly 425–450°F on the hot side and 300–350°F on the cool side. If your grill has a lid thermometer, treat it as a general guide; grate-level heat is what matters.
Pro tip: If flare-ups are common, place a drip pan (foil pan works) on the cool side under the grate. It catches rendered fat before it hits flames and buys you steadier heat.
Common mistake: Starting drumsticks over direct high heat. The fat renders fast, fires up the burners, and you’ll chase flames instead of cooking.
Practical example: On a typical 3-burner gas grill, set the left burner to high, the middle to low, and keep the right off with a foil pan under it. You’ll cook most of the time on the right (indirect), then slide pieces left to finish and crisp.

Season and Prep Drumsticks for Even Cooking and Crisp Skin
With the grill staged, shift to the chicken. Drumsticks are forgiving, but they’re not magic—uneven thickness and wet skin are the two biggest reasons they cook inconsistently and refuse to crisp.
Start by trimming and inspecting. Snip off loose skin flaps that can burn, and remove any stray bone fragments from packaging. If drumsticks are very large, plan extra time on indirect heat.
Dry the surface aggressively. Pat each drumstick with paper towels until the skin feels tacky, not slick. Moisture is the enemy of browning; it forces the grill to “steam” the skin before it can crisp.
Next, oil lightly. Use just enough neutral oil to help seasoning adhere and promote even color. Too much oil drips, triggers flare-ups, and leaves you with soot instead of a clean char.
Seasoning options (choose one path and commit):
- Dry brine: salt (and optional pepper) 2–12 hours uncovered in the fridge for deeper seasoning and drier skin
- Dry rub: salt + paprika + garlic powder + onion powder + black pepper (apply 20–30 minutes before grilling)
- Marinade: oil + acid + aromatics (pat dry before grilling; avoid heavy sugar early)
If you want the most reliable crisp skin, dry brining is the move. Salt draws out moisture, then the meat reabsorbs it, improving juiciness while the surface dries out in the fridge.
Pro tip: Add baking powder only if you know it’s aluminum-free and you use a tiny amount (about 1/2 tsp per pound) mixed into the rub. It can boost browning, but too much tastes metallic and looks chalky.
Common mistake: Seasoning right out of the package without drying. The rub turns pasty, slides off on the grill, and you lose both flavor and texture.
Arrange drumsticks on a tray in a single layer after seasoning. This prevents wet spots where pieces touch and keeps your workflow clean—raw chicken juice shouldn’t be near your cooked-food landing zone.
Practical example: For a family pack (about 10 drumsticks), pat dry, toss with 1–2 tbsp avocado oil, then season with 2 tsp kosher salt, 2 tsp smoked paprika, 1 tsp garlic powder, and 1/2 tsp black pepper. Let them sit 25 minutes while the grill stabilizes, then start them on the indirect side for controlled cooking.
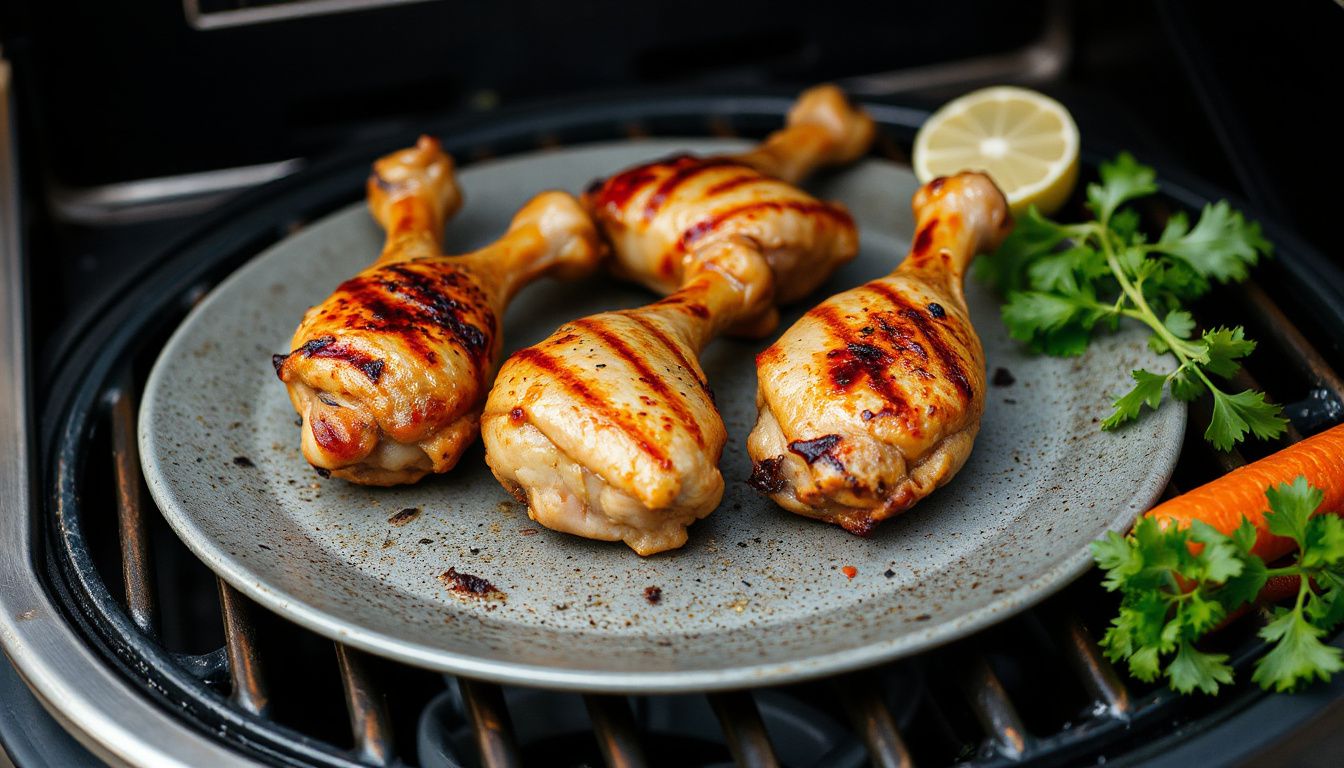
Grill Drumsticks Step-by-Step Using Indirect Then Direct Heat
Now you’re set up for the part that actually fixes the “burnt outside, raw inside” problem: controlled cooking first, then a fast finish. The goal is simple. Cook the drumsticks through on indirect heat, then crisp and color the skin over direct heat.
Start with the lid closed and the grill stabilized in the medium range. Place drumsticks on the indirect side, thicker ends angled toward the hotter zone. That small positioning trick helps the dense meat cook evenly without scorching the thinner end.
- Place drumsticks on the indirect zone: Leave a little space between pieces so hot air can circulate.
- Close the lid: You’re roasting with gas grill convection, not “open-flame grilling.”
- Cook 20–30 minutes: Flip once halfway through for even browning and to prevent hot spots from over-darkening one side.
- Watch for flare-ups: If fat drips and flames lick the skin, slide that piece deeper into the indirect zone and close the lid.
- Move to direct heat to finish: When the drumsticks are close to done, shift them to the direct side for 1–3 minutes per side to crisp.
Look, the timing isn’t a fixed number because drumsticks vary in size and grills vary in output. Your best “clock” is the visual change: the skin tightens, fat renders, and the surface starts to look dry and set rather than wet and pale.

When you move to direct heat, stay close. Rotate and turn frequently instead of letting one side sit. You’re aiming for even caramelization, not black patches.
- Pro tip: If you’re using a sweet sauce, brush it on only during the last 2–4 minutes on direct heat to avoid burning sugars.
- Pro tip: If the skin isn’t crisping, open the lid for 30–60 seconds on direct heat to drive off surface moisture.
- Common mistake: Starting over direct heat. That’s how you get charred skin and undercooked meat at the bone.
Practical example: If you’re grilling 10 average drumsticks for a backyard lunch, run them indirect for about 25 minutes with the lid closed, flipping at minute 12. Then move them to direct heat for about 2 minutes per side, turning often, until the skin turns deep golden with a few dark edges.
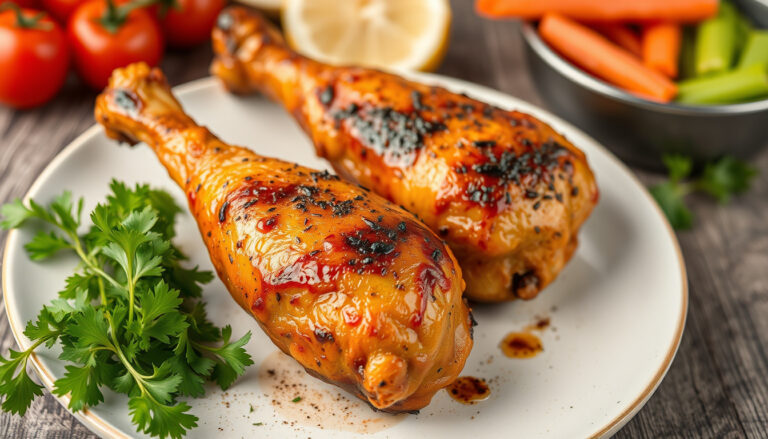
Check Doneness, Rest, and Serve (Plus Storage and Reheating Tips)
Once the drumsticks look great, don’t guess. Doneness is where food safety and texture meet, and it’s the step that separates “fine” from reliably excellent.
Use an instant-read thermometer and probe the thickest part of the drumstick without touching bone. Bone conducts heat and can give a false reading, so angle the probe in from the side toward the center of the meat.
- Target internal temperature: 175–185°F for drumsticks (tender, juicy, and the connective tissue has softened).
- Minimum safety threshold: 165°F, but many drumsticks at 165°F still eat a bit tight near the bone.
- Visual cues: Juices run mostly clear, meat has pulled back slightly from the bone ends, and the skin is rendered and crisp.
Once they hit temperature, move drumsticks to a clean tray and rest. Resting isn’t optional. It lets juices redistribute and finishes carryover cooking without drying the surface out.
Rest 5–10 minutes, loosely tented with foil if it’s windy or cold outside. Don’t wrap tightly. Tight foil traps steam and can soften the crisp skin you just worked for.
Serving is straightforward. Keep it simple: a squeeze of lemon, a light sprinkle of flaky salt, or a thin glaze brushed on right after the grill for shine. If you’re serving sauced drumsticks, offer extra sauce on the side so the skin stays crisp on the plate.
Storage matters if you’re meal prepping. Cool drumsticks for about 20–30 minutes, then refrigerate in shallow containers. Keep them covered so the fridge doesn’t dry them out.
- Refrigerator: 3–4 days in an airtight container.
- Freezer: Up to 3 months; wrap tightly to prevent freezer burn.
- Food safety: Don’t leave cooked chicken out longer than 2 hours (1 hour if it’s hot outside).
For reheating, avoid the microwave if you care about skin texture. Use a 375°F oven for 12–18 minutes, or reheat on the gas grill over indirect heat with the lid closed, then finish 1 minute per side on direct heat to re-crisp.
Practical example: If you grilled extra for weekday lunches, refrigerate four drumsticks in a container. On day two, warm them indirect on the grill for 8–10 minutes, then hit direct heat for 60–90 seconds per side. You’ll get hot, juicy meat and skin that’s still pleasantly crisp.
Putting It Into Practice
Now it’s just repetition and small adjustments. The real win is consistency: you’re building a reliable routine for how to grill chicken drumsticks on gas grill that works weeknights and cookouts.
Keep your next grill session simple and focused. Aim to improve one variable at a time, then lock it in.
- Track what you change (seasoning level, burner setting, cook time) so you can repeat results.
- Use cues, not guesses: color, rendered skin, and steady heat control.
- Plan the finish: sauce timing, resting window, and serving temperature.
Real-world example: if your first batch tastes great but the skin isn’t quite where you want it, keep the same seasoning next time and only tweak the final crisping window by a couple minutes—then note the difference.
Next step: pick a date, buy a family-pack of drumsticks, and run one “practice cook” this week—then write down your settings so the next round is automatic.
One Comment