How to Grill Corn Without Husk in Foil for Juicy Ears
How to grill corn without husk in foil and still get sweet, juicy kernels with light char—without drying it out? It’s simple: wrap shucked ears with fat and seasoning, then grill over medium heat so the foil steams the corn while the grill adds flavor.
This method works when the husk is already removed, the corn is slightly older, or the grill is running hot. The foil creates a controlled environment, so moisture stays in and seasoning stays put. With a few small technique tweaks, they’ll get tender corn every time.
They’ll learn the key choices that make or break results:
- How to build a tight foil packet for even cooking
- What to add (butter, oil, herbs, spices) and when to add it
- How long to grill, when to flip, and how to finish for char
- Common mistakes that cause bland or mushy corn
Example: At a backyard cookout, they can wrap four shucked ears with butter, salt, and chili powder, grill them 12–15 minutes, then open the foil for a quick 2-minute char. That’s how to grill corn without husk in foil with predictable, crowd-pleasing results.
Gather Tools and Ingredients Before You Start
Now that the approach is clear, they’ll get better results by setting up the station first. Grilling corn in foil moves fast once the heat is on, and scrambling for supplies usually leads to torn foil or uneven seasoning.
They should start with the basics: a hot grill, sturdy foil, and a way to handle heat safely. Thin foil can split when the corn is turned, so heavy-duty foil is the safer default for direct grilling.
- Grill setup: gas or charcoal, plus a clean grate and a lid that closes
- Foil: heavy-duty sheets (or double-wrap with standard foil)
- Tools: long tongs, instant-read thermometer (optional), grill brush
- Flavor builders: butter or oil, kosher salt, pepper, spices, fresh herbs
- Convenience: small bowl for butter, pastry brush or spoon, tray for raw/finished corn
Ingredient choices matter because foil traps steam. Butter gives a classic, rich finish but can brown and darken quickly; oil handles heat a bit better and keeps flavors cleaner. If they want a smoky edge, chili powder, smoked paprika, or cumin works well, while sugar-heavy glazes should wait until the last minutes to avoid burning.
Practical example: For a weeknight cookout, they can portion eight 16-inch foil sheets, mix 4 tablespoons melted butter with 1 teaspoon kosher salt and 1/2 teaspoon smoked paprika, then stage tongs and a tray beside the grill. When the corn hits the heat, each ear gets wrapped in under 30 seconds, and nothing gets missed.
Pro tip: They should keep a “cool zone” on the grill (one burner off, or a charcoal-free side) for holding corn that’s done early. Common mistake: using short foil pieces that leave the ends exposed, which dries kernels and leaks butter onto flare-ups.
Prep the Corn for Even Cooking
Look, the prep is where consistency is won. When they prep each ear the same way, the foil packets cook evenly, season evenly, and finish with the same juicy bite.
They should start by shucking fully and removing every strand of silk. Silk burns fast, sticks to kernels, and can create bitter spots, so a quick rinse and thorough towel-dry is worth it.
- Shuck the corn and pull off silk; rinse if needed, then dry well.
- Trim any long stem end so the ear sits flat in the foil.
- Lightly coat with butter or oil; season with salt and chosen spices.
- Wrap tightly in foil, leaving a small air pocket for steam circulation.
They should aim for a thin, even fat layer, not puddles. Too much butter pools at the bottom of the packet, washing seasoning off one side while the other stays under-seasoned. If they’re using compound butter, spreading it on warm corn helps it coat instead of clumping.
For better texture, they can pierce the foil once or twice with a knife tip to vent a little steam. That small vent reduces “boiled” flavor and encourages a touch of char without drying the kernels.
Pro tip: If the ears vary in size, they should group similar sizes together so turning and timing stay simple. Common mistake: wrapping loosely; gaps let hot air rush in and dry the outer kernels before the center heats through.

When done right, this prep supports how to grill corn without husk in foil with predictable doneness and clean flavor. The next phase is all about heat control and turning rhythm.
Wrap Corn in Foil to Lock in Moisture and Flavor
With the corn cleaned and ready, the next win is building a foil wrap that steams the kernels while still letting the grill add flavor. The goal is a tight seal, a little fat, and just enough seasoning to taste the corn—not bury it.
They’ll start by tearing heavy-duty foil sheets long enough to fully enclose each ear. A good rule is 18–20 inches per ear, which leaves room to fold and crimp without punctures. If standard foil is all that’s available, they should double-layer it.
They’ll place one ear in the center and add a light coating of fat to protect moisture and carry flavor. Butter works for classic sweetness; oil handles higher heat with less risk of scorching. Either way, a thin, even layer beats big clumps.
- Fat: 1–2 tsp butter or oil per ear
- Seasoning: salt, pepper, chili powder, smoked paprika, or garlic powder
- Aromatics (optional): lime zest, minced herbs, or a pinch of sugar for extra caramel notes
Now they’ll wrap it correctly: bring the long sides up, fold them down tightly, then crimp the ends like a candy wrapper. They should leave a small air pocket around the kernels. That headspace helps steam circulate and cook evenly.
Pro tip: If they want a touch of char later, they can keep one “fin” of foil folded so it’s easy to open on the grill for a brief finishing sear. Common mistake: wrapping too loose, which leaks steam and dries the corn.
Practical example: for four ears at a backyard cookout, they can build a “butter mix” in a bowl—4 tbsp softened butter, 1 tsp kosher salt, 1/2 tsp smoked paprika, and lime zest—then spread it evenly before sealing each packet.
Grill the Foil-Wrapped Corn Step by Step
Once the packets are sealed, the grill does two jobs at once: it steams the corn inside the foil and adds gentle roasted flavor outside. Consistent heat and a simple turning routine keep the kernels juicy and evenly cooked.
They’ll preheat the grill to medium-high, aiming for steady heat rather than flare-ups. On gas, that’s typically 400–450°F; on charcoal, they’ll bank coals to create a moderate direct zone and a slightly cooler side for control.
- Place foil-wrapped ears on the grates over medium-high heat.
- Close the lid and cook 12–15 minutes total.
- Turn every 3–4 minutes so each side heats evenly.
- Check doneness by gently squeezing with tongs; the kernels should feel tender through the foil.
- Rest 2 minutes off-heat before opening to avoid a steam blast.
Pro tip: If they want light char, they’ll open the foil carefully, peel it back, and set the bare corn directly on the grates for 60–120 seconds per side. They should watch closely; sugar in corn browns fast.
Common mistakes: cooking too hot (butter scorches inside the packet), leaving packets unmoved (hot spots cause uneven tenderness), or opening repeatedly (steam escapes and slows cooking). One quick check near the end is enough.
Practical example: when grilling burgers and corn together, they can put the corn packets on first, then add burgers about 6–7 minutes later. While the burgers rest, they’ll finish the corn with a quick direct-grate char, then serve immediately with a squeeze of lime.
Check Doneness and Finish with Char and Seasoning
Now that the foil packets have done the heavy lifting, the goal shifts to two things: confirming the kernels are tender and building a little smoky char without drying the corn out.
They’ll start by moving one packet to a cooler zone of the grill, then carefully opening it away from their face to vent steam. A quick visual check helps, but texture is the real test.

Use these doneness cues before committing to any high-heat charring:
- Kernels look plump and glossy, not wrinkled or dull.
- A paring knife slides into a kernel with light resistance.
- The cob feels hot through the foil and slightly flexible when gently pressed.
If the corn isn’t there yet, they should re-seal the packet tightly and grill in short bursts. Two to four minutes per check prevents overcooking and keeps the butter or oil from scorching.
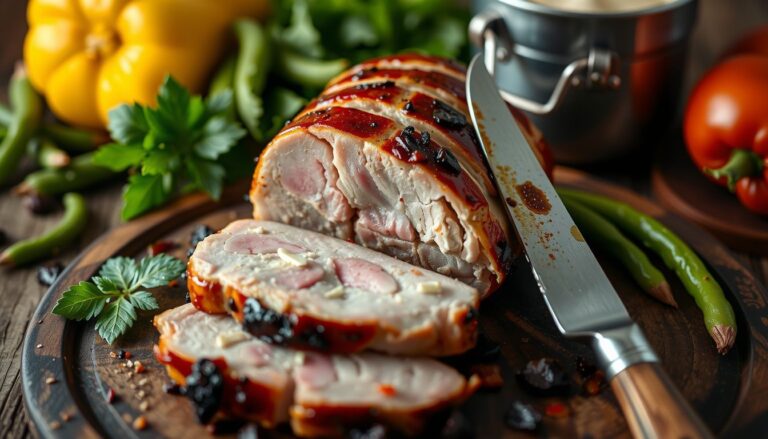
For char, they’ll open the foil fully and place the corn directly over medium-high heat for 60–120 seconds per side. Turning frequently matters. It creates spotty browning while protecting the sugars from burning.
Seasoning lands best right after charring while the surface is hot. A simple, reliable sequence is: fat first, salt second, then acids and spices last.
- Fat: butter, olive oil, or mayo for a clingy coating
- Salt: flaky salt or fine salt for even coverage
- Finish: lime juice, chili powder, smoked paprika, grated Parmesan
Practical example: For a backyard cookout, they can char each ear for about 90 seconds per side, then brush with butter, sprinkle with chili-lime seasoning, and add a pinch of flaky salt right before plating.
Common mistake: leaving the corn over direct heat too long “to get grill marks.” That often turns sweet kernels bitter fast.
Serve, Store, and Reheat Foil-Grilled Corn Safely
Once seasoned, serving is straightforward, but timing matters. Corn tastes best within minutes of coming off the grill, when the kernels are still juicy and the char is aromatic.
They should serve it hot with clean handling, especially if using shared toppings. A small “seasoning station” keeps things neat and prevents cross-contamination.
- Serve with: tongs, a platter, and a small brush for butter
- Offer toppings in separate bowls: salt, citrus wedges, cheese, spice blends
- Use corn holders or cut ears in half for easier eating
For storage, the safe move is rapid cooling. They’ll let corn cool just until it stops steaming, then refrigerate in an airtight container within two hours (one hour if it’s very hot outdoors).
Foil can be used for short-term holding, but it’s not ideal for refrigeration because it traps moisture. They’ll get better texture by unwrapping first and storing the ears or kernels in a sealed container.
Reheating should prioritize gentle heat to avoid tough kernels. Good options include:
- Grill: wrap in fresh foil with a teaspoon of water or butter, 5–8 minutes over medium heat
- Oven: 350°F (175°C) in foil, 10–12 minutes
- Microwave: covered dish, 30–60 seconds per ear, rotating once
Practical example: If they grilled corn on Saturday, they can cut leftover kernels off the cob on Sunday, warm them in a skillet with butter for two minutes, then fold into tacos or a grain bowl.
Common mistake: reheating uncovered on high heat. It drives off moisture quickly and makes the corn chewy.
Start Here
Now they’ve seen how to grill corn without husk in foil from start to finish, the focus shifts to repeatability. Consistent results come from keeping heat steady, timing predictable, and flavors intentional. When they treat each foil packet like a mini roasting chamber, the corn stays tender while still earning that grilled character.
A practical example: for a backyard cookout, they can prep a batch of foil-wrapped ears ahead, grill them while burgers finish, then open and season right before serving. That workflow keeps food hot, reduces last-minute juggling, and makes portions easy to manage.
- Pick a target outcome: buttery and mild, smoky and spicy, or bright and herby.
- Standardize the routine: same packet size, same grill zone, same check interval.
- Plan for serving: set toppings, tongs, and a tray so the corn moves fast.
Next step: they should choose one seasoning profile, grill two ears as a test run, then scale up with confidence for the next meal.