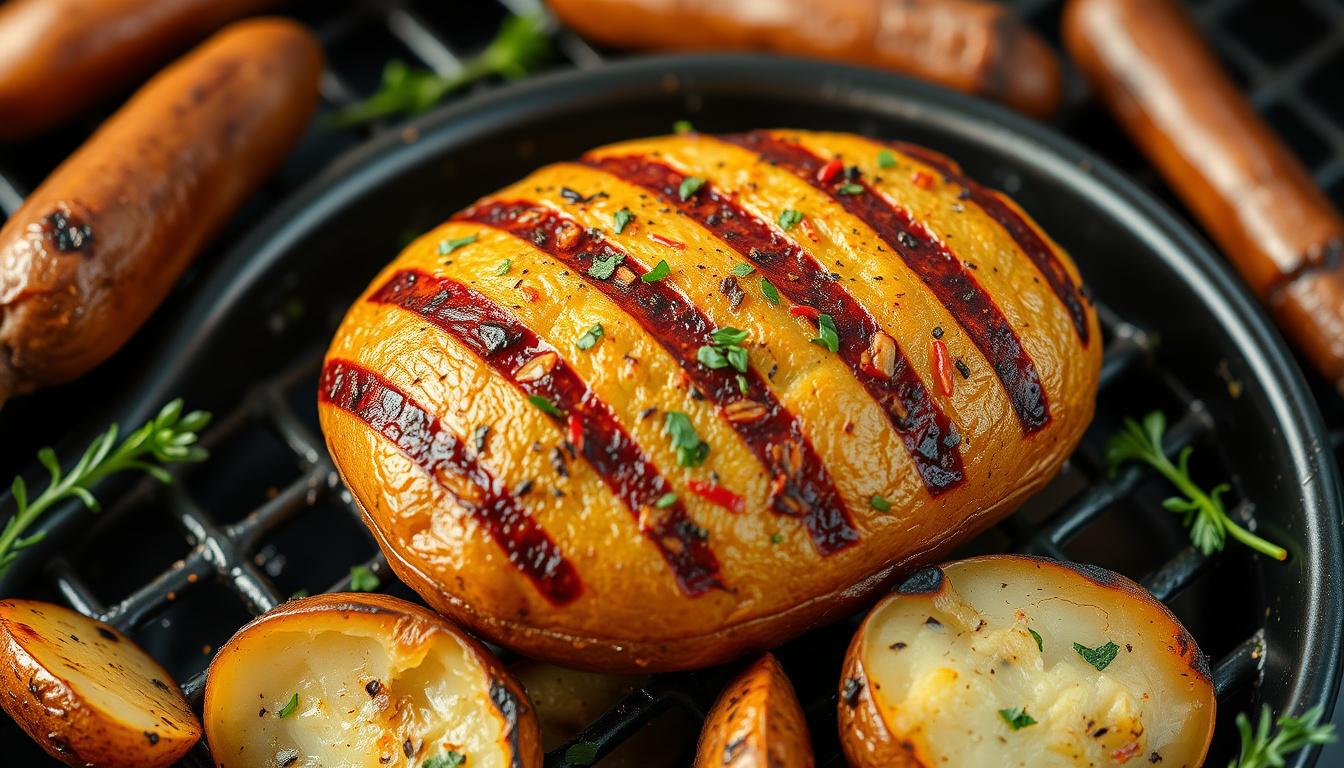
How to Grill Baked Potatoes Fast: Quick Method and Timing
Grilled baked potatoes deliver what oven versions can't always promise: a crisp, smoky, salt-crackled skin wrapped around a fluffy, steaming interior. The catch has always been time. Starting from raw, a dense russet can easily sit on the grill for 50 to 60 minutes before its center reaches that ideal tender stage.
The faster approach doesn't sacrifice texture for speed. By combining a brief microwave par-cook with a two-zone grill finish, you can have restaurant-quality grilled baked potatoes on the table in roughly 20 to 25 minutes, prep included. This guide breaks down the timing, technique, and small decisions that separate a genuinely great grilled potato from one that merely survived the flame. You can also read our guide on how to grill baked potatoes fast.
Why Grilled Baked Potatoes Take So Long (and How to Speed Them Up)
A raw russet potato is a dense mass of starch and moisture. For that moisture to soften the cell walls enough to create a fluffy texture, the potato's internal temperature needs to climb to around 205–210°F. On a grill running at 400–450°F, that journey takes close to an hour because indirect grill heat penetrates dense flesh more slowly than a convection oven's circulating air.
The fix is par-cooking. Microwaving the potatoes for four to six minutes before they touch the grate drives heat deep into the center, effectively jump-starting the cooking process. The grill then handles what it's best at: drying and crisping the exterior while a light kiss of smoke works into the oil and salt. You can also read our guide on how to grill ribs on charcoal fast.
In practice, the microwave handles the inside, the grill handles the outside. This is the same logic used by cooks who employ two-zone grilling techniques for everything from thick chops to whole birds—controlled heat that cooks and finishes in stages rather than all at once.
Choosing the Right Potatoes for Speed and Texture
Potato variety, size, and surface prep matter more on the grill than in the oven because you're working with a shorter window and more aggressive heat.
Best Potato Varieties for Grilling
| Variety | Starch Level | Skin Quality | Grilling Verdict |
|---|---|---|---|
| Russet | High | Thick, sturdy | Best for fluffy interior; needs thorough drying |
| Yukon Gold | Medium | Thin, delicate | Cooks faster; buttery flavor; softer, less crackly skin |
| Red | Low (waxy) | Thin, smooth | Holds shape but stays dense; less classic baked texture |
Russets are the standard choice because their high starch content produces the signature airy, floury center. Yukon Golds cook a few minutes faster and bring a rich, almost buttery flavor, though their thinner skin won't achieve quite the same crunch. Waxy red potatoes hold their shape beautifully but never develop that light, opened-up texture—they're better suited to roasting or potato salad.
Size Matters More Than You Think
Aim for medium potatoes in the 6 to 8 ounce range. They're large enough to be a proper side dish but small enough to par-cook evenly and finish quickly on the grill. Oversized potatoes weighing 10 ounces or more take noticeably longer and tend to cook unevenly: the exterior can be overdone by the time the center yields.
If you're cooking for a group, select potatoes of uniform size. A mixed bag means pulling potatoes off the grill at staggered intervals, which complicates timing and makes it harder to serve everything hot together.
Prep Steps That Promote Even Cooking
- Scrub the skins thoroughly under running water to remove any dirt or residue trapped in the eyes and crevices.
- Pat each potato completely dry with a clean towel. Surface moisture steams rather than crisps, so dryness is the first step toward a crackling skin.
- Pierce each potato three to four times with a fork. This gives steam an escape route and reduces the risk of a potato bursting under heat.
- Optional shallow scoring: Cut a crosshatch pattern about a quarter-inch deep into the top. This increases surface area, slightly shortens cooking time, and gives you a natural seam for splitting the potato open at serving.
The Two-Zone Grill Setup: Your Foundation for Control
Two-zone cooking means arranging your grill with a hot direct side and a cooler indirect side. This setup lets you gently cook the interiors without scorching the skins, then finish with a controlled blast of high heat for texture.
How to Set It Up
- Gas grill: Turn the burners on one side to medium-high, targeting roughly 450°F. Leave the other side completely off.
- Charcoal grill: Pile the lit coals on one half of the charcoal grate, leaving the opposite half empty, then replace the cooking grate over both zones.
Without this setup, potatoes placed directly over the flame will char on the outside while the centers stay firm. The indirect side functions like a gentle oven, raising internal temperature steadily. The direct side delivers the finishing sear that transforms a soft skin into a crisp, golden shell.
A common mistake is trusting the grill's built-in hood thermometer, which often reads significantly different from the grate itself. An instant-read or probe thermometer—ideally a model from a reliable maker such as ThermoWorks—takes the guesswork out. Aim for an indirect zone around 400–425°F and a direct zone between 450–500°F.
Step-by-Step: The Fastest Way to Grill Baked Potatoes
This method stages heat in two places—microwave, then grill—so the interior finishes at the same moment the skin reaches maximum crispness.
Step 1: Microwave Par-Cook (5–7 Minutes)
Place the prepared potatoes on a microwave-safe plate with at least an inch of space between them. Microwave on high for four to six minutes for 6 to 8 ounce potatoes; add one to two minutes for larger ones. Flip them at the halfway mark so both ends heat evenly.
Test with a skewer: it should slide in with light resistance but not hit a hard, raw center. The goal is not a fully cooked potato—just enough interior heat that the grill can finish the job in minutes rather than an hour.
Safety note: Potatoes retain heat remarkably well. Let them rest two to three minutes after microwaving before handling them with bare hands.
Step 2: Season the Skins (2 Minutes)
Par-cooked potatoes release steam and surface moisture, so pat them dry once more. Brush each potato with a thin coat of olive oil or melted butter—just enough to make the seasoning adhere. Too much oil drips onto the coals or burners and causes flare-ups that can blacken the skin unevenly.
Season generously. Coarse kosher salt or flaky salt gives the skin that satisfying crackle, while black pepper, garlic powder, smoked paprika, or dried rosemary and thyme add depth. The oil acts as a binder and a crisping agent, so this step does double duty.
Step 3: Grill Over Indirect Heat First (10–14 Minutes)
Place the seasoned potatoes on the indirect side of the grill and close the lid. The trapped heat creates an oven-like environment that finishes the interior without aggressive direct flame. After about 10 minutes, check the internal temperature with an instant-read thermometer inserted into the thickest part. You're looking for 190–200°F before moving to the next stage.
 Par-cooked, oiled, and seasoned potatoes rest on a tray before hitting the grill.
Step 4: Finish Over Direct Heat (3–5 Minutes)
Once the interior is nearly tender, move the potatoes to the direct heat zone. Turn them every one to two minutes so all sides brown evenly. Watch for the skin to blister and turn deep golden-brown—this is where the crisp, smoky character develops. The internal target at pull time is 205–210°F.
Step 5: Rest (3–5 Minutes)
Transfer the finished potatoes to a wire rack rather than a plate. A plate traps steam beneath the potato, softening the skin you just worked to crisp. The three to five minute rest lets moisture redistribute through the flesh, which is the difference between a fluffy interior and a slightly gummy one.
Total time: 20–25 minutes from start to finish, compared to an hour or more for a fully grilled raw potato.
Grilling Time Chart: Quick Reference
Use these times as a starting point, then adjust for your specific grill and potato size.
| Potato Size | Par-Cook Time (Microwave) | Indirect Grill Time | Direct Grill Finish | Total Time |
|---|---|---|---|---|
| 5–6 oz | 3–4 minutes | 8–10 minutes | 3–4 minutes | 15–18 minutes |
| 7–8 oz | 4–5 minutes | 10–12 minutes | 3–5 minutes | 18–22 minutes |
| 9–10 oz | 5–6 minutes | 12–14 minutes | 4–5 minutes | 22–25 minutes |
These figures assume an indirect zone running at 400–425°F. Colder grills stretch every stage; hotter grills compress them. The instant-read thermometer remains your most reliable tool.
Foil vs. Unwrapped: What Actually Works Better
Few potato debates run hotter. Here's the honest breakdown of when each approach earns its keep.
When Foil Helps
- During microwave par-cooking: Loose foil can help potatoes steam and soften slightly faster, though it adds cleanup.
- When you want soft, supple skin: Foil traps moisture, keeping the skin tender rather than crisp. This works if you're loading the potato with butter and cheese and don't mind a softer exterior.
- For holding and transport: Wrapped potatoes stay warm longer, which is useful for camping-style meals or packed lunches.
When to Skip Foil
- When you want crispy skin: Unwrapped potatoes exposed to dry grill heat develop the crackling exterior that foil prevents.
- When using the two-zone method: The indirect side already provides oven-like heat, so foil adds little and can slow the final crisping stage.
- When time is tight: Foil traps moisture, which works against the skin-drying effect you need at the end.
Recommendation: Skip foil on the grill. Because the par-cook already tenderizes the interior, you don't need foil's steaming effect. Cooking unwrapped lets the indirect stage bake while the direct finish crisps—best of both worlds.
How to Tell When Grilled Baked Potatoes Are Done
Time charts help, but visual color can deceive. Use these checks in combination.
The Internal Temperature Test (Most Reliable)
Insert an instant-read thermometer into the thickest part of the potato. At 205–210°F, the starches have fully gelatinized, which is what creates that light, fluffy texture. Undercooked potatoes read in the 180°F range and taste dense or slightly waxy.
The Squeeze Test
Gently press the potato with tongs or an oven mitt. A properly cooked potato yields slightly under pressure—like a firm water balloon—without collapsing.
The Fork Test
Slide a fork into the center. It should enter with almost no resistance and emerge with soft, fluffy flesh clinging lightly to the tines.
The Skin Test
Crisp skin should feel taut and faintly papery, not rubbery. When you press the surface, it should wrinkle slightly and make a soft crackling sound—your cue that the finish worked.
Common Mistakes That Ruin Grilled Baked Potatoes
Mistake 1: Skipping the Par-Cook
It's tempting to believe a hot grill can somehow cook a raw potato faster than an oven. It can't. Without the microwave stage, you're back to 45–60 minutes of grilling, often with charred skins and undercooked centers.
The fix: Microwave first. Five minutes of countertop work saves a half-hour or more at the grill.
Mistake 2: Overcrowding the Grate
Potatoes packed tightly together steam each other, which prevents the skin from drying and crisping. Give each potato at least one to two inches of breathing room on all sides.
The fix: Cook in batches or use a larger cooking area. Finished potatoes hold reasonably well on a wire rack, so batch cooking is more forgiving than crowding.
Mistake 3: Too Much Oil
Excess oil drips, flares up, and creates a fried-steam effect that keeps the skin soft. A thin, even coating is all you need.
The fix: Brush lightly, then rub the surface with clean hands to distribute the oil, wiping away any obvious excess with a paper towel.
Mistake 4: Trusting Color Over Temperature
A skin can look beautifully browned while the center remains crunchy. External appearance is a poor proxy for internal doneness.
The fix: Use an instant-read thermometer. It eliminates the guesswork in three seconds.
Mistake 5: Cutting Open Too Early
Slashing into a potato the moment it leaves the grill releases steam and causes the flesh to condense into a dense, gummy texture.
The fix: Rest for three to five minutes. This is not wasted time; it is essential texture development.
Par-Cooking Without a Microwave
No microwave? You still have faster options than an hour on the grill.
Boiling: Simmer prepared potatoes in salted water for 8–10 minutes until a skewer meets slight resistance at the center. Drain, pat completely dry, then proceed with seasoning and grilling. Boiling adds a few minutes compared to microwaving but remains far faster than starting raw.
Oven pre-bake: Bake at 400°F for 20–25 minutes, then move to the grill for the direct-heat finish. This works well when the oven is already running for another dish.
Steaming: A steamer basket over simmering water for 12–15 minutes accomplishes a similar jump-start. The trade-off is a wetter surface, so drying becomes even more important before oiling.
How to Grill Baked Potatoes for a Crowd
Feeding a group doesn't mean reverting to slow raw potatoes. Use this staged workflow to keep quality high at volume.
Step 1: Par-Cook in Batches
Microwave four to six potatoes at a time, depending on your microwave's capacity. Let each batch cool slightly, season, and stage on a tray while the next batch cooks.
Step 2: Maintain Your Zones
Keep the indirect side steady at 400°F. You'll shuttle potatoes from indirect to direct in waves, so consistent temperature is more valuable than speed.
Step 3: Run a Production Line
- Wave 1: Start the first batch on the indirect side.
- Wave 2: Ten minutes later, start batch two on the indirect side as batch one moves to direct heat.
- Wave 3: Continue the pattern, using rest time to stage the next wave and serve finished potatoes.
Step 4: Hold Finished Potatoes Correctly
Place finished potatoes on a wire rack in a warm spot, covered loosely with foil. Tight wrapping traps steam and softens the skin. A cooler corner of the grill works well for short holds.
Step 5: Build a Topping Bar Before Grilling Starts
Set out toppings before the first potato hits the heat. Bowls of butter or compound butter, sour cream, shredded cheddar or pepper jack, crispy bacon bits, chopped chives or green onions, and even chili or pulled pork for loaded versions let guests dress their own potatoes the moment they come off the grill.
Serving Ideas That Complement Grilled Potatoes
Grilled baked potatoes slot into nearly any outdoor menu. They pair naturally with an approachable steak cut if you're still building confidence with beef, or with juicy grilled hamburgers for a casual cookout spread. For something a little different, they hold their own beside smoked fish or crisp deep-fried fish for a mixed-method summer dinner.
Toppings deserve the same attention as the potato itself. Smoked paprika butter, garlic-herb cream cheese, or a drizzle of balsamic glaze all lean into the potato's smoky edge. A loaded version with cheese, bacon, and chives turns a side dish into a main.
Storing and Reheating Leftover Grilled Potatoes
Leftover grilled baked potatoes keep for three to four days in the refrigerator. Let them cool completely, then store them uncovered or loosely wrapped so the skin doesn't turn gummy in trapped moisture.
Reheating: An oven or toaster oven at 400°F for 10–12 minutes revives both the interior and much of the skin's crispness. A microwave is fastest but softens the skin considerably—acceptable if you're scooping the flesh into a hash or mash, less ideal if texture matters.
For guidance on food safety and proper storage temperatures, the USDA's food safety resources offer current, practical advice for cooked starchy sides.
FAQ
Can I use sweet potatoes with this method?
Yes. Sweet potatoes cook slightly faster than russets because their flesh is softer and less dense. Reduce the indirect grilling time by two to three minutes and expect a softer skin, since sweet potato skin is thinner and less likely to blister into a crisp shell.
What if I don't have a microwave?
You can par-cook potatoes by boiling them in salted water for eight to ten minutes until nearly tender. Drain, pat completely dry, season, and proceed with the grilling method. This adds a few minutes but still saves significant grill time compared to starting raw.
How do I keep potatoes warm if I'm grilling other food first?
Place finished potatoes on a wire rack over the cooler side of the grill, covered with a loose foil tent. They'll stay warm without continuing to cook aggressively. Check the internal temperature before serving—if it drops below 200°F, move them back over indirect heat for a few minutes.
Can I grill potatoes directly on the coals?
You can, but it's an advanced technique. Coals create intense, uneven heat that chars the skin quickly while potentially leaving the center undercooked. Par-cooking becomes even more critical here. A cooking grate offers far more control for consistent results.
What's the best way to reheat leftover grilled baked potatoes?
Reheat them in a 400°F oven or toaster oven for 10 to 12 minutes. The microwave works, but it softens the skin. For the best texture, stick with dry heat.
Conclusion
Grilling baked potatoes doesn't have to be an hour-long commitment. With a quick microwave par-cook, a two-zone grill setup, and a thermometer-driven finish, you can produce potatoes with a crisp, seasoned exterior and a fluffy interior in about 20 to 25 minutes total.
Three keys anchor the method:
- Par-cook first to eliminate the main time bottleneck.
- Use two heat zones so the interior bakes and the exterior crisps in stages.
- Check temperature, not color—205 to 210°F is the target for fluffiness.
The next time you light the grill, add potatoes to the menu with confidence. Fast enough for a weeknight, impressive enough for guests, and endlessly adaptable to whatever toppings you love. Fire up the grill and taste the difference that proper staging makes.