Air Stone For Fish Tank How To Use: Step-by-Step Setup
An air stone for fish tank how to use correctly is one of the most common questions aquarists ask when they notice fish hovering near the surface, a filter outlet that barely ripples the water, or debris settling in the same dead corner week after week. The tank looks fine at a glance, but the water feels still, and the livestock seems slightly off. That subtle stagnation is usually what prompts someone to consider adding bubbles.
An air stone does not manufacture oxygen out of thin air. What it actually does is turn pressurized air into thousands of fine bubbles that rise through the water column and break the surface. That surface agitation is where the real work happens: it accelerates the exchange of gases, letting oxygen dissolve into the water while carbon dioxide escapes. Used properly, a well-placed air stone stabilizes dissolved oxygen levels, softens dead spots, and encourages more natural fish behavior — without turning the aquarium into a chaotic bubble storm. You can also read our guide on blackstone grill how to use.
The setup itself is straightforward, but the details matter more than most guides admit. A 20-gallon community tank with a sponge filter, for example, often benefits from a small 1-inch air stone placed near the back corner to boost flow and surface movement, especially during warm weather when water holds less oxygen. Get the pump sizing, valve placement, and airflow tuning right, and the system runs quietly for months. Get any one of them wrong, and you risk back-siphon, stressed fish, or a pump that burns out early.
This guide walks through choosing, installing, placing, and maintaining an air stone so it genuinely helps your aquarium. You will learn how to:
- Match the right air pump, tubing, and stone size to your tank depth and stocking level
- Position the stone for better circulation, less noise, and calmer fish
- Install a check valve correctly to prevent back-siphon and equipment damage
- Tune airflow for stable, fine bubbles rather than aggressive turbulence
- Clean and troubleshoot the system so it keeps performing predictably
Understand What an Air Stone Does and When Your Tank Needs One
Now that the role is clear, it helps to understand the mechanics behind the bubbles. An air stone connects to an air pump through airline tubing. The pump pushes air through the stone's porous surface, which splits the airflow into a curtain of fine bubbles. As those bubbles rise, they drag water upward with them, creating gentle vertical circulation. For more on this, see our guide on how often do you clean a betta fish.
The primary benefit is improved gas exchange at the water surface. Oxygen enters the water and carbon dioxide leaves more efficiently when the surface is in constant motion. This matters most in tanks where the filter outflow is weak, the water is warm, or the lid sits tight enough to limit natural surface contact with the air.
In practice, an air stone is worth adding when you notice any of these conditions:
- High water temperature: Warm water holds less dissolved oxygen than cool water, so summer heat waves or heaters set above 78°F often justify extra aeration.
- Heavy stocking or frequent feeding: More fish and more food mean higher oxygen demand and more waste breakdown consuming available oxygen.
- Medication treatments: Several common fish medications, including some antibiotics and parasite treatments, reduce dissolved oxygen levels. Extra aeration during treatment protects gill function.
- Low surface movement: A filter outflow aimed downward or a tight-fitting glass lid can leave the surface too calm for efficient gas exchange.
- Nighttime in planted tanks: Live plants produce oxygen during the day but consume it after lights-out. An air stone can buffer those overnight dips, though heavy daytime aeration in high-tech planted tanks may strip too much CO₂.
A common mistake is running bubbles so aggressively that they stress long-finned fish or drive off carbon dioxide faster than plants can use it. Aim for steady, fine bubbles and visible surface rippling — not a rolling boil that pushes fish around the tank. For more on this, see our guide on fish tank thermometer how to read.
Choose the Right Air Stone Size and Type for Your Tank
Selecting the correct air stone prevents weak bubbles, noisy operation, and unnecessary pump strain. Air stones come in four common styles: cylinders, discs, bars, and flexible bubble wands. Each serves a different tank shape and livestock sensitivity.
Cylinder stones are compact and work well in small tanks, sponge filters, and quarantine setups. Disc stones sit flat on the substrate and produce a broad, even bubble field ideal for medium tanks. Bar stones and bubble wands spread airflow across a longer footprint, making them useful in large or long aquariums where a single point of bubbles would leave far corners untouched. For more on this, see our guide on how big does betta fish tank need to.
Use this sizing guidance as a starting point:
| Tank Size | Recommended Air Stone |
|---|---|
| 5–10 gallons | 1–2 inch cylinder or small disc |
| 10–30 gallons | 2–4 inch disc or short bar |
| 30+ gallons | Long bar or bubble wand across the base |
Material also matters. Fine-pore ceramic and limewood air stones create smaller bubbles, which provide more surface area per unit of air and better gas exchange. The trade-off is that fine pores clog faster and require more frequent cleaning or replacement. Coarse-pore stones are lower-maintenance but produce larger, less efficient bubbles.

A ceramic disc air stone produces fine bubbles that maximize gas exchange while keeping flow gentle.
In practice, pick an air stone rated slightly below your pump's maximum output, then dial the flow back with an inline control valve. A stone that is too large for a small pump will produce weak, pulsing bubbles because the pump cannot maintain pressure against the stone's resistance. Conversely, an undersized stone on a powerful pump becomes a noisy, turbulent jet. For more on this, see our guide on starting a fish tank for beginners.
Gather Supplies and Check Compatibility Before You Start
Setup goes smoother when you verify compatibility before cutting any tubing or filling the tank. The key is matching the air pump's output to both tank volume and water depth, then using flexible, kink-resistant materials.
You will typically need the following items:
- Air pump sized for the aquarium, considering both gallon capacity and depth
- Airline tubing made from silicone or flexible PVC that will not kink or crack
- Air stone matched to the tank footprint and bubble style you want
- Check valve to prevent water from siphoning backward during a power outage
- Inline control valve (optional but recommended) to fine-tune bubble volume
- Suction cups or airline clips to secure the tubing along the glass
Depth matters because water pressure increases by roughly 0.43 psi for every foot of water column. A pump that works fine in a 10-gallon shallow tank may struggle to push air through a stone placed 24 inches deep in a 55-gallon setup. Check the pump's rated depth — usually listed as "maximum depth" or "pressure rating" — and leave a margin rather than running the pump at its absolute limit.
A common mistake is skipping the check valve. If the pump sits on a shelf below the tank, water can siphon down the airline during a power loss, flooding the pump and potentially the floor. A check valve installed correctly costs a few dollars and prevents hundreds in damage. Compare the routine upkeep of this small aquarium accessory to maintaining other household equipment, and the principle is the same: a cheap safeguard prevents a costly failure.
Plan Placement for Better Circulation and Calmer Fish
Placement is where an air stone either improves the tank or annoys every creature in it. The goal is gentle, steady circulation that lifts surface film and clears dead zones without turning the aquarium into a whirlpool.
Place the stone low in the tank so bubbles travel farther upward. That longer rise drags more water along with it, improving overall movement through the entire water column. If the stone sits too high, bubbles pop quickly and contribute less to circulation.
These placement guidelines work for most tanks:
- Back corner placement keeps equipment discreet and directs flow along the glass rather than blasting fish in the open swimming area.
- Opposite the filter outlet creates a slow circular loop that reduces stagnant pockets in the far end of the tank.
- Away from delicate plants and loose substrate prevents uprooted stems and constant sand disturbance.
- Clear of caves, driftwood overhangs, and decorations that trap bubbles, create noise, and startle bottom-dwellers.
Aim for surface agitation, not splashing. The water surface should ripple visibly, but air should not be popping so hard that droplets land on the lid or nearby equipment. Splashing increases evaporation, leaves mineral deposits, and generally signals too much airflow.
In a 29-gallon tank with a hang-on-back filter on the right side, placing the air stone low on the left rear corner often evens out flow and keeps calmer species from pressing against the glass to escape turbulence. Watch how your fish respond during the first hour: if they avoid the bubble column or breathe rapidly, reduce flow or reposition the stone.
Install Airline Tubing and Secure the System
With placement planned, you can connect the system starting with the airline. Cut the tubing to the shortest practical run, leaving a small service loop so the pump can be moved for cleaning without tugging connections loose.
Follow these steps for a clean, reliable installation:
- Measure the route from the pump to the planned stone position, following the tank rim or stand edge rather than a direct diagonal line.
- Cut the tubing cleanly with sharp scissors or a tubing cutter. Ragged edges leak air and reduce pressure.
- Soften the tubing end in warm tank water for 10–15 seconds, then press it fully onto the pump's outlet nozzle until it seats past the barb ridge.
- Route the line to the tank rim, then down the glass to the air stone. Use suction clips every 8–12 inches to keep the line tidy and away from heater surfaces.
- Press the remaining end onto the air stone's nipple, again softening with warm water if needed.
Never use a lighter or open flame to soften airline tubing. Heat damage causes micro-cracks that leak slowly and fail unpredictably. Warm water is enough.
A common mistake is running tubing behind the stand where cabinet doors, hinges, or the stand's own weight pinch it. A quick visual check along the entire route prevents silent airflow restrictions that are maddeningly hard to diagnose later.
In a 20-gallon community tank, a typical installation might run 3 feet of tubing from a shelf-mounted pump, clip it along the back glass, and leave a 4-inch loop near the rim so routine water changes do not pull the connection loose.
Install the Check Valve and Position the Air Pump
The check valve is the single most important safety component in the entire air system. It allows air to flow from the pump toward the tank but blocks water from flowing back in the opposite direction. Without one, a power outage or disconnected hose can turn your airline into a siphon.
Install the check valve in the airline outside the tank, ideally a few inches above the waterline where you can see it. The small arrow printed on the valve body must point toward the tank and air stone, matching the direction of airflow.
Installation steps:
- Cut the airline at a straight section near the tank rim.
- Insert the check valve between the two tubing ends, with the arrow pointing toward the aquarium.
- Press both tubing ends onto the valve barbs until fully seated.
- Mount the air pump above the waterline whenever possible. If the pump must sit below the tank, install the check valve high under the rim and add a drip loop on the power cord so any stray moisture drips onto the floor instead of into the outlet.
- Test the valve by blowing through it from both directions. Air should pass only toward the tank. If it leaks both ways, replace it immediately — cheap valves fail more often than people expect.

The arrow on a check valve shows the correct airflow direction. It must point toward the air stone, never toward the pump.
If the pump sits inside a cabinet under a 55-gallon tank, install the check valve just under the rim and route the power cord into a drip loop before it reaches the wall outlet. That single change protects floors, equipment, and livestock.
Prime, Start, and Adjust Airflow for Stable Bubbles
With the line secured and the valve correctly oriented, you can start the system and tune it for consistent performance. Plug in the pump, watch the air stone, and confirm a steady stream of fine bubbles rather than sporadic bursts or complete silence.
If bubbles lag at startup, check for pinched tubing, a reversed check valve, or a loose connection at any fitting. New ceramic stones sometimes need a minute to fully wet out before they produce uniform microbubbles, so give the system 60–90 seconds before judging output.
Adjustment steps:
- Plug in the pump and observe the bubble pattern for one to two minutes.
- Use the pump's dial or an inline control valve to reduce airflow to a gentle, stable output.
- Reposition the stone slightly if bubbles slam directly into fish, uproot plants, or disturb substrate.
- Listen for rattling. Place the pump on a foam pad or rubber mat to damp vibration, and make sure the pump body is not touching the stand or glass.
Aim for visible surface rippling, not a boiling effect. Too much airflow can stress long-finned fish, particularly bettas and fancy goldfish, and may drive off carbon dioxide faster than plants can absorb it. The right setting usually looks deceptively calm from across the room: the surface shimmers, and bubbles rise in a neat column rather than a chaotic plume.
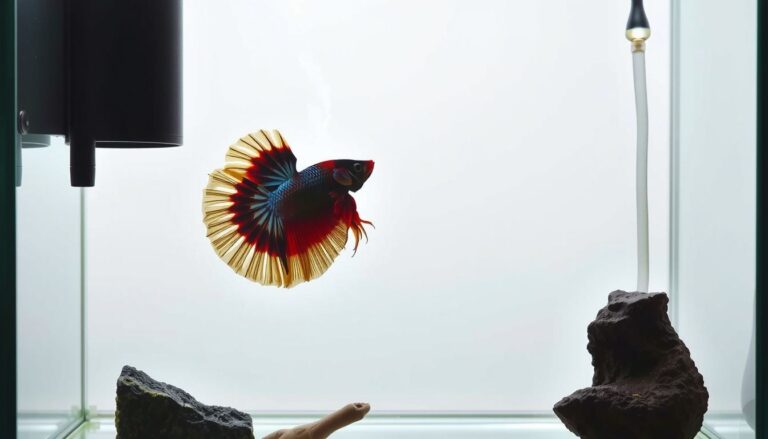
In a betta tank, set airflow to a light shimmer at the surface and keep the bubble column near a back corner so the fish can rest without constantly fighting current. Bettas are labyrinth fish that breathe from the surface, but they still appreciate calm, stable water below.
Maintain and Clean the Air Stone to Prevent Clogging
Once the bubbles are flowing steadily, maintenance keeps output consistent and extends the life of both the stone and the pump. Most air stones slowly clog with a combination of biofilm, algae, and mineral scale from hard water. As pores block, the pump must work against higher resistance, which reduces bubble output and shortens pump life.
Set a simple schedule based on your water hardness and stocking level. A quick visual check during weekly tank care is usually enough to catch early clogging before it becomes a full airflow drop.
| Frequency | Maintenance Task |
|---|---|
| Weekly | Confirm even bubble pattern; wipe algae off the stone surface |
| Monthly | Remove stone and rinse in dechlorinated water; never use soap |
| As needed | Soak clogged stone in 1:10 bleach-to-water solution for 10 minutes, then rinse thoroughly and soak in dechlorinator |
Watch for warning signs: larger bubbles than usual, one-sided bubbling, a "hissing" sound from the pump, or visibly reduced output. These often mean pores are restricting air and pressure is building in the line.
In a 20-gallon community tank running on hard tap water, you may notice reduced bubbles after three to four weeks. A short bleach soak followed by a thorough dechlorinator bath can restore fine bubbles without replacing the stone.
Avoid scrubbing with abrasive tools, which damage the pore structure permanently. If the stone still will not produce even bubbles after cleaning, replacement is almost always cheaper than running a strained pump that fails early. Keeping the air stone clean is part of the same discipline as properly maintaining a boat's interior surfaces — neglect shows up eventually as reduced performance.
Troubleshoot Weak Bubbles, Noise, and Backflow
When performance changes, troubleshoot in a fixed order: air source first, then line restrictions, then the stone itself. This prevents unnecessary replacements and pinpoints whether the issue is mechanical or maintenance-related.
Weak or absent bubbles usually trace back to one of these causes:
- Clogged stone pores from mineral buildup or biofilm
- Pinched, kinked, or crushed airline tubing
- An undersized pump that cannot overcome tank depth
- A clogged pump intake filter or worn diaphragm
- A loose connection at the pump, valve, or stone
Noise and vibration are often fixable in minutes. Place the pump on a foam pad, keep it from touching the stand or glass, and ensure the airline does not pull the unit off level. If rattling persists after these adjustments, the internal diaphragm may be worn, and a rebuild kit or replacement pump is the next step.
Backflow or water in the airline points to a failed or reversed check valve. The arrow must point toward the tank. If water appears in the line after a water change, unplug the pump, drain the line, verify valve orientation, and restart. If backflow recurs, replace the check valve and relocate the pump above the waterline whenever possible.
A practical example: after a water change, bubbles weaken and water sits in the airline. Unplug the pump, disconnect the line at the check valve, drain the trapped water, confirm the arrow points toward the tank, reconnect, and restart. Normal flow usually returns within minutes.
If you keep a boat or other water equipment, you already know how small leaks and orientation mistakes cause outsized problems. The same diagnostic discipline applies to aquarium airlines: check the simplest explanation first, fix one variable at a time, and do not replace parts blindly.
Safety Notes and Long-Term Setup Habits
A few habits separate a reliable air system from one that causes anxiety every time you leave the house. Build these into your routine from day one.
Elevate the pump above the waterline whenever the stand layout allows. This eliminates most back-siphon risk even if a check valve eventually fails. If the pump must sit below the tank, treat the check valve as a consumable part and inspect it monthly.
Use a drip loop on every power cord near the tank. A drip loop lets water run down to the lowest point of the cord and drip onto the floor instead of following the cord into the electrical outlet. This is basic aquarium safety and applies to heaters, filters, and air pumps alike.
Label the check valve direction with a small piece of tape if you frequently disconnect the airline for cleaning. Reversing the valve during reassembly is one of the most common setup mistakes, and the symptom — no bubbles — often sends people chasing the wrong cause.
Keep a spare air stone and extra airline on hand. Air stones are inexpensive consumables. Having a spare means a failed stone never forces you to leave the tank without aeration overnight.
Frequently Asked Questions
Can an air stone add too much oxygen to a fish tank?
No. In normal aquarium conditions, water reaches a dissolved oxygen saturation point based on temperature and atmospheric pressure. An air stone cannot push oxygen beyond that natural limit, so you cannot overdose oxygen with one. Excessively aggressive bubbling can, however, strip carbon dioxide too quickly in planted tanks and physically stress fish.
Do I need an air stone if I have a filter?
Not always. If your filter outlet creates visible surface ripples and your fish are active with normal gill movement, a separate air stone may be unnecessary. Air stones add most value in warm water, heavily stocked tanks, or situations where the filter's surface agitation is minimal.
Should I run an air stone at night?
In many tanks, yes. Plants stop producing oxygen after lights-out but continue consuming it, and fish and beneficial bacteria still need oxygen. An air stone running at night helps stabilize dissolved oxygen during the hours when levels naturally dip. This is especially useful in densely planted tanks and during warm weather.
How often should I replace my air stone?
Replace the stone when cleaning no longer restores an even, fine bubble pattern. Depending on water hardness and bio-load, most ceramic stones last six to twelve months with monthly cleaning. Limewood stones, which produce very fine bubbles, typically wear out faster and may need replacement every one to three months.
Why is my air stone only bubbling on one side?
One-sided bubbling usually means partial clogging. Mineral scale and biofilm rarely block pores evenly. Try soaking the stone in a 1:10 bleach-to-water solution for 10 minutes, then rinse thoroughly and soak in dechlorinator. If the stone still bubbles unevenly, replace it.
Can an air stone replace a filter in an emergency?
No. An air stone provides circulation and gas exchange, but it does not remove solid waste, ammonia, or nitrite through mechanical or biological filtration. During a filter failure, run the air stone to protect oxygen levels, but address the biological load with partial water changes and get the filter running again as soon as possible.
Conclusion
An air stone is a simple tool, but using it well comes down to matching the pump to the tank depth, placing the stone for calm circulation, installing a check valve in the correct orientation, and tuning airflow until the surface shimmers rather than boils. When those pieces line up, the system stabilizes dissolved oxygen, clears dead spots, and helps fish behave more naturally — quietly and with almost no daily effort.
The next step is to observe your tank for 48 hours after setup. Watch how the fish respond: normal breathing, relaxed swimming, and no constant surface-gasping or hiding from the current. If the livestock seem comfortable and the bubble pattern stays even, your air stone is doing its job. If not, make one small adjustment at a time — reposition the stone, lower the airflow, or move the pump — and reassess. That patient, observation-driven approach is what turns a basic air stone setup into a genuinely healthier aquarium.
If you are planning other upgrades for your outdoor or indoor gear, the same careful matching process applies whether you are dialing in a backyard cooking setup or tending to other water systems.