Starting a Fish Tank for Beginners: Step-by-Step Setup
Starting a fish tank for beginners sounds simple—fill it with water, add fish, enjoy. Then the cloudy water hits, a fish hides all day, and the “easy” hobby suddenly feels like a science project.
With a few basics, though, it becomes predictable and relaxing. The key is understanding that a tank is a tiny ecosystem, and starting a fish tank for beginners works best when the setup supports stable water quality from day one.
They’ve learned from countless first-tank setups that most problems trace back to the same handful of steps: rushing, skipping testing, or buying the wrong gear. A small plan up front saves money, protects fish, and keeps the tank looking sharp.
Look, a practical example helps: someone sets up a 10-gallon with a filter and heater, then “cycles” the tank for a couple of weeks while testing water; when they finally add a small group of hardy fish, losses are rare and algae stays manageable.
They’ll cover the essentials—what to buy, what to do first, and what to avoid—so the tank stays clear and the fish stay active:
- Tank size and stocking basics
- Filtration, heating, and lighting that match the species
- Cycling and water testing before adding fish
- Simple maintenance that fits a busy schedule
If they’re ready, they can start with the equipment checklist and a straightforward setup plan that takes the guesswork out of the first month.
What Beginners Need to Know Before Buying a Fish Tank
Now the fun part starts: planning the setup before any money changes hands. When starting a fish tank for beginners, most problems trace back to rushed choices, not “bad luck.” A tank is a small ecosystem, and it needs time and stable conditions to work.
The first concept is the nitrogen cycle. Fish waste becomes ammonia, bacteria convert it to nitrite, then to nitrate, and water changes remove nitrate. If fish go in before those bacteria establish, ammonia and nitrite can spike fast.
Beginners should budget for more than glass and water. A reliable heater, filter sized for the tank, dechlorinator, a thermometer, and a basic test kit are non-negotiable. Skipping testing is how “looks fine” turns into sudden losses.
- Time: Expect 2–6 weeks to cycle safely, depending on method and temperature.
- Maintenance: Plan weekly partial water changes and light gravel cleaning.
- Stocking: Pick fish based on adult size and temperament, not the store label.
- Water: Know if local tap water is hard/soft and if it contains chloramine.
Practical example: a beginner buys a 10-gallon kit, adds five fish on day one, and feeds heavily “to help them settle.” Within 48 hours, the tank tests at 1.0 ppm ammonia. The fix isn’t medicine; it’s pausing stocking, reducing feeding, and stabilizing the cycle with water changes and testing.
Choosing the Right Tank Size, Location, and Stand
After the basics are clear, the next decision is size and placement. Bigger tanks usually run more stable because waste dilutes and temperature swings slow down. Small tanks can work, but they punish mistakes quickly.
For most homes, a 20-gallon “long” is a strong beginner choice: more swimming room, forgiving water chemistry, and plenty of stocking options. A 5–10 gallon tank suits one betta or a shrimp colony, but it demands tighter feeding and water-change discipline.
- Size: Choose the largest tank they can maintain, not just fit.
- Location: Keep it away from direct sun, HVAC vents, and high-traffic bumps.
- Access: Leave space for a siphon, filter removal, and a lid opening fully.
Placement is structural, not aesthetic. Water weighs about 8.3 lb per gallon, before gravel and rock. The stand must be level, designed for aquarium loads, and support the entire bottom frame evenly.
Practical example: a 20-gallon tank placed on a flimsy dresser begins to twist, and the waterline looks uneven. Moving it to a purpose-built stand, leveling with shims, and adding a foam mat (if manufacturer-approved) prevents seam stress and long-term leaks.
Essential Equipment Checklist (Filter, Heater, Light, and More)
Now that the tank choice is locked in, the gear decisions matter more than most beginners expect. The goal is stable water, consistent temperature, and predictable maintenance.

A filter is non-negotiable because it provides mechanical cleanup and, more importantly, a home for beneficial bacteria. For most community tanks, a hang-on-back or sponge filter is beginner-friendly; canisters shine on larger tanks but add complexity. Aim for steady flow without blasting fish around the tank.
A heater is essential for most tropical species, and reliability beats fancy features. A simple adjustable heater paired with a separate thermometer prevents “set-and-forget” surprises. Many aquarists target ~24–26°C (75–79°F), then fine-tune based on the fish species.
Light should match the plan: fish-only tanks need basic illumination, while planted tanks need stronger, plant-capable LEDs on a timer. A timer (8–10 hours/day) helps control algae by keeping the schedule consistent.
Round out the setup with tools that prevent common early failures:
- Water conditioner to neutralize chlorine/chloramine every refill
- Liquid test kit (ammonia, nitrite, nitrate, pH) for accurate cycle tracking
- Gravel vacuum and bucket reserved for aquarium use
- Fish net, algae scraper, and a lid to reduce evaporation and jumping
Practical example: for a 20-gallon tropical community tank, many hobbyists choose a 100W adjustable heater, a hang-on-back filter rated for 20–30 gallons, and a basic LED on a timer—simple, stable, and easy to service.
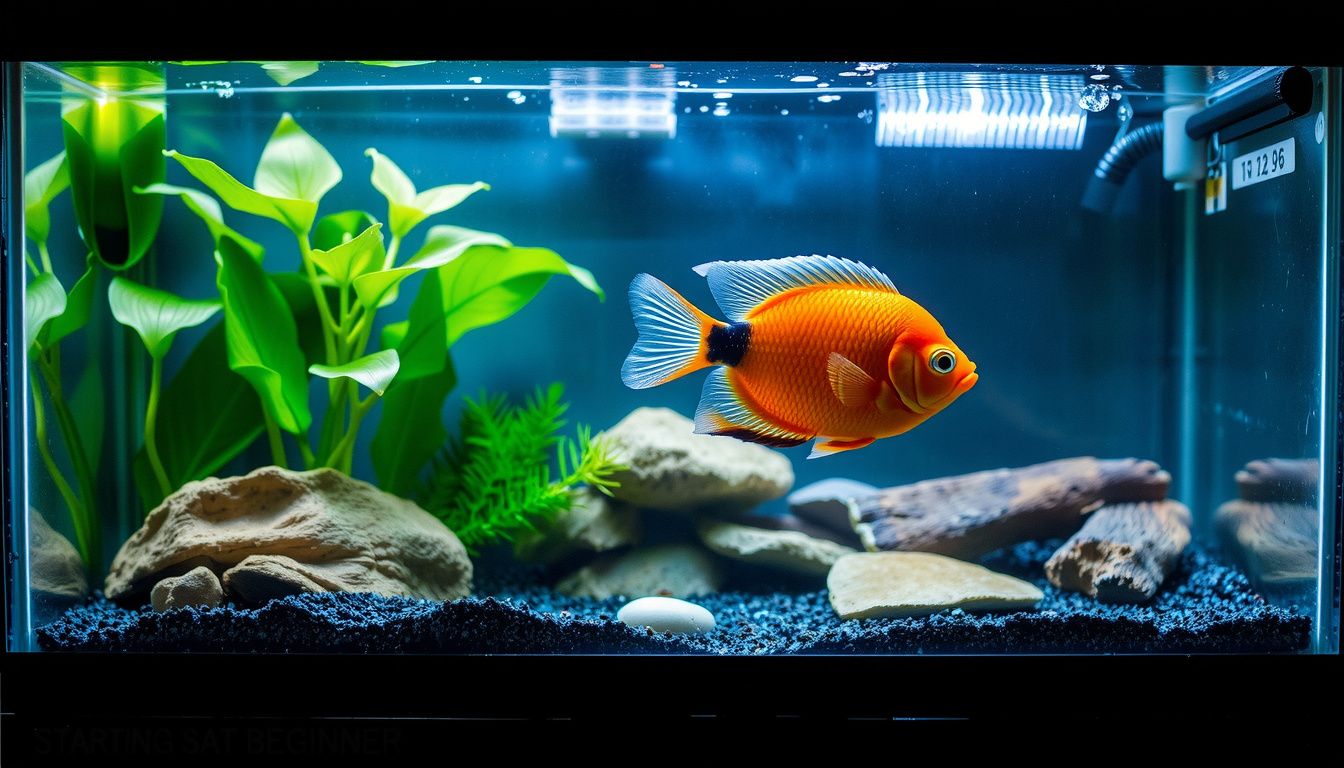
Setting Up the Tank: Substrate, Decor, Plants, and Water Prep
With equipment ready, the setup order is what keeps the water clear and the fish safe. Slow down here; rushed setups often lead to cloudy water, unstable parameters, and stressed livestock.
Start with substrate. Rinse gravel or sand until the rinse water runs mostly clear to reduce dust storms after filling. Choose grain size to match the inhabitants: sand suits bottom-dwellers, while gravel is forgiving for general community tanks and easier to vacuum.
Next comes decor and hardscape. Place heavy rocks and wood directly on the tank bottom (or on a thin mat) before adding full substrate depth, so digging fish can’t undermine them. Skip sharp ornaments; rough edges can tear fins and cause infections.
If they’re adding plants, beginners usually succeed fastest with hardy species like anubias, java fern, and vallisneria. Rhizome plants (anubias, java fern) shouldn’t be buried; they’re typically attached to wood or rock. Live plants help with nutrient uptake, but they don’t replace filtration or cycling.
Water prep is the final step before the cycle begins:
- Add a plate or plastic bag on the substrate and pour water onto it to prevent craters
- Condition water immediately for the full tank volume
- Install heater and filter, then let temperature stabilize before testing
Practical example: when setting up a 10-gallon planted tank, many aquarists use 1.5–2 inches of rinsed sand, attach anubias to driftwood with thread, fill slowly over a plate, dose conditioner, then run the filter and heater overnight to confirm stable temperature and clear water.
Cycling the Aquarium: Establishing Beneficial Bacteria Correctly
Now the tank looks ready, but it isn’t biologically safe yet. Cycling is the process of growing beneficial bacteria that convert toxic waste into less harmful compounds. Without it, fish can be exposed to ammonia and nitrite spikes within days.
A stable cycle relies on two bacterial groups: one that converts ammonia to nitrite, and another that converts nitrite to nitrate. Nitrate is managed with water changes and plant uptake. This is why “clear water” doesn’t equal “safe water.”
For beginners, a fishless cycle is the most controlled route. They add an ammonia source and test until the tank can process it quickly. Bottled bacteria can help, but it still needs verification with a test kit.
- Target readings: ammonia 0 ppm, nitrite 0 ppm, nitrate present (often 5–40 ppm)
- Tools: liquid test kit, thermometer, dechlorinator
- Keys: consistent temperature, running filter 24/7, patience
Practical example: in a new 20-gallon tank, they dose ammonia to about 2 ppm and test daily. At first, ammonia stays high; then nitrite appears and climbs. When both ammonia and nitrite drop to 0 within 24 hours after dosing, and nitrate is detectable, the cycle is functioning.

They should avoid large water changes during the active cycle unless ammonia or nitrite gets extreme. Once cycled, a partial water change lowers nitrate before any fish arrive.
Adding Fish Safely: Stocking Plans, Acclimation, and Compatibility
Once cycling is confirmed, stocking should be slow and intentional. A beginner’s best move is choosing hardy, compatible species and adding them in small groups. This keeps the biofilter from being overwhelmed.
A simple stocking plan starts with adult size, temperament, and water needs. Fish that share temperature and pH preferences tend to thrive together. Aggressive or nippy species can turn a calm tank into a stress factory.
- Start light: add 25–40% of the planned bioload, then wait 1–2 weeks
- Quarantine if possible: 2–4 weeks in a separate tank reduces disease risk
- Compatibility checks: schooling needs, fin-nipping, territorial behavior, mouth size
Acclimation matters because store water and home water rarely match. They should float the bag to equalize temperature, then gradually mix tank water into the bag over 20–40 minutes. Netting fish into the tank (not pouring bag water in) helps limit contaminants.
Practical example: after cycling a 29-gallon community tank, they add 6 hardy tetras first. They test for ammonia and nitrite daily for a week; both remain at 0, so they add a small group of bottom-dwellers next. If readings rise, they pause stocking and increase water changes.
Feeding should be conservative at first. Overfeeding is the fastest way to create a waste spike in a newly stocked aquarium.
Routine Care and Troubleshooting: Maintenance, Testing, and Common Mistakes
Now that fish are settling in, the real success comes from consistent upkeep. For starting a fish tank for beginners, a simple routine prevents most “mystery” problems before they show up.
Weekly maintenance should stay predictable. They should replace 20–30% of the water, vacuum debris from the substrate, and wipe algae from the glass. They should also top off evaporation with dechlorinated water (not straight tap) to avoid sudden parameter swings.
Testing is the early-warning system, not a reaction tool. They should check ammonia and nitrite any time fish act off, and track nitrate weekly to guide water-change volume. If pH or hardness shifts, they should verify the source water and avoid chasing numbers with quick-fix chemicals.
- Cloudy water: usually a bacterial bloom or overfeeding; reduce feeding and keep water changes steady.
- Fish gasping: low oxygen or high ammonia; increase surface agitation and test immediately.
- Algae spikes: too much light or nutrients; shorten photoperiod and remove excess waste.
Practical example: a 10-gallon tank tests 0 ammonia, 0 nitrite, but 60 ppm nitrate after a busy week. They should do a 30% change today, another 20% in two days, then cut feeding slightly and clean the filter intake to restore flow.
Common mistakes include rinsing filter media under tap water, replacing all media at once, and skipping dechlorinator. They should clean media in old tank water, change only part of it, and keep a log so patterns are obvious.
The Bottom Line
Now that the groundwork is set, starting a fish tank for beginners comes down to patience, consistency, and keeping choices simple. A stable aquarium is built through small, repeatable habits, not one perfect setup day. When the system is calm, fish behavior is steady, and water readings stay predictable, the tank starts to feel easy.
Look at a real-world example: a new keeper with a 10-gallon community tank notices a fish flashing once or twice. Instead of buying a “quick cure,” they pause, observe for 24 hours, confirm parameters, and adjust feeding and routine—often stopping a problem before it snowballs.
For reliable progress, they should stick to a short operating plan:
- Track a simple weekly log (tests, feedings, notes).
- Observe fish daily for appetite, breathing, and fin condition.
- Change one thing at a time when troubleshooting.
Next step: they should choose a start date, gather supplies, and commit to a 30-day routine checklist to build momentum.