How to Change Electric Awning on Camper Step-by-Step
An electric awning that stops halfway out can turn a relaxing campsite into a repair project in minutes. The switch clicks, the motor hums, but the roller tube will not move—or torn fabric flaps in the wind and the arms sit crooked. The good news: replacing the entire electric awning assembly is a straightforward driveway job if you follow the right sequence.
This guide walks you through the full swap: choosing the correct replacement, cutting 12V power safely, removing the old roller and brackets, installing the new awning, setting the limits, and testing for leaks. You will also learn where most DIY installs go wrong, so you can avoid a return trip to the parts counter. For more on this, see our guide on how to replace rv awning fabric on electric.
Before you pull a single bolt, make sure the camper is on level ground and you have a helper for the heavy parts. If you need to move the rig to a better workspace, a dependable road-trip vehicle makes that part much easier.
Know the Parts of an Electric RV Awning
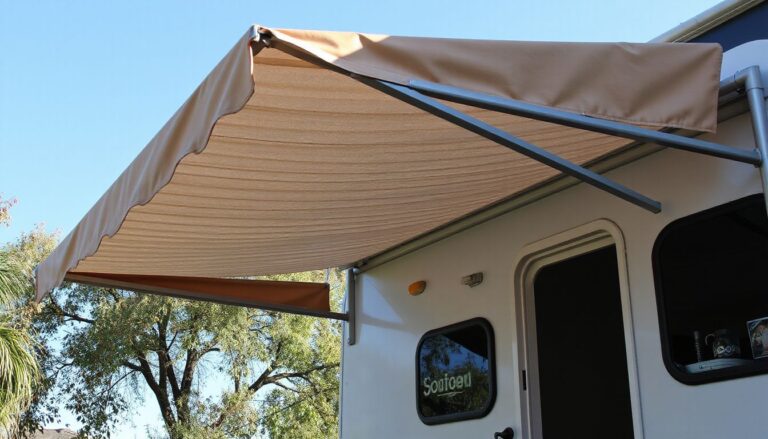
Most modern camper awnings use a 12V DC motor mounted inside or at one end of the roller tube. When the motor turns, the roller rotates and the fabric extends or retracts along a track on the sidewall. Understanding the main parts makes it easier to order the right part and diagnose what went wrong. For more on this, see our guide on how to install an awning on a camper.
| Part | What It Does |
|---|---|
| Roller tube | Rotates to roll the fabric in and out |
| Canopy | The vinyl or acrylic fabric that provides shade |
| Arms | Support the outer edge; lateral-arm designs are most common |
| Awning rail | The track on the camper sidewall that holds the fabric bead |
| Brackets | Mount the arms to the sidewall |
| Motor | Powers the roller tube through a gear drive |
| Limit switch / control module | Stops the awning at full extend and full retract |
| End caps | Cover the ends of the roller and protect the hardware |
Brands such as Dometic, Carefree, and Lippert build assemblies with different bracket shapes and arm lengths. A 16-foot awning from one brand will not necessarily fit another brand’s brackets, even if the fabric width looks the same. The safest move is to match the original brand and model.
You also need to decide whether to replace the full assembly or only the fabric. A complete replacement makes sense when the motor grinds, the roller tube is bent, or the arms are corroded and stiff. A fabric-only replacement makes sense when the roller turns smoothly and the arms and brackets are in good condition. If you are unsure, replace the whole assembly—it costs more but removes the variables. For more on this, see our guide on how to install camper awning.
Measure and Confirm Compatibility Before You Buy
Most awnings have an ID label on the roller tube end cap, inside the front cover, or along the fabric hem. That label usually lists the brand, model, awning size, and sometimes the motor side. Write those details down before ordering anything.
Next, take these measurements:
- Fabric width: measure the canopy edge to edge, not including the arms
- Assembly width: measure the roller tube endcap-to-endcap
- Bracket spacing: measure center-to-center between the mounting brackets
- Motor side: note whether the wiring exits on the left or right when you face the awning from outside
- Wall clearance: check for windows, doors, or trim that could block the arms
- Extended projection: how far the outer edge reaches when the awning is fully out
Here is a common example. The label says 16-foot awning, the endcap-to-endcap measurement reads 15 feet 10 inches, and the actual canopy is 14 feet 6 inches. For a complete assembly, order the labeled 16-foot size. For a fabric-only replacement, you need the canopy width, not the overall assembly length. Mixing those two measurements is the most common reason a new awning binds on the first test. For more on this, see our guide on how to replace camper awning fabric.
Take close-up photos of the old brackets, arm ends, and motor connector before you order. Manufacturers use different connectors and bracket profiles, and photos help you compare part numbers. If the awning is still attached but stuck, measure along the roller tube and lay the fabric flat if it is still removable.
Gather Tools, Parts, and Safety Gear
Electric awning replacement goes smoother when everything is staged before the first bolt comes out. The assembly is long, awkward, and heavier than it looks. For more on this, see our guide on how to fix a leaking camper roof 2.
Essential tools:
- Socket set and combination wrenches in both SAE and metric sizes
- Drill/driver with a full set of bits and nut drivers
- Torque wrench, if the manufacturer specifies torque values
- Non-marring pry tool and plastic trim tools
- Measuring tape, level, painter’s tape, and marker
- Step ladder
- Ratchet straps or cam straps
- Cardboard or a moving blanket for sidewall protection
Parts and consumables:
- Correct replacement awning assembly, or fabric/motor kit
- New stainless steel hardware if the original bolts are rusty or one-time-use
- Butyl tape or high-quality exterior RV sealant
- Isopropyl alcohol for surface prep
- Heat-shrink butt connectors, dielectric grease, wire loom, and zip ties
Safety gear matters as much as tools. Wear work gloves to protect against sharp bracket edges and safety glasses in case a fastener snaps. Have a helper support the roller tube during removal and re-hanging. Before any wrench touches the brackets, tape cardboard or a moving blanket to the sidewall directly under the awning. Most scratches happen when a bracket swings free, not when the awning is lifted as a whole.
For stubborn sealant residue left after the old brackets are off, use a non-abrasive approach. The same gentle method you would use when cleaning watercraft gelcoat works well on RV sidewalls without dulling the finish.
Disconnect Power and Secure the Old Awning
Safety comes before removal. An electric awning is connected to the camper’s 12V electrical system, and some control modules can hold voltage or backfeed through the switch. Treat the wiring as live until you have verified it is off.
Start by parking the camper on level ground. Chock the wheels and use stabilizers if the ground is uneven. Then cut power to the awning circuit:
- Turn off the awning wall switch
- Disable the battery disconnect if your camper has one
- Remove the negative battery cable
- Pull the awning fuse or trip the breaker and label it “AWNING”
- Use a multimeter to confirm the awning motor leads read 0 volts
Even though this is low-voltage DC work, the same discipline used in general electrical work applies. OSHA’s electrical safety guidance outlines the basic habit of verifying power is off before touching conductors, and that habit is your best protection against a surprise short.
If the awning is partially extended, retract it as far as it will go while power is still available. If it is stuck open, use the motor’s manual override if one exists, then strap the roller tube to the folded arms with two ratchet straps. Keep the straps away from sharp bracket edges.
Never rely on the wall switch alone. Switches fail, and controllers can backfeed. Verify the circuit is dead at the motor leads before cutting wires or removing brackets.
Remove the Old Awning Assembly
With the system de-energized and the roller secured, removal follows a predictable sequence. Work slowly and support the assembly at all times.
- Remove the end caps from the roller tube.
- Disconnect the motor wiring at the motor lead or controller junction. Cap and label each wire.
- Remove any fabric stops or screws at the ends of the awning rail.
- Have your helper support the roller tube while you loosen the bracket fasteners.
- Remove the upper and lower arm bracket bolts, but leave one fastener loosely started on each bracket until you are ready to lift the assembly away.
- Lower the assembly onto padded sawhorses.
- Slide the fabric bead out of the awning rail using steady, even pressure.
Before you lift, use painter’s tape to mark the bolt hole locations for each bracket. Note any shims or spacers and tape them to the wall next to their bracket. Those small pieces correct sidewall contours, and losing them can cause the new awning to bind.
A common mistake is forcing the fabric bead out of the rail. The bead is designed to slide, not to be yanked. If it catches, check for a hidden screw or burr in the track.
If a bracket screw is stripped, stop before you wallow out the hole. Back it out with locking pliers or a screw extractor, repair the hole if needed, and then continue. Forcing a stripped screw usually turns a five-minute fix into a wall repair.
 Support and strap the roller tube before loosening the first bracket.
Install the New Awning Assembly
Keep the new awning’s fabric rolled on the tube until it is mounted. Confirm the motor side matches the original wiring entry point. If the replacement uses a new rail profile, swap the awning rail before hanging the new assembly.
Position the new awning on padded sawhorses near the wall. With your helper supporting the roller, follow this lift sequence:
- Hook the fabric bead into the awning rail and slide it to the marked center point.
- Raise the roller and arms into position, keeping the arms folded according to the manufacturer’s instructions.
- Start all bracket fasteners by hand before tightening any single point.
- Install the upper and lower arm brackets, then confirm the arms sit square and do not bind.
- Tighten the fasteners in a cross pattern to avoid twisting the bracket.
A common mistake is over-tightening lag screws into thin wall framing. Stop when the bracket is seated and stable. Crushing the sidewall creates stress cracks and future leaks.
Torque values and limit-switch adjustments vary by model. The manufacturer’s installation manual is the best source for exact specifications; Dometic’s support library is a reliable starting point for many power awning models.
If the original brackets used shims to clear a curved sidewall, keep the same shim arrangement on the new assembly. Removing shims can angle the arms and cause the fabric to track unevenly.
 Keep the new assembly fully supported until the arms are pinned to the brackets.
Reconnect Wiring, Align Arms, and Set Limits
Once the brackets are secure, reconnect the motor wiring with heat-shrink butt connectors. Match the original polarity carefully—reversed polarity can make the motor run the wrong way and damage limit switches. Apply dielectric grease to the connections and add wire loom or zip ties where the wires pass near moving arms or metal edges.
Before testing, check the alignment:
- Measure the distance between both arms at the top and bottom; they should be equal.
- Confirm the roller tube is parallel to the awning rail.
- Look along the fabric path for folds or uneven tension.
- Adjust the pitch if your awning model has pitch arms.
Set the travel limits next. Many power awnings have small adjustment screws on the motor head or a learning routine through the controller. Extend the awning fully, adjust the stop, retract it fully, and adjust the retract stop in small increments. The fabric should end slightly taut, not stretched.
A common mistake is setting the retract limit too tight. That can crush the fabric edge, strain the arms, and make the motor chatter. If the motor chatters, stop and adjust before you burn out the motor.
Test the awning three full times:
- Cycle extend and retract while watching both arms move together.
- Confirm the awning stops cleanly at both limits.
- Listen for grinding, clicking, or motor strain.
- Stop immediately if one arm lags or the fabric bunches.
Seal, Test, and Inspect for Leaks
A new awning is only as good as its seal. Clean every mounting surface with isopropyl alcohol and let it dry completely. Then apply sealant under the bracket flanges and over the fastener heads. Some manufacturers use butyl tape under the brackets; if so, compress it evenly and trim off the squeeze-out.
When the sealant is in place, run the water test. Close all windows, then run a hose over the awning rail and brackets for five to ten minutes. Go inside and check the ceiling line, window frames, and the wall behind the brackets for moisture.
If you see water appear, remove one fastener at a time, inject sealant into the hole, reinstall it, and retest. This usually fixes the leak without removing the whole bracket.
While the brackets are exposed, it is also worth checking the sidewall and roofline above the awning. If you notice soft wood, dark stains, or bubbling wallboard, the problem goes beyond the awning. Take care of repairing water intrusion before you close everything up, otherwise the new brackets will hide ongoing damage.
Post-Installation Maintenance Checklist
The install is finished, but the job is not done until you confirm everything stays tight after a real drive. Vibration on the road can loosen fasteners that felt perfect in the driveway.
- Recheck all awning fasteners after a 10–15 minute drive
- Do one full extend/retract cycle once you reach the campsite
- Inspect sealant edges for gaps, cracks, or missed screw heads
- Confirm wire routing is still clear of moving arms
- Clean the fabric with mild soap and water; avoid pressure washing
- Record the part numbers, fuse size, and limit settings in a maintenance log
An awning replacement is also a good time to handle other camper upkeep. Basic waste tank maintenance keeps campground stops odor-free, and scheduling a thorough holding-tank flush before storage prevents buildup. Both are quick tasks that fit well in the same weekend.
Conclusion
Changing an electric camper awning is not a mystery repair. The key is preparation: match the replacement, support the roller, kill the power, seal every hole, and adjust the limits carefully. Most DIY failures come from skipped steps—wrong part, over-tightened screws, or a limit set too tight.
Your next step is simple. Before the next rain, walk the installation with your helper and run one full extend/retract cycle. If the awning rolls smoothly and stays dry, pack up and enjoy the trip. If you see even a small bind, fix it now—an afternoon recheck is far cheaper than replacing the awning again later in the season.
Frequently Asked Questions
Can I replace just the fabric on an electric awning?
Yes, if the roller tube is straight, the motor is strong, and the arms and brackets are in good shape. Order fabric by brand, model, and canopy width. Slide the old fabric out of the rail and roller, install the new fabric, and re-tension it. If any component was damaged by a storm, a full assembly is safer.
How do I know whether my awning motor is left-hand or right-hand?
Face the awning from outside, with the camper wall behind you. The motor side is the end of the roller tube where the wiring exits. Some labels read LH or RH. If you cannot find a marking, inspect the motor itself or count the wires. Take a photo and include it when ordering.
Why won't my new awning retract all the way?
Usually the retract limit is set too early, the fabric is binding in the rail, or the arms are not parallel. Clean the rail, make sure the fabric feeds straight, then adjust the retract stop in small increments. If the motor chatters, stop and adjust before you burn it out.
Can I convert a manual awning to an electric awning?
Sometimes yes, if the roller tube has room for a motor and the arms can handle constant stress. Brands sell electric conversion kits, but the awning frame and fabric must be compatible. On an older camper, replacing the whole assembly is often cheaper and more reliable than retrofitting.
Should I seal awning brackets every year?
Inspect them every spring and after any long road trip. Sealant shrinks, and bracket fasteners can loosen from vibration. If you see cracks, gaps, or water stains, clean and reseal immediately. Catching it early prevents rot in the wall framing behind the bracket.
How much does it cost to replace an electric camper awning?
Brand, width, and motor style drive the price, so a full assembly can cost from a few hundred dollars to well over a thousand. A fabric-only replacement is cheaper, but only if the motor and arms are healthy. Always compare exact part numbers before ordering.