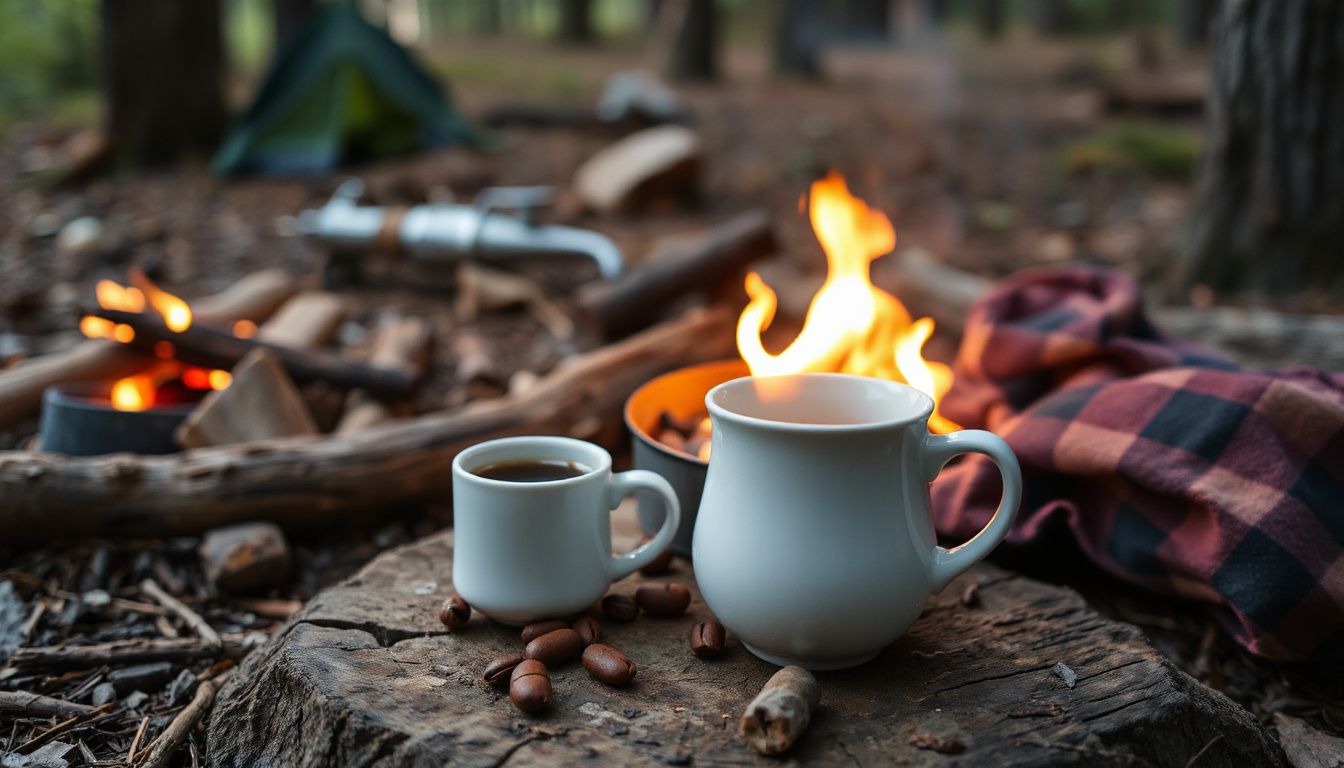
How to Make Coffee Camping: Step-by-Step at Any Campsite
Great camp coffee isn't about hauling an espresso machine into the woods or settling for bitter instant crystals dissolved in lukewarm water. It's about matching a brewing method to your trip style, controlling a handful of variables, and building a routine you can repeat even when your hands are cold and the wind is howling. Whether you're car camping with a full kitchen box or backpacking with a single pot, you can brew a genuinely satisfying cup at any campsite.
The core principles remain constant across every method: clean water, appropriate grind size, correct coffee-to-water ratio, and stable heat. Get those four elements right, and you can produce balanced coffee with a French press, pour-over cone, AeroPress, percolator, or nothing more than a pot and spoon. Each method carries trade-offs in weight, cleanup, and reliability in adverse conditions, which is why understanding your options matters more than memorizing a single recipe.
This guide walks through every step: choosing gear, preparing your coffee kit, setting up a functional camp coffee station, brewing with five different methods, troubleshooting common problems, and cleaning up responsibly. By the end, you'll have a repeatable system that works whether you're at a windy ridge, a lakeside car-camping spot, or a backcountry site with minimal resources.
Choose Your Camp Coffee Brewing Method
The first decision is picking a brewer that fits how you camp. Fastpacking? Car camping with kids? Motorcycle touring? Your constraints—pack space, group size, cleanup tolerance, and available heat—should drive the choice. Don't fight your trip style with gear that's too heavy, fragile, or fiddly for the conditions.
| Brew Method | Best For | Weight | Cleanup | Brew Time |
|---|---|---|---|---|
| Pour-over dripper | Solo or pairs, precise control | Very light | Easy (filter carries grounds) | 3–4 min |
| AeroPress | Solo, durability, consistency | Light | Easy (puck ejects) | 2 min |
| French press | Groups, full body, forgiveness | Medium | Moderate (grounds messy) | 4–5 min |
| Percolator | Groups, nostalgia, no filters | Medium-heavy | Moderate | 8–12 min |
| Cowboy coffee | Zero gear, last resort | None | Easy | 5 min |
Pour-over drippers collapse flat, weigh almost nothing, and give you clean, bright cups. They require paper filters and a somewhat steady pour, but plastic or silicone models shrug off drops and pack easily. This is the sweet spot for most backpackers and solo campers who still want real coffee.
AeroPress brewers are nearly indestructible, extremely forgiving of grind inconsistencies, and clean up in seconds with a compacted puck. The trade-off: you're brewing one mug at a time unless you make a concentrate and dilute. For solo travelers who prioritize speed and consistency, it's hard to beat.
French press handles larger volumes well and produces a full-bodied cup that many campers prefer on cold mornings. The downside is cleanup—separating spent grounds from the carafe without making a mess requires some care, especially in dry campsites where water is precious.
Percolators seem old-school, but they still earn their place in group car camping where you want a full pot without filters. They tolerate less-than-perfect grinds and produce hot, robust coffee. The risk is over-extraction and bitterness if the pot bubbles too aggressively.
Cowboy coffee requires zero specialized gear: just a pot, coffee, water, and patience. It's the ultimate backup method and worth knowing even if you never plan to rely on it.
Pack the Right Coffee Kit: Beans, Grinder, Water, and Heat
Once you've chosen a brewer, the next layer of success comes from preparation. Camp coffee rarely happens by accident—it's the result of packing gear that matches your trip, keeping coffee fresh, and planning for water and heat constraints before you leave home.
Coffee format matters. Whole beans stay freshest and deliver the best flavor, but they require a hand grinder—another item to pack and a step to perform when you're groggy at dawn. Pre-ground coffee is faster and lighter, but stale flavor accelerates once the bag opens, making it best for short trips or when you can vacuum-seal portions. Instant coffee has improved dramatically in recent years, with specialty roasters offering single-origin instant that tastes genuinely good. Keep a few packets as backup no matter what method you choose.
For a two-person, two-night campout, plan roughly 60–70 grams of coffee per person per trip for two morning cups. Pre-portion doses into small zip bags or reusable tubes at home. This shortcut prevents over-dosing when you're half awake and keeps your main coffee supply sealed and fresh until needed.
Water quality quietly drives everything. If your water tastes like a funky lake, chlorine tablet, or iodine treatment, your coffee will carry that flavor directly into the cup. Filtered water is ideal. If you're treating stream or lake water, use a proper filtration system rather than chemical treatment alone—or let treated water sit and air out for several minutes before heating. A carbon filter bottle improves taste noticeably when sourced water is questionable.
Heat source selection affects your entire workflow. Canister stoves offer the most control: quick ignition, adjustable flame, no soot. Liquid fuel stoves perform better in cold temperatures and at altitude. Wood fires work fine for cowboy coffee or percolators but require coals, not flames, for stable heating. If you're brewing on a fire, pack a stable grate or choose a pot with a wide base that won't tip on uneven coals.
A small digital scale is one of the highest-return items you can pack for consistent coffee. It removes guesswork when you're measuring ground coffee and hot water in challenging conditions. If you skip the scale, use a consistent scoop and a water bottle with marked volumes, and don't change your method mid-trip.
Set Up a Practical Camp Coffee Station
You'll brew better coffee—and spill far less—if you establish a simple coffee station before the morning rush or after a long day on the trail. Look for a flat, stable surface away from the tent (food smells attract critters) and at least a few feet from open flames or fuel canisters.
Stabilize your stove first. Place it on firm, level ground or a small folding table. A collapsible windscreen makes an enormous difference—it shields the flame, speeds boil time, and saves fuel. Never wrap a windscreen around the canister itself, as trapped heat can cause dangerous pressure buildup. Position the windscreen around the burner and pot only.
Lay out your workflow in order: water, heat, coffee, then cleanup. Keep your mug, brewer, spoon, and coffee within arm's reach of the stove so you're not digging through bags with cold fingers. For car camping, a small bin or tote keeps everything organized and contained.
Grind size must match your method. Consistency matters more outdoors than it does at home because wind and uneven heating already push extraction around. A stable grind removes one variable from an unpredictable environment.
- Pour-over: medium-fine, like table salt
- AeroPress: medium, slightly finer than pour-over
- French press: coarse, like breadcrumbs
- Percolator: medium-coarse, like rough sand
- Cowboy coffee: coarse, to settle quickly
Use a consistent ratio. The standard starting point is 1:15 to 1:17 coffee-to-water by weight. For a single mug, that's roughly 20 grams of coffee to 320 grams of water. For two mugs, double it: 40 grams to 640 grams. If you're using a scoop instead of a scale, measure both coffee and water the same way every time—consistency beats precision when you're adjusting by taste.
Preheat your brewer and mug. This small step matters more outside than indoors because ambient cold rapidly steals heat from your brew. Swirl hot water in your mug and through your brewer, discard it, then begin brewing. A mug that starts warm keeps your finished coffee hot for several extra minutes, and a preheated brewer maintains extraction temperature more steadily.
 A simple pour-over setup works reliably in windy conditions with a stable stove and fresh grind.
Brew Camp Coffee Step-by-Step: Five Methods That Work Outdoors
Once your station is set and water is near boiling, the fundamentals stay the same regardless of method: stable heat, correct ratio, appropriate grind, and controlled contact time. Here's how to execute each popular camp brewing method properly.
French Press: Full-Bodied and Forgiving
The French press is the easiest "real coffee" method when you want speed, volume, and a rich cup without fuss. It tolerates wind and minor temperature swings better than pour-over because the coffee steeps in a closed vessel rather than draining through an open cone.
Step-by-step:
- Heat water to just off-boiling, then let it sit 30–45 seconds (target around 200°F).
- Add coarse-ground coffee to the press: 20 grams per 300 milliliters as your baseline.
- Pour water over the grounds, then stir gently to wet everything evenly.
- Place the lid on to retain heat and steep for 4 minutes.
- Press the plunger slowly and steadily, then pour immediately into mugs.
Common mistake: pumping the plunger up and down to "extract more." This agitates fine particles and produces a gritty, over-extracted cup. Press once, slowly, and pour.
Cleanup tip: after decanting, add a small amount of water, swirl, and scatter the diluted grounds widely or pack them out. Avoid dumping a wet coffee puck directly at the base of a tree—animals will dig it up.
Pour-Over: Clean, Bright, and Controlled
Pour-over works exceptionally well at camp if you shield the dripper from wind and keep your kettle close for controlled pours. You don't need a gooseneck kettle, but slow, circular pouring helps even extraction.
Step-by-step:
- Rinse the paper filter with hot water to remove paper taste, then discard the rinse water.
- Add medium-ground coffee and level the bed gently.
- Pour just enough water to saturate all grounds—about twice the coffee weight—and wait 30–45 seconds for the bloom.
- Pour in slow circles in stages, keeping the bed evenly wet without letting it run dry.
- Finish when the brew drains; target 2:30–4:00 total brew time for a single mug.
Common mistake: pouring a large volume quickly and letting the water channel down the sides, which under-extracts most of the bed. A gentle, steady pour keeps water in contact with all grounds.
Flavor adjustments: if the cup tastes sour, grind slightly finer or extend brew time. If it tastes bitter, grind coarser or pour faster with less agitation. Change one variable at a time until it lands right.
AeroPress: Fast, Consistent, Nearly Foolproof
The AeroPress is beloved by campers because it's nearly impossible to break, very forgiving of grind size and water temperature, and cleans up in seconds. Its short steep time means you waste less fuel and time waiting.
Step-by-step:
- Place a paper filter in the cap and rinse it with hot water if desired.
- Attach the cap to the chamber and set it on your mug.
- Add medium-ground coffee: 17–20 grams for a strong single cup.
- Pour hot water to your target level (typically 250–280 milliliters), then stir for 10 seconds.
- Insert the plunger just enough to create a seal, then press gently over 20–30 seconds.
- Stop when you hear a hiss; the puck should be compacted and dry enough to eject.
Batch tip: for two cups, brew a concentrated batch with double the coffee and half the water, then dilute with hot water to taste after pressing.
Cleanup tip: remove the cap, push the puck into a trash bag or scatter it well away from camp, and rinse the rubber plunger seal with clean water. The whole process takes under a minute.
Percolator: Old-School Volume for Groups
Percolators cycle near-boiling water through grounds repeatedly, extracting rich, robust coffee. They're perfect for family campouts where you want a full pot without filters. The technique is simple but requires attention to avoid over-extraction.
Step-by-step:
- Fill the pot with cold water to your desired cup level.
- Add medium-coarse coffee to the basket: about 10 grams per cup (slightly less than other methods, since extraction is aggressive).
- Assemble the percolator and place it over medium heat—not a roaring flame.
- Watch for the water to begin percolating through the glass knob, then reduce heat.
- Percolate gently for 6–8 minutes, aiming for a slow, steady bubble rather than a vigorous churn.
- Remove from heat and let it settle for 1 minute before serving.
Common mistake: letting the percolator bubble hard for 15 minutes. That produces a bitter, over-extracted pot that tastes scorched. Gentle, brief percolation yields a surprisingly smooth cup.
Cowboy Coffee: Zero Gear, Maximum Simplicity
When you have only a pot and a spoon, cowboy coffee still delivers a decent cup. The technique relies on steeping coarse grounds off heat, then settling them so you can pour cleanly.
Step-by-step:
- Bring water nearly to a boil, then remove from direct heat.
- Add coarse grounds: about 15 grams per 250 milliliters.
- Stir once to wet all grounds, then let steep, uncovered, for 3–5 minutes.
- To settle grounds, tap the side of the pot firmly several times, or add a small splash of cold water to drop fines to the bottom.
- Pour slowly and steadily from the pot, stopping before the grounds slide into your cup.
Common mistake: boiling the grounds hard, which extracts harsh, ashy compounds and turns the pot bitter. Steep off heat instead.
Insider tip: an eggshell (rinsed) thrown into the pot helps settle grounds faster—a genuine cowboy trick that works. Or use a small mesh strainer held over your mug for insurance.
Troubleshoot Common Camp Coffee Problems
Even with a solid setup, outdoor variables will occasionally throw off your brew. Here's how to diagnose and fix the most common issues quickly—without dumping your cup in frustration.
Bitter, Harsh, or Ashy Taste
This almost always means over-extraction: too much contact time, too fine a grind, or water that's too hot. Fix it by grinding coarser, shortening steep time by 30–60 seconds, or letting your boil settle before pouring. If using a percolator, reduce heat and shorten percolation time. If using a campfire, move the pot away from direct flames and use coals instead.
Sour, Thin, or Weak Coffee
Sourness indicates under-extraction: not enough contact time, too coarse a grind, or water that dropped below ideal temperature. Fix it by grinding finer, extending brew time slightly, or increasing your coffee dose by 1–2 grams per cup. At high altitude, where water boils at a lower temperature, compensate with a finer grind and longer extraction rather than trying to overheat the water—it won't get hotter.
Gritty or Muddy Cup
Grit comes from fine particles passing through your filter or press. For French press, grind coarser and press more slowly. For cowboy coffee, let the pot sit longer before pouring and add a cold-water splash to settle fines. For pour-over, ensure your filter isn't collapsing or tearing—carry a couple of spare filters for this reason.
Coffee Cools Too Quickly
Outdoor air, wind, and cold surfaces steal heat rapidly. Preheat your mug thoroughly, use a lid when possible, and brew slightly stronger than you would at home so dilution with hot water extends the drinking window. If you're serving a group, pour back-to-back and keep the carafe wrapped in a towel or cozy.
Consistent Inconsistency
If your coffee swings from great to mediocre across mornings, the issue is usually process variance, not beans. Standardize one baseline: same scoop, same water volume, same grind setting, same steep time. When something tastes off, change only one variable. Keeping brief notes on your phone—dose, grind, brew time, taste result—turns guesswork into a repeatable system.
Serve Well and Clean Up Without a Trace
Your brew isn't done until it's served at the right temperature and cleaned up responsibly. Coffee grounds are food waste, and leaving them scattered or buried attracts animals, creates odors, and violates Leave No Trace principles that protect shared campsites.
Serve intentionally. Preheat mugs, decant French press coffee immediately to stop extraction, and use lids when wind or cold temperatures threaten heat loss. If the coffee is too strong, adjust in the cup by adding hot water—don't try to re-brew weaker.
 Preheating insulated mugs before pouring extends the window to enjoy hot coffee outdoors.
Pack out grounds when you can. The cleanest approach is to carry a dedicated sealable bag for spent grounds and used filters. Tap the brewer's grounds into this bag before rinsing. If packing out isn't practical due to trip length, scatter dried grounds broadly at least 200 feet from water sources, trails, and camp—the same guidance applies to gray water. The Leave No Trace Center for Outdoor Ethics offers reliable guidance on managing food waste and dishwater in backcountry settings.
Rinse with minimal soap. Wipe your brewer with a paper towel or small spatula first to remove coffee oils, then rinse with a small amount of water. If you need soap, use a biodegradable camp soap sparingly and dispose of the rinse water by scattering it widely, never pouring it into lakes or streams. Let your brewer air-dry before packing to prevent mildew smells in your kit.
Before your next trip, consider the other meals you'll cook at camp. If coffee is your morning anchor, what about dinner? Learning to grill a tender cut over coals or getting the timing right for burgers on a portable grill extends the same thoughtful approach to the rest of your camp meals.
Frequently Asked Questions About Camp Coffee
How much coffee should I pack per person per day?
Plan on 30–35 grams of whole-bean coffee per person per day for two solid morning cups. For a three-day trip with two people, that's roughly 200 grams of coffee total. Add an extra 10–15 grams per person as a buffer for unexpected late afternoons or guests. If you're using pre-ground, vacuum-seal individual portions to slow staling.
Can I make coffee without a stove or fire?
Yes. Cold brew concentrate is the simplest no-heat option: steep coarse coffee in cold water at a 1:4 ratio for 12–18 hours, then strain. Some campers pack pre-made concentrate in a leakproof bottle. Instant coffee also dissolves acceptably in cold water with vigorous stirring, though it tastes better hot.
What's the easiest method for a complete beginner at a campsite?
An AeroPress with pre-ground coffee and a small canister stove is the most forgiving entry point. The short steep time tolerates imprecise water temperature, the paper filter catches almost all grit, and cleanup takes seconds. Pair it with a marked water bottle and a consistent scoop, and you'll produce decent coffee on your first attempt.
Does altitude affect how I should brew?
Yes. Water boils at lower temperatures as elevation increases—around 194°F at 10,000 feet versus 212°F at sea level. The lower temperature extracts less efficiently, so compensate with a slightly finer grind and 30–60 seconds longer steep or brew time. If flavor is still thin, increase your dose slightly. Don't try to force the water hotter; it physically can't exceed its boiling point at altitude.
How do I keep coffee fresh on a multi-day trip?
Keep whole beans in a sealed, light-blocking bag and open it only when measuring. If you're pre-grinding at home, vacuum-seal portions or use small airtight tubes. Store coffee away from heat sources and direct sun. For trips longer than five days, whole beans with a compact hand grinder will noticeably outperform pre-ground coffee that's been open for several days.
Can I use lake or stream water for coffee?
Only if you filter or treat it first—both for safety and flavor. Pathogens in untreated water are a real health risk, and even "clean" wilderness water picks up organic compounds that taste unpleasant when heated. Use a proper backcountry water filter or purify according to current guidelines. For the best-tasting cup, filter first, then heat.
You're Ready: Start With One Reliable Routine
The best camp coffee isn't the most complicated method or the fanciest gear. It's the one you can repeat reliably with your actual constraints. Consistency beats technical sophistication every time, especially when you're cold, tired, or breaking camp early.
Lock in a simple default routine and treat everything else as a controlled adjustment. Choose one baseline ratio, one brew time, and one grinder setting, then practice it at home before your trip. That single step—rehearsing your routine in your kitchen—eliminates most of the fumbling that ruins camp mornings.
When your coffee tastes off in the field, change only one variable at a time. Block wind before adjusting grind. Preheat your mug before blaming the beans. Standardize, stabilize, and sanitize as your three pillars. The difference between a frustrating morning and a great one is often a five-minute setup and a windscreen, not a new brewer.
You don't need to tinker every morning. You need one system that works. Now build it, test it, and enjoy the best part of waking up outdoors.
Planning a trip away from the campsite soon? A reliable road-trip vehicle on a budget makes getting to trailheads and dispersed sites far easier, and knowing how to manage your trailer's holding tank keeps the whole experience smooth when you return. If your outdoor adventures also involve time on the water, a well-maintained aluminum hull with the right protective coating keeps gear hauling drama-free, while a dependable reel matched to your rod ensures you can fish for your breakfast before brewing it. And when coffee season ends and garden season begins, those spent grounds don't have to go to waste—composting them properly is a smart way to feed your soil rather than a landfill. Back home, those same grounds can keep giving back. Coffee grounds add nitrogen to compost piles and improve soil structure, and they work especially well alongside a balanced mix of vegetable scraps and properly aged chicken manure. A little planning turns your morning ritual into a full-circle outdoor habit: great coffee on the trail, richer garden soil when you return. The same mindset—preparation, consistency, and respect for the places you camp—will serve you well in every other part of your outdoor routine. Pick your brewer, practice at home, and bring that confidence to the trail. Every sunrise becomes a moment you’re ready for, and every mug tastes like a small victory won before the day even begins. Happy brewing.


One Comment