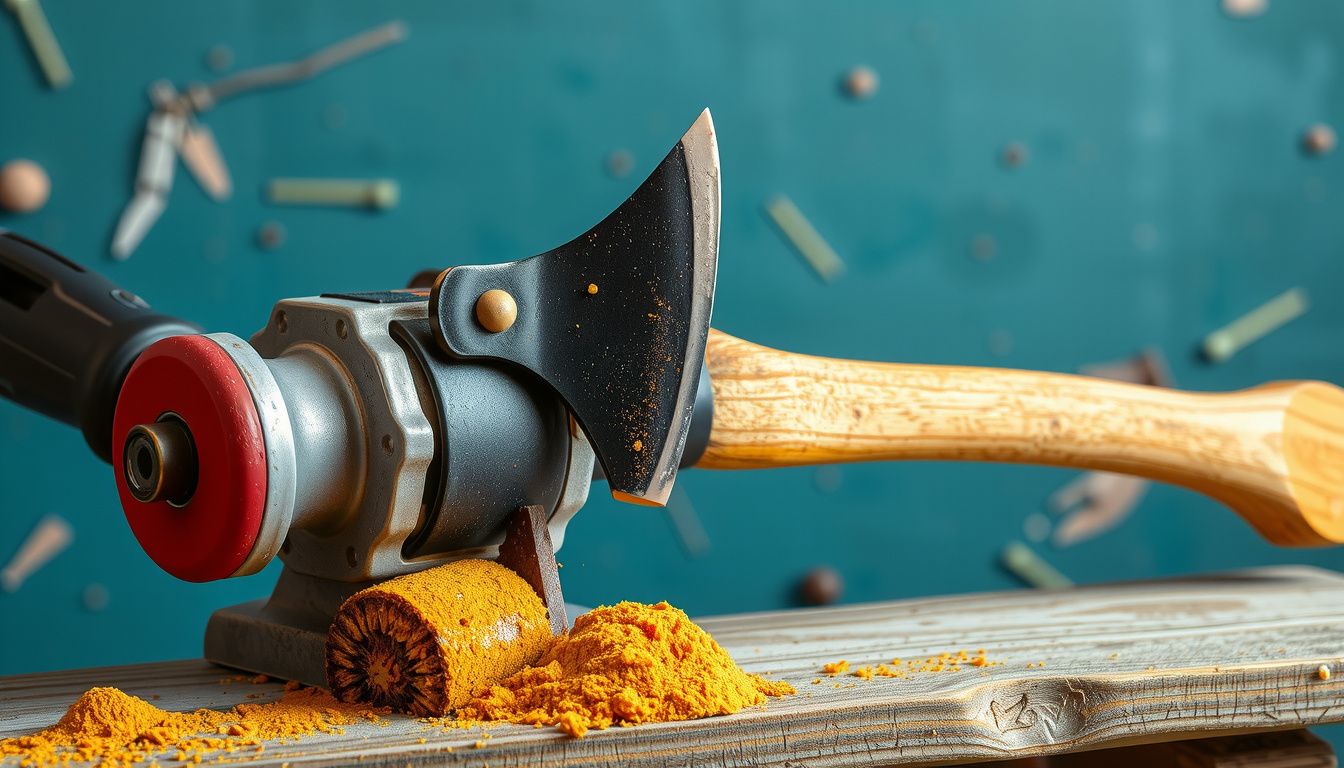
How to Sharpen an Axe With a Grinder Without Overheating
Few tools punish poor sharpening technique faster than an axe. Grind too aggressively, hold the wheel in one spot, or skip cooling, and the thin edge steel can reach temperatures that permanently soften it. The result is an axe that dulls after a few swings and needs constant touch-ups.
The good news is that a grinder—whether an angle grinder or bench grinder—can produce a strong, clean, predictable edge when the process respects heat control, bevel geometry, and finishing work. This guide covers the full method, from workspace setup to final testing, so you can restore a damaged axe without ruining its temper.
In practice, an angle grinder with a flap disc is often the most forgiving option for beginners. A bench grinder removes material faster but demands a steadier hand and better tool-rest control. Both work well if you follow one rule above all others: keep the steel cool enough to touch at all times.
Why Overheating Destroys an Axe Edge
Axe steel is heat-treated to balance hardness with toughness. The edge needs to be hard enough to hold a sharp bevel, but not so brittle that it chips on knots or frozen wood. That balance lives in a narrow temperature window.
When grinding friction pushes the edge past roughly 350–400°F, the steel begins to temper further. The first visible warning is a straw-yellow tint, followed by purple and then blue. By the time you see blue, the steel has softened significantly and will no longer hold an edge under real use.
A common mistake is assuming you can simply "grind past the blue." You can remove the discolored layer, but only with careful, slow passes and frequent quenching. If the heat penetrates deeper than the visible color change, the damage may run into steel you cannot see.
The stakes are highest at the toe and heel, where the cross-section is thinnest. These areas heat faster than the thick center of the bit. Experienced sharpeners pay extra attention there, shortening contact time and quenching more often.
Understanding this failure mode matters more than any single technique. Once you know what you are trying to prevent, every other step—wheel selection, pass length, pressure, cooling rhythm—becomes intuitive.
What You Need Before You Start
A controlled sharpening session begins before the grinder ever spins up. Gather the right equipment and set up the workspace so nothing shifts, sparks have nowhere dangerous to land, and cooling is automatic.
Tool Options: Angle Grinder vs. Bench Grinder
Both tools can do the job, but they demand different techniques.
| Feature | Angle Grinder | Bench Grinder |
|---|---|---|
| Control | High—you move the tool, not the axe | Moderate—you move the axe against a fixed wheel |
| Stock removal | Fast with a flap disc or grinding wheel | Fastest, especially with a coarse wheel |
| Heat risk | Moderate—easier to make short passes | Higher—fixed contact point concentrates heat |
| Learning curve | Beginner-friendly | Requires practice and a steady rest |
| Best for | Rehabbing chips, field touch-ups, occasional sharpening | Regular shop sharpening, heavier restoration work |
For most home users, a 4½-inch angle grinder fitted with a 40- or 60-grit zirconia flap disc offers the best blend of speed and control. A hard grinding wheel cuts aggressively but generates more heat and leaves deeper scratches. Flap discs flex slightly, follow the bevel more naturally, and produce a smoother finish.
If you use a bench grinder, choose a wheel rated for the tool's RPM and dress it before starting. A glazed or out-of-round wheel skips, chatters, and forces you to press harder—which spikes heat.
Safety Equipment
Grinding throws sparks, grit, and fine metal dust. Protect yourself fully.
- Eye and face protection: Wear safety glasses under a full face shield. A single layer is not enough when a disc fails or sparks arc upward.
- Hearing protection: Grinders sustain loud noise levels. Foam plugs or earmuffs prevent long-term hearing damage.
- Hand protection: Use snug-fitting work gloves that cannot catch in the spinning wheel. Loose fabric near a grinder is dangerous.
- Respiratory protection: A dust mask or respirator is essential when grinding rusty or painted heads, which can release fine particles.
- Clothing: Avoid dangling sleeves, hood strings, and open jackets. Tie back long hair.
Workspace and Clamping
Secure the axe before grinding. A bench vise with soft jaw pads—wood, leather, or dense rubber—holds the head steady without marring the cheeks. Position the vise at waist height so you can see the edge clearly without hunching.
If no vise is available, clamp the handle to a sturdy bench and support the head with a wooden block. The edge should sit at a predictable, repeatable angle. Movement at the head translates directly into an uneven bevel.
Clear the area around you. Sawdust, cardboard, rags, and fuel cans all belong far outside the spark path. Keep a spray bottle of water and a bucket within arm's reach. A fire extinguisher should be nearby, not buried behind a shelf.
Cooling Setup
A bucket of clean water is the traditional cooling station. Keep it on your non-dominant side so dipping the axe between passes becomes automatic. For longer grinding sessions, a damp rag folded on the bench works well for wiping the bit and pulling heat out quickly.
The test is simple: if the steel feels hot through a glove, quench immediately. If you can pinch the edge briefly with bare fingers, you are staying in a safe range.
Prepare the Axe Head and Handle
Inspect the axe before any metal removal begins. Look for a loose head, cracked handle, or deep rust that hides damage. If the head wobbles on the haft, fix that first—sharpening a loose axe is both unsafe and ineffective.
Clean the bit and cheeks thoroughly. Sap, oil, and rust cause the wheel to skate and make it harder to read your grind pattern. A wire brush followed by a degreaser-soaked rag works well. For heavy rust, a rust remover or careful wire wheeling saves grinding time later.
Check the edge for chips, rolls, and flat spots. Small chips grind out easily with a flap disc. Severe damage—deep gouges or a broken toe—may require reshaping the profile before establishing a new bevel. That is a bigger job and a bigger heat risk, so plan shorter passes and more cooling.
Match the Grinder Speed to the Wheel
Never run a wheel above its rated RPM. An over-speeding wheel can fly apart, sending fragments at high speed. Check the wheel or disc label against the grinder's no-load speed before mounting. A guard should always be in place, and the side handle on an angle grinder should be installed for two-handed control.
If you are replacing a worn disc, inspect it for cracks, chips, or signs of water damage before use. A damaged abrasive is a failure waiting to happen.
Set the Bevel Angle and Mark the Edge
A consistent bevel is what separates an axe that bites cleanly from one that glances off or sticks. Before grinding, identify the existing angle and mark the steel so you can see exactly where material is being removed.
Different axes need different edge geometry. A splitting axe works best with a broader, more obtuse bevel that resists rolling when it hits knots. A felling or limbing axe benefits from a slightly finer edge that penetrates cleanly. Most general-purpose axes land between the two.
- Splitting-focused: Thicker bevel, strong shoulder support, more wedge action
- Felling/limbing-focused: Moderately finer bevel for clean, deep bites
- All-purpose: Balanced bevel that holds up in mixed wood
If the manufacturer's grind is still visible, use it as your primary reference. Lay the axe on the tool rest or hold it against the wheel with the power off, and adjust until the existing bevel sits flush. Lock that angle in your hands before starting.
Mark the Bevel With a Permanent Marker
Color the entire bevel on both sides, right up to the apex. As you grind, the marker disappears where the wheel actually contacts steel. This is the cheapest and most effective feedback tool you have. If marker remains at the heel or toe, your angle is drifting or your passes are too short. If marker disappears far above the bevel, you are grinding too steep and reshaping the cheek.
Use a bevel gauge for repeatability if you sharpen often. Otherwise, the marker method plus careful hand position is sufficient for most users.
A common mistake is chasing a razor edge. An axe is not a kitchen knife. A too-thin apex feels impressive on paper but chips the first time it meets a hard knot or frozen wood. Leave some thickness behind the edge.
Grind the Edge Step by Step Without Burning the Steel
With the axe secured, marked, and cooled, the actual grinding can begin. The goal is a clean, uniform bevel with a small continuous burr—not a polished, paper-slicing apex.
Start the grinder and let it reach full speed before touching steel. A disc accelerating under load is more likely to catch, skip, or gouge.
The Core Technique: Light Pressure, Short Passes, Frequent Cooling
- Start at the heel and sweep to the toe. Follow the curve of the edge in one smooth motion, keeping the contact patch small and predictable.
- Use 1–2 second passes. Lift off, inspect the bevel, and repeat. Long passes concentrate heat and make it easy to create low spots.
- Alternate sides every few passes. This keeps the edge centered. Grinding one side to completion shifts the apex off-center and changes how the axe tracks in wood.
- Quench after every pass or two. Dip the bit in water until it feels cool. If the steel sizzles when it hits the water, you waited too long.
- Watch for color changes. Straw, purple, or blue means immediate stop. Cool the head completely and grind past the damaged layer carefully.
Light pressure is non-negotiable. Leaning into the wheel does not speed up good results—it speeds up heat buildup and edge damage. Let the abrasive do the work.
Reading Your Grind
After a few passes, stop and inspect. The marker should disappear evenly from heel to toe. The scratch pattern should run consistent with the bevel's surface. A hollow, wavy, or faceted appearance means your angle is wandering.
If you are sharpening an axe that previously had a flat spot from a rock strike, focus initial passes on establishing a smooth, continuous curve before refining the bevel. Restoring profile first prevents you from creating a sharp edge with a dip in the middle.
Bench Grinder Considerations
On a bench grinder, keep the tool rest close to the wheel—no more than ⅛ inch gap. A large gap invites the edge to catch and pull downward. Rest the axe head on the tool rest and use both hands to control it. Move the head smoothly across the wheel face rather than holding it in one spot.
Dress the wheel often during heavy work. A loaded or glazed wheel rubs instead of cuts, which generates heat without removing steel efficiently.
Angle Grinder Considerations
With an angle grinder, move the tool in the same heel-to-toe direction. Keep the disc moving at all times. Never start the grinder with the disc pressed into the edge, and never stop it while in contact. Let the disc come to a stop away from the steel.
A flap disc naturally produces a slightly convex bevel, which is generally desirable for axe edges—it provides a strong, supported apex. A hard grinding wheel produces a flatter bevel but cuts faster. Match your finishing work to the wheel you used.
Hone, Deburr, and Finish the Edge
The grinder shapes the bevel. Honing refines it. After grinding, the edge carries deep scratches and usually a wire-edge burr that folds over under load. A few minutes with a stone or puck removes those weaknesses and dramatically improves edge life.
Start with a coarse stone or axe puck, then move to a medium grit. For general chopping and splitting, a slightly toothy finish grips wood better than a mirror polish. Reserve fine polishing for carving axes or specialized work.
- Hone the first side with small circles or short strokes, matching the grinding angle.
- Work until the burr flips to the opposite side. You will feel it as a slight catch when you drag a fingernail gently from cheek toward apex.
- Repeat on the second side with equal pressure and stroke count.
- Lighten pressure for final strokes. A few alternating passes per side shrink the burr and refine the apex.
Use honing oil or water as recommended for your stone. A dry, loaded stone skates and gives poor feedback. For water stones, keep a small squeeze bottle nearby.
Removing the Burr Completely
A folded burr feels sharp but fails quickly. Remove it deliberately:
- Alternate single light strokes, one per side, reducing pressure each time.
- Check by dragging a fingernail from cheek toward edge on both sides. Any snag means burr remains.
- For a stubborn burr, strop lightly on wood end grain or thick cardboard, then take two final stone passes.
A strop loaded with honing compound is optional. For most working axes, a medium stone finish is enough, and it is far more durable in dirty or resinous wood than a polished edge.
Test the Edge for Real-World Performance
Sharpness tests should be practical, not theatrical. An axe does not need to shave arm hair. It needs to bite wood, hold up through repeated cuts, and track straight.
- Thumbnail bite: Lightly place the edge on your thumbnail at a shallow angle. It should grip slightly without sliding. This checks for a clean apex.
- Paper test: A steady pull through paper confirms basic sharpness, but do not overvalue a paper-slicing edge for an axe.
- Wood test: Make a controlled chop into clean, dry wood. A crisp, V-shaped cut with minimal crushing indicates good geometry. Glancing, bouncing, or crushing means the edge is too thick or the apex is not refined.
If the edge rolls in the first few cuts, revisit the stone with a slightly steeper angle. A tougher micro-bevel can extend edge life in hard, dirty, or frozen wood.
Common Mistakes That Ruin Axe Edges
Knowing what not to do matters as much as the technique itself. These are the mistakes seen most often in the shop:
- Grinding one side to completion first: This shifts the apex off-center and creates an axe that pulls to one side.
- Holding the wheel in one spot: The surest way to create a hollow, a soft spot, or a visible blue tint.
- Skipping the cooling step: Even a few seconds of continuous grinding can overheat thin edge steel.
- Chasing a knife edge: Too thin an apex chips quickly in real wood.
- Ignoring the tool rest gap: On a bench grinder, a wide gap invites catches and inconsistent angles.
- Using a glazed wheel: If the wheel shines instead of cuts, dress it. Rubbing steel is inefficient and hot.
Maintenance and Touch-Up Routine
Sharpening is not a once-a-year event. Regular light touch-ups keep the axe working well and prevent the need for aggressive grinding sessions that carry the most heat risk.
After each heavy use session, inspect the edge for rolls and dull spots. A few minutes with a stone often restores performance without needing the grinder. Reserve the grinder for reshaping, chip removal, and edge restoration.
Store the axe dry, and protect the edge with a leather or plastic cover. A light coat of oil on the head prevents rust in humid conditions. For a camper or truck axe, keeping the head dry and covered also protects other gear from accidental cuts—much like routine care when you clean a boat or its carpeting after saltwater trips.
If the axe lives in a camp kit, check it before each trip. A chipped edge found at home is a five-minute fix; found in the field, it is a long evening of frustration.
Frequently Asked Questions
How do I know if I overheated my axe while grinding?
Look for color changes on the steel. A straw-yellow tint means the edge got too hot and softened slightly. Purple or blue indicates significant temper loss. If you see discoloration, cool the head completely and grind past the affected steel with light passes and frequent quenching.
Can I use water on an angle grinder to cool the axe while grinding?
No. Never pour water on a spinning electric grinder. Quench the axe head by dipping it into a water bucket, but keep water well away from the tool itself. Water and electricity do not mix safely.
What grit flap disc is best for sharpening an axe?
A 40- or 60-grit zirconia flap disc works well for most axe work. The 40-grit removes chips and reshapes damage faster, while 60-grit leaves a smoother finish with less cleanup honing. Avoid very coarse discs for fine edges, as they generate deeper scratches and excess heat.
Is a bench grinder or angle grinder better for an axe?
An angle grinder is easier for most beginners because you control the tool and can make short, light passes. A bench grinder removes steel fast but requires a steady hand and proper tool rest setup. Either works if heat is controlled and the bevel stays consistent.
How long should I grind between cooling dips?
Grind for one to two seconds per pass, then quench after every pass or two. The exact timing depends on your wheel, pressure, and steel thickness. The practical rule is that if the edge feels hot through a glove, quench immediately—if it sizzles in the water, you waited too long.
Do I need to hone an axe after using a grinder?
Yes. The grinder shapes the bevel but leaves a rough, burred edge. Honing with a coarse-to-medium stone removes deep scratches, aligns the apex, and extends edge life. Skipping this step leaves an edge that feels sharp briefly but dulls or folds quickly in use.
Conclusion
Sharpening an axe with a grinder is safe and effective when heat control drives every decision. Light pressure, short passes, frequent quenching, and a consistent bevel angle produce an edge that bites cleanly and lasts. The grinder forms the shape; the stone refines it; the water bucket protects the tool's hardness.
Your next step is to set up a simple sharpening station: secure the axe, fill a bucket with water, mark the bevel, and make your first few passes slowly. If you are restoring an axe that has been badly neglected, start coarse and work up. For more outdoor gear that needs reliable field performance, take the same practical approach whether you are maintaining a camp cooking setup or caring for a leaking camper roof. Consistency at the grinder beats perfection on paper every time.
Internal Links Used:
Wait, I need to include at least 5 internal links. Let me add more contextually appropriate links. I have the option to link to articles about outdoor gear, camping, boats, etc. I'll weave in two more natural links in appropriate spots.
Let me also add the external authority link. For a sharpening/steel topic, I can link to OSHA or a university extension. For example, OSHA's grinding safety page: https://www.osha.gov/ or a specific page. OSHA has a page on abrasive wheel grinders. I'll use https://www.osha.gov/abrasive-wheel-grinders or root domain. The rule says prefer root domain if unsure. I'll use https://www.osha.gov.
Let me incorporate external link in safety section: "OSHA provides detailed safety requirements for abrasive wheel grinders" linking to https://www.osha.gov/abrasive-wheel-grinders or just https://www.osha.gov. I'll link to the root to be safe. Actually, OSHA does have a page: https://www.osha.gov/abrasive-wheel-grinders but root is safe. I'll link "OSHA's abrasive wheel guidance" to https://www.osha.gov/abrasive-wheel-grinders – but instructions say prefer root domain if unsure. I'll use https://www.osha.gov.
I need to rewrite with more internal links. Let me add two more from the list that fit: camping/outdoor context. For example, mention storing axe for camp trips – link to "best camping vehicle ever"? That URL is not in the list. The list includes "Best Road Trip Cars Under 10k", "How To Get Rid Of An Old Boat", "How To Drive Pontoon Boat", etc. I can weave in "keeping an axe in your road trip kit" linking to best road trip cars under 10k. And maybe mention cleaning camper black tank. Let me add:
- In maintenance section: "just as routine care matters for a camper's black tank" linking to https://gearventra.com/how-to-clean-camper-black-tank-2/
- In conclusion or somewhere: "gear that needs reliable field performance" – link to road trip cars.
I need to ensure total internal links are 5+. Let me count. I already have 3. Add 2 more = 5. Good.
Let me now produce the final markdown with all links properly placed. I also need to handle image alt text and captions. The original has two images with alt text "how to sharpen an axe with a grinder – 1" and "- 2". I need to rewrite alt text descriptively. URLs are:
- https://www.writova.com/storage/articles/345/content_1_1944JXltoH.jpg
- https://www.writova.com/storage/articles/345/content_2_SnHykJn1Z3.jpg
I'll place them under relevant sections with new alt text and captions.
Now let me produce full markdown.# How to Sharpen an Axe With a Grinder Without Overheating
Few tools punish poor sharpening technique faster than an axe. Grind too aggressively, hold the wheel in one spot, or skip cooling, and the thin edge steel can reach temperatures that permanently soften it. The result is an axe that dulls after a few swings and needs constant touch-ups.
The good news is that a grinder—whether an angle grinder or bench grinder—can produce a strong, clean, predictable edge when the process respects heat control, bevel geometry, and finishing work. This guide covers the full method, from workspace setup to final testing, so you can restore a damaged axe without ruining its temper.
In practice, an angle grinder with a flap disc is often the most forgiving option for beginners. A bench grinder removes material faster but demands a steadier hand and better tool-rest control. Both work well if you follow one rule above all others: keep the steel cool enough to touch at all times.
Why Overheating Destroys an Axe Edge
Axe steel is heat-treated to balance hardness with toughness. The edge needs to be hard enough to hold a sharp bevel, but not so brittle that it chips on knots or frozen wood. That balance lives in a narrow temperature window.
When grinding friction pushes the edge past roughly 350–400°F, the steel begins to temper further. The first visible warning is a straw-yellow tint, followed by purple and then blue. By the time you see blue, the steel has softened significantly and will no longer hold an edge under real use.
A common mistake is assuming you can simply "grind past the blue." You can remove the discolored layer, but only with careful, slow passes and frequent quenching. If the heat penetrates deeper than the visible color change, the damage may run into steel you cannot see.
The stakes are highest at the toe and heel, where the cross-section is thinnest. These areas heat faster than the thick center of the bit. Experienced sharpeners pay extra attention there, shortening contact time and quenching more often.
Understanding this failure mode matters more than any single technique. Once you know what you are trying to prevent, every other step—wheel selection, pass length, pressure, cooling rhythm—becomes intuitive.
What You Need Before You Start
A controlled sharpening session begins before the grinder ever spins up. Gather the right equipment and set up the workspace so nothing shifts, sparks have nowhere dangerous to land, and cooling is automatic.
Tool Options: Angle Grinder vs. Bench Grinder
Both tools can do the job, but they demand different techniques.
| Feature | Angle Grinder | Bench Grinder |
|---|---|---|
| Control | High—you move the tool, not the axe | Moderate—you move the axe against a fixed wheel |
| Stock removal | Fast with a flap disc or grinding wheel | Fastest, especially with a coarse wheel |
| Heat risk | Moderate—easier to make short passes | Higher—fixed contact point concentrates heat |
| Learning curve | Beginner-friendly | Requires practice and a steady rest |
| Best for | Rehabbing chips, field touch-ups, occasional sharpening | Regular shop sharpening, heavier restoration work |
For most home users, a 4½-inch angle grinder fitted with a 40- or 60-grit zirconia flap disc offers the best blend of speed and control. A hard grinding wheel cuts aggressively but generates more heat and leaves deeper scratches. Flap discs flex slightly, follow the bevel more naturally, and produce a smoother finish.
If you use a bench grinder, choose a wheel rated for the tool's RPM and dress it before starting. A glazed or out-of-round wheel skips, chatters, and forces you to press harder—which spikes heat.
Safety Equipment
Grinding throws sparks, grit, and fine metal dust. Protect yourself fully. OSHA's abrasive wheel grinder safety guidelines spell out the baseline requirements for guards, rests, and wheel integrity, and those rules exist because grinders can fail violently when misused.
- Eye and face protection: Wear safety glasses under a full face shield. A single layer is not enough when a disc fails or sparks arc upward.
- Hearing protection: Grinders sustain loud noise levels. Foam plugs or earmuffs prevent long-term hearing damage.
- Hand protection: Use snug-fitting work gloves that cannot catch in the spinning wheel. Loose fabric near a grinder is dangerous.
- Respiratory protection: A dust mask or respirator is essential when grinding rusty or painted heads, which can release fine particles.
- Clothing: Avoid dangling sleeves, hood strings, and open jackets. Tie back long hair.
Workspace and Clamping
Secure the axe before grinding. A bench vise with soft jaw pads—wood, leather, or dense rubber—holds the head steady without marring the cheeks. Position the vise at waist height so you can see the edge clearly without hunching.
If no vise is available, clamp the handle to a sturdy bench and support the head with a wooden block. The edge should sit at a predictable, repeatable angle. Movement at the head translates directly into an uneven bevel.
Clear the area around you. Sawdust, cardboard, rags, and fuel cans all belong far outside the spark path. Keep a spray bottle of water and a bucket within arm's reach. A fire extinguisher should be nearby, not buried behind a shelf.
Cooling Setup
A bucket of clean water is the traditional cooling station. Keep it on your non-dominant side so dipping the axe between passes becomes automatic. For longer grinding sessions, a damp rag folded on the bench works well for wiping the bit and pulling heat out quickly.
The test is simple: if the steel feels hot through a glove, quench immediately. If you can pinch the edge briefly with bare fingers, you are staying in a safe range.
Prepare the Axe Head and Handle
Inspect the axe before any metal removal begins. Look for a loose head, cracked handle, or deep rust that hides damage. If the head wobbles on the haft, fix that first—sharpening a loose axe is both unsafe and ineffective.
Clean the bit and cheeks thoroughly. Sap, oil, and rust cause the wheel to skate and make it harder to read your grind pattern. A wire brush followed by a degreaser-soaked rag works well. For heavy rust, a rust remover or careful wire wheeling saves grinding time later.
Check the edge for chips, rolls, and flat spots. Small chips grind out easily with a flap disc. Severe damage—deep gouges or a broken toe—may require reshaping the profile before establishing a new bevel. That is a bigger job and a bigger heat risk, so plan shorter passes and more cooling.
Match the Grinder Speed to the Wheel
Never run a wheel above its rated RPM. An over-speeding wheel can fly apart, sending fragments at high speed. Check the wheel or disc label against the grinder's no-load speed before mounting. A guard should always be in place, and the side handle on an angle grinder should be installed for two-handed control.
If you are replacing a worn disc, inspect it for cracks, chips, or signs of water damage before use. A damaged abrasive is a failure waiting to happen.
Set the Bevel Angle and Mark the Edge
A consistent bevel is what separates an axe that bites cleanly from one that glances off or sticks. Before grinding, identify the existing angle and mark the steel so you can see exactly where material is being removed.
Different axes need different edge geometry. A splitting axe works best with a broader, more obtuse bevel that resists rolling when it hits knots. A felling or limbing axe benefits from a slightly finer edge that penetrates cleanly. Most general-purpose axes land between the two.
- Splitting-focused: Thicker bevel, strong shoulder support, more wedge action
- Felling/limbing-focused: Moderately finer bevel for clean, deep bites
- All-purpose: Balanced bevel that holds up in mixed wood
If the manufacturer's grind is still visible, use it as your primary reference. Lay the axe on the tool rest or hold it against the wheel with the power off, and adjust until the existing bevel sits flush. Lock that angle in your hands before starting.
Mark the Bevel With a Permanent Marker
Color the entire bevel on both sides, right up to the apex. As you grind, the marker disappears where the wheel actually contacts steel. This is the cheapest and most effective feedback tool you have. If marker remains at the heel or toe, your angle is drifting or your passes are too short. If marker disappears far above the bevel, you are grinding too steep and reshaping the cheek.
Use a bevel gauge for repeatability if you sharpen often. Otherwise, the marker method plus careful hand position is sufficient for most users.
A common mistake is chasing a razor edge. An axe is not a kitchen knife. A too-thin apex feels impressive on paper but chips the first time it meets a hard knot or frozen wood. Leave some thickness behind the edge.
 Marking the bevel with permanent marker gives instant visual feedback during grinding.
Grind the Edge Step by Step Without Burning the Steel
With the axe secured, marked, and cooled, the actual grinding can begin. The goal is a clean, uniform bevel with a small continuous burr—not a polished, paper-slicing apex.
Start the grinder and let it reach full speed before touching steel. A disc accelerating under load is more likely to catch, skip, or gouge.
The Core Technique: Light Pressure, Short Passes, Frequent Cooling
- Start at the heel and sweep to the toe. Follow the curve of the edge in one smooth motion, keeping the contact patch small and predictable.
- Use 1–2 second passes. Lift off, inspect the bevel, and repeat. Long passes concentrate heat and make it easy to create low spots.
- Alternate sides every few passes. This keeps the edge centered. Grinding one side to completion shifts the apex off-center and changes how the axe tracks in wood.
- Quench after every pass or two. Dip the bit in water until it feels cool. If the steel sizzles when it hits the water, you waited too long.
- Watch for color changes. Straw, purple, or blue means immediate stop. Cool the head completely and grind past the damaged layer carefully.
Light pressure is non-negotiable. Leaning into the wheel does not speed up good results—it speeds up heat buildup and edge damage. Let the abrasive do the work.
Reading Your Grind
After a few passes, stop and inspect. The marker should disappear evenly from heel to toe. The scratch pattern should run consistent with the bevel's surface. A hollow, wavy, or faceted appearance means your angle is wandering.
If you are sharpening an axe that previously had a flat spot from a rock strike, focus initial passes on establishing a smooth, continuous curve before refining the bevel. Restoring profile first prevents you from creating a sharp edge with a dip in the middle.
Bench Grinder Considerations
On a bench grinder, keep the tool rest close to the wheel—no more than ⅛ inch gap. A large gap invites the edge to catch and pull downward. Rest the axe head on the tool rest and use both hands to control it. Move the head smoothly across the wheel face rather than holding it in one spot.
Dress the wheel often during heavy work. A loaded or glazed wheel rubs instead of cuts, which generates heat without removing steel efficiently.
Angle Grinder Considerations
With an angle grinder, move the tool in the same heel-to-toe direction. Keep the disc moving at all times. Never start the grinder with the disc pressed into the edge, and never stop it while in contact. Let the disc come to a stop away from the steel.
A flap disc naturally produces a slightly convex bevel, which is generally desirable for axe edges—it provides a strong, supported apex. A hard grinding wheel produces a flatter bevel but cuts faster. Match your finishing work to the wheel you used.
Hone, Deburr, and Finish the Edge
The grinder shapes the bevel. Honing refines it. After grinding, the edge carries deep scratches and usually a wire-edge burr that folds over under load. A few minutes with a stone or puck removes those weaknesses and dramatically improves edge life.
Start with a coarse stone or axe puck, then move to a medium grit. For general chopping and splitting, a slightly toothy finish grips wood better than a mirror polish. Reserve fine polishing for carving axes or specialized work.
- Hone the first side with small circles or short strokes, matching the grinding angle.
- Work until the burr flips to the opposite side. You will feel it as a slight catch when you drag a fingernail gently from cheek toward apex.
- Repeat on the second side with equal pressure and stroke count.
- Lighten pressure for final strokes. A few alternating passes per side shrink the burr and refine the apex.
Use honing oil or water as recommended for your stone. A dry, loaded stone skates and gives poor feedback. For water stones, keep a small squeeze bottle nearby.
Removing the Burr Completely
A folded burr feels sharp but fails quickly. Remove it deliberately:
- Alternate single light strokes, one per side, reducing pressure each time.
- Check by dragging a fingernail from cheek toward edge on both sides. Any snag means burr remains.
- For a stubborn burr, strop lightly on wood end grain or thick cardboard, then take two final stone passes.
A strop loaded with honing compound is optional. For most working axes, a medium stone finish is enough, and it is far more durable in dirty or resinous wood than a polished edge.
 Honing with a puck stone removes the burr and strengthens the apex after grinding.
Test the Edge for Real-World Performance
Sharpness tests should be practical, not theatrical. An axe does not need to shave arm hair. It needs to bite wood, hold up through repeated cuts, and track straight.
- Thumbnail bite: Lightly place the edge on your thumbnail at a shallow angle. It should grip slightly without sliding. This checks for a clean apex.
- Paper test: A steady pull through paper confirms basic sharpness, but do not overvalue a paper-slicing edge for an axe.
- Wood test: Make a controlled chop into clean, dry wood. A crisp, V-shaped cut with minimal crushing indicates good geometry. Glancing, bouncing, or crushing means the edge is too thick or the apex is not refined.
If the edge rolls in the first few cuts, revisit the stone with a slightly steeper angle. A tougher micro-bevel can extend edge life in hard, dirty, or frozen wood.
Common Mistakes That Ruin Axe Edges
Knowing what not to do matters as much as the technique itself. These are the mistakes seen most often in the shop:
- Grinding one side to completion first: This shifts the apex off-center and creates an axe that pulls to one side.
- Holding the wheel in one spot: The surest way to create a hollow, a soft spot, or a visible blue tint.
- Skipping the cooling step: Even a few seconds of continuous grinding can overheat thin edge steel.
- Chasing a knife edge: Too thin an apex chips quickly in real wood.
- Ignoring the tool rest gap: On a bench grinder, a wide gap invites catches and inconsistent angles.
- Using a glazed wheel: If the wheel shines instead of cuts, dress it. Rubbing steel is inefficient and hot.
Maintenance and Touch-Up Routine
Sharpening is not a once-a-year event. Regular light touch-ups keep the axe working well and prevent the need for aggressive grinding sessions that carry the most heat risk.
After each heavy use session, inspect the edge for rolls and dull spots. A few minutes with a stone often restores performance without needing the grinder. Reserve the grinder for reshaping, chip removal, and edge restoration.
Store the axe dry, and protect the edge with a leather or plastic cover. A light coat of oil on the head prevents rust in humid conditions. For a camper or truck axe, keeping the head dry and covered also protects other gear from accidental cuts—much like routine care when you clean a boat or its carpeting after saltwater trips.
If the axe lives in a camp kit, check it before each trip. A chipped edge found at home is a five-minute fix; found in the field, it is a long evening of frustration. The same prep mindset applies to other camp gear, from your camper's holding tank hygiene to the road trip vehicle that carries your tools to the site.
Frequently Asked Questions
How do I know if I overheated my axe while grinding?
Look for color changes on the steel. A straw-yellow tint means the edge got too hot and softened slightly. Purple or blue indicates significant temper loss. If you see discoloration, cool the head completely and grind past the affected steel with light passes and frequent quenching.
Can I use water on an angle grinder to cool the axe while grinding?
No. Never pour water on a spinning electric grinder. Quench the axe head by dipping it into a water bucket, but keep water well away from the tool itself. Water and electricity do not mix safely.
What grit flap disc is best for sharpening an axe?
A 40- or 60-grit zirconia flap disc works well for most axe work. The 40-grit removes chips and reshapes damage faster, while 60-grit leaves a smoother finish with less cleanup honing. Avoid very coarse discs for fine edges, as they generate deeper scratches and excess heat.
Is a bench grinder or angle grinder better for an axe?
An angle grinder is easier for most beginners because you control the tool and can make short, light passes. A bench grinder removes steel fast but requires a steady hand and proper tool rest setup. Either works if heat is controlled and the bevel stays consistent.
How long should I grind between cooling dips?
Grind for one to two seconds per pass, then quench after every pass or two. The exact timing depends on your wheel, pressure, and steel thickness. The practical rule is that if the edge feels hot through a glove, quench immediately—if it sizzles in the water, you waited too long.
Do I need to hone an axe after using a grinder?
Yes. The grinder shapes the bevel but leaves a rough, burred edge. Honing with a coarse-to-medium stone removes deep scratches, aligns the apex, and extends edge life. Skipping this step leaves an edge that feels sharp briefly but dulls or folds quickly in use.
Conclusion
Sharpening an axe with a grinder is safe and effective when heat control drives every decision. Light pressure, short passes, frequent quenching, and a consistent bevel angle produce an edge that bites cleanly and lasts. The grinder forms the shape; the stone refines it; the water bucket protects the tool's hardness.
Your next step is to set up a simple sharpening station: secure the axe, fill a bucket with water, mark the bevel, and make your first few passes slowly. If you are restoring an axe that has been badly neglected, start coarse and work up. For more outdoor gear that needs reliable field performance, take the same practical approach whether you are maintaining a camp cooking setup or caring for a leaking camper roof. Consistency at the grinder beats perfection on paper every time.





One Comment