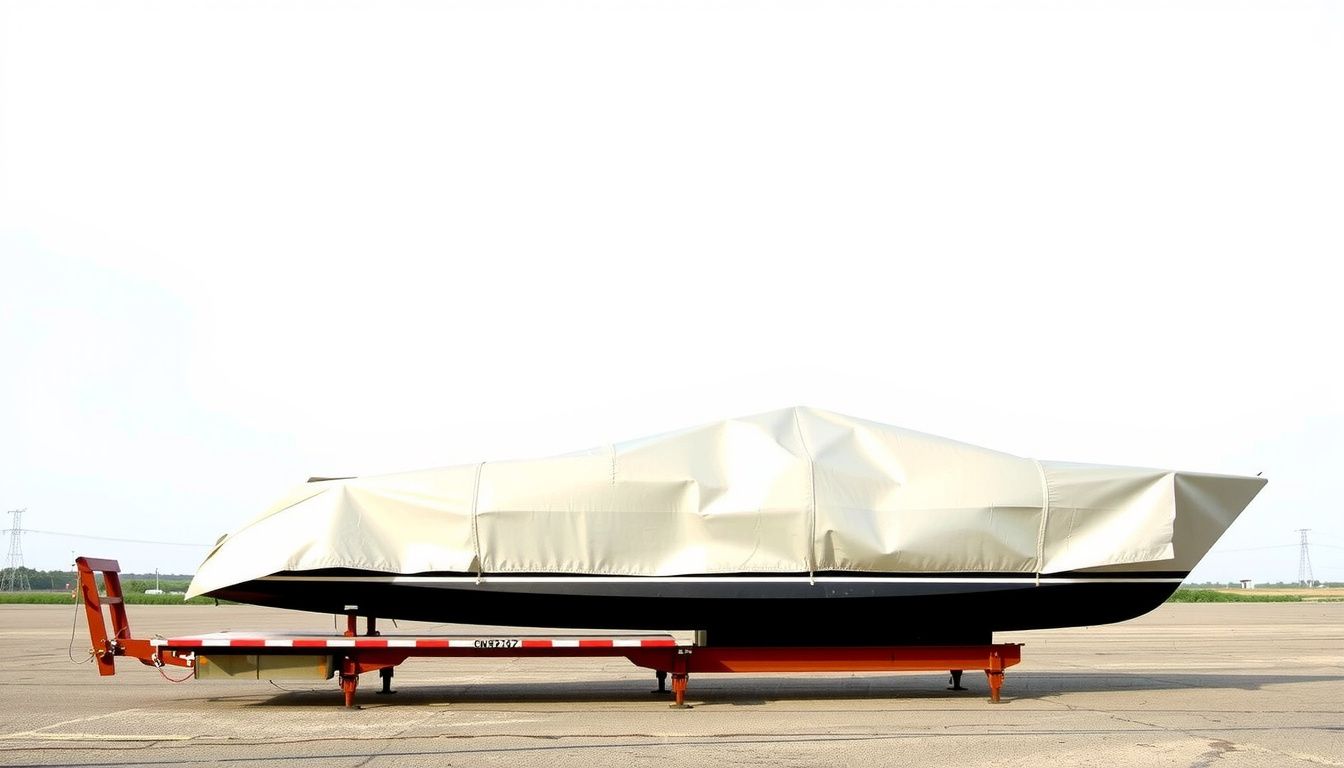
How to Shrink Wrap a Boat for Secure Winter Storage
Shrink wrapping a boat properly is one of the highest-value winterization skills a boat owner or marina technician can develop. A well-executed wrap keeps out snow, ice, debris, and UV damage while preventing the moisture buildup that leads to mildew, corrosion, and ruined upholstery. A poorly done wrap, by contrast, can trap condensation, tear under snow load, or rub holes through the hull's gelcoat.
This guide covers the full sequence: selecting the right materials, preparing the boat, building a sound support frame, securing the film, installing ventilation, applying controlled heat, and inspecting the finished cover. Whether you are wrapping a small outboard runabout or a larger cabin cruiser, the same principles apply — but the details change with boat size, storage location, and local winter conditions.
Why Shrink Wrapping Works — and Where It Fails
Shrink wrap protects a boat differently than a standard canvas or polyester cover. The heat-shrinking process creates a taut, semi-rigid shell that naturally sheds water and snow. Unlike a loose tarp, a properly shrunk cover does not flap in the wind, which is the main cause of abrasion damage during winter storage.
The film used for marine shrink wrapping is typically a low-density polyethylene formulated with UV inhibitors. It is available in several thicknesses, commonly 6-mil, 7-mil, and 8-mil, with heavier gauges recommended for larger boats, longer storage periods, or areas with heavy snow accumulation. White is the standard color for winter storage because it reflects sunlight and keeps interior temperatures more stable. Blue film, while occasionally seen, transmits more heat and is generally not recommended for long-term outdoor storage.
In practice, most shrink-wrap failures come down to three avoidable mistakes: insufficient ventilation leading to trapped moisture, inadequate frame support allowing snow to pool and stretch the film, and rushed heat-shrinking that creates thin spots prone to tearing. Addressing those three issues before the film ever goes on is what separates a cover that lasts one season from one that protects the boat all winter.
A common misconception is that shrink wrap should be completely airtight to keep moisture out. In reality, the opposite is true: the goal is a cover that sheds precipitation while actively allowing humidity to escape. Boat interior cleaning matters, but without airflow, even a dry boat will develop condensation during freeze-thaw cycles.
Choosing the Right Materials for Your Boat
Getting the material selection right before you start saves time, film, and frustration. Shrink wrapping is not a job where you want to discover mid-process that your film is too thin, your tape refuses to stick, or your heat gun lacks the output to shrink the film evenly.
Film Thickness and Size
For most recreational boats under 25 feet, 7-mil film offers a good balance of durability, heat response, and cost. Smaller runabouts and fishing boats stored for one season often do fine with 6-mil, but if your area sees heavy snow or high winds, step up to 7-mil or 8-mil. Boats over 28 feet, those stored in exposed locations, or boats being transported on a trailer may need 8-mil or even 9-mil film to handle the additional stress.
Film sizing is straightforward once you know the boat's length, beam, and overall height at the highest point — usually the windshield, T-top, or radar arch. The film must cover the boat from bow to stern with enough overhang to create a secure hem below the rub rail. As a rule of thumb, order a sheet at least 10 to 12 feet longer than the boat's length and 4 to 6 feet wider than the combined beam plus height.
Tape, Straps, and Accessories
Not all tape is shrink-wrap tape. Standard duct tape fails quickly in cold weather and does not bond well to polyethylene film. Use tape specifically designed for shrink wrap, which remains flexible at low temperatures and adheres strongly to the film without peeling in wind. You will also need:
- Strapping or belly bands: Polypropylene strapping, non-stretch rope, or purpose-made shrink-wrap strap material. These hold the film tight to the hull and prevent wind from lifting the skirt.
- Chafe protection: Foam, felt, or shrink-wrap chafe tape for sharp points like cleats, windshields, and railing corners.
- Vents: Molded plastic shrink-wrap vents with adhesive flanges, available in several sizes. Larger boats or enclosed cabins need more vents.
- Access door kit: A zippered or adhesive door frame that lets you enter the boat during winter without cutting the film.
- Heat gun: A purpose-built propane-powered shrink gun with a wand-style burner, not a household paint-stripping heat gun, which lacks the heat output and control needed for marine film.
A practical mistake to avoid: buying film, tape, and vents from different manufacturers and assuming they are compatible. Some film formulations work better with matching tape adhesives. When possible, purchase a system from one marine supplier.
Prepare the Boat and Work Area Before You Start
Preparation is the least glamorous part of the job and the most reliable predictor of a successful wrap. A clean hull, a dry interior, and a properly staged work area prevent most failures before the first length of film is unrolled.
Choose the Right Day and Location
Wind is the enemy of shrink wrapping. Film acts like a sail, and a gust can pull partially secured film out of your hands or tear it against sharp edges. Plan the job for a calm, dry day — ideally with wind under 10 mph. If you must work in cooler weather, the film shrinks fine, but adhesives bond better when the film surface is dry and above freezing.
Set up on a flat surface with room to walk entirely around the boat. If the boat is on a trailer, chock the wheels and make sure the trailer jack is secure. A slight slope is acceptable, but substantial slopes make ladder work unsafe and cause the film to pull unevenly.
Clean and Dry the Boat Completely
Dirt trapped under shrink wrap becomes an abrasive paste that scratches gelcoat and painted surfaces as the film shifts in wind. Wash the boat thoroughly and allow it to dry completely. Pay special attention to cockpit lockers, fish boxes, and the bilge — areas where standing water lingers long after the deck looks dry.
Open all lockers, hatches, and interior doors to promote airflow during storage. If the boat has a cabin, leave cushion bases propped up and doorways open so moisture does not become trapped in enclosed compartments. For boats stored in humid climates, place moisture absorbers or desiccant packs inside before sealing the wrap.
Remove or Protect Hardware
Shrink wrap does not conform gracefully around antennas, bimini tops, outriggers, or fishing rod holders. Remove anything that can be removed, and pad what cannot. Antennas should come down; canvas and eisenglass should be taken off, cleaned, and stored indoors. Electronics that can be removed are better off inside the house than under wrap.
For hardware that stays in place — cleats, windshield corners, railing stanchions, anchor rollers — apply foam, felt, or dedicated chafe tape before the film goes on. These are the points where wind-driven movement eventually saws through the plastic.
Plan Ventilation Now, Not Later
Deciding where vents will go after the film is shrunk is a classic beginner mistake. Once the film has been heated, it is tight and thin, making clean cuts more difficult and increasing the risk of tear-out. Plan vent locations based on cabin volume and local climate. A small center console may need two vents; an enclosed cabin with multiple compartments typically needs four or more, placed to create crossflow.
 The support frame gives the shrink film its shape and keeps it clear of sharp deck hardware.
Build a Support Frame and Add Chafe Protection
The frame is the skeleton of the wrap. Without it, film sags between the windshield and the rear deck, creating low spots where water and snow pool. Pooled water adds hundreds of pounds to the cover and eventually stretches the film until it tears or collapses. A strong frame turns a flat, vulnerable surface into a tent-like peak that sheds precipitation on its own.
Set the Ridge Line
Run a ridge line or strap from the bow to the stern, elevated above the highest fixed point on the boat — typically the windshield frame, T-top, or cabin top. The ridge must be high enough to create a consistent slope, but low enough so the film does not need to be stretched unnaturally to cover the sides. Too steep and the film becomes difficult to tension evenly near the gunwales; too flat and snow will accumulate.
Secure the ridge line to sturdy points like the bow eye and transom tie-downs. Do not tie off to an antenna mount, a bimini fitting, or any part of the boat not designed to handle a strong pull.
Add Uprights and Cross Ties
The ridge line alone is not enough. It needs vertical supports spaced along the length to hold it at the correct height and prevent sagging. On a 19- to 24-foot boat, uprights spaced roughly every 3 to 5 feet work well. Use cross ties between uprights to prevent the frame from racking or swaying sideways in wind.
Any upright that contacts the deck should sit on a padded base, not a bare pipe or board end. A bare end can crack a non-skid surface or leave a mark that shows up at spring commissioning. If uprights press against upholstery or coaming pads, add a layer of foam at the contact point.
Protect Chafe Points
Even with a well-built frame, the film moves subtly in wind. At any point where the plastic touches a hard or sharp surface, friction slowly thins the material. Rails, cleats, windshield edges, and antenna mounts are the highest-risk areas. Wrap these points in foam or felt, then add a layer of chafe tape. The padding should be firm enough to stay in place but soft enough to prevent hard contact.
After the frame and padding are in place, walk around the boat with a rag or glove and run it along every potential contact point. If the rag catches on anything, the film will too. Fix snags now; once the film is shrunk, access becomes difficult.
 The film should drape evenly on both sides with enough overhang at the bow and stern for a secure hem.
Wrap, Seal, and Install Vents for a Weatherproof Fit
With the frame solid and the boat protected, the job shifts to controlling the film itself. A clean drape, straight hem, tight strap work, and properly placed vent openings are what make the difference between a cover that stays quiet and one that drums, tears, and traps moisture.
Drape and Center the Film
Unroll the shrink film and pull it over the ridge line so it falls evenly on both sides. The factory fold should run along the boat's centerline. This simple step ensures the material tracks straight as you tension it. Before anchoring anything, check that the film overhangs evenly at the bow and stern and that both sides reach well below the rub rail.
Create the Hem and Run Straps
Fold the bottom edge of the film into a straight hem around the perimeter and run a strap or rope through or over it. This creates a mechanical anchor that prevents the skirt from lifting in wind. Some professionals add a second belly band around the hull at the waterline or trailer frame for extra security. A single strap near the hem is often sufficient for boats under 20 feet, while larger boats or those in exposed storage yards benefit from two perimeter straps.
Burn foam or felt into the hem at stress points — particularly where straps cross rub rails or chines — to prevent the strap from cutting through the film over time.
Seal Seams and Overlaps
If you need to join two sheets of film, overlap the seam by at least 6 to 8 inches with the upper sheet facing down-slope so water sheds over the joint rather than under it. Tape the seam thoroughly with shrink-wrap tape on dry film, pressing firmly to eliminate bubbles and prevent peeling.
Any small puncture, tear, or thin spot should be patched immediately using a piece of film larger than the damaged area by several inches in every direction. Wind will turn a pinhole into a split surprisingly quickly.
Install Vents Before Shrinking
Ventilation should be installed in the film before or during the initial securing, not after the heat-shrinking is complete. Cutting into cold, relaxed film is safer and cleaner than cutting into tight, heated film.
A small boat under 20 feet with an open cockpit needs at least two vents, placed high on the cover and on opposite sides to encourage crossflow. Larger boats, closed cabins, or storage in humid climates benefit from four or more. Think of ventilation as managing interior humidity, not just preventing visible condensation: the goal is to keep interior surfaces dry enough to prevent mildew growth and electrical corrosion.
Heat-Shrink the Film in the Right Sequence
Heat shrinking is where the cover transforms from a loose sheet into a rigid, weather-resistant shell. The process requires patience and a systematic sequence. Rushing is the most common way to burn through the film or leave uneven thin spots that fail later.
Work from the Top Down
Start shrinking at the ridge and upper slopes first. This locks the material into the correct shape and reduces wrinkles before the lower sections become tight. Hold the heat gun far enough from the film — typically 8 to 12 inches — and keep it moving in smooth, overlapping passes. The film should turn glossy and pull tight, never brown or smoke. If you see those signs, you are too close or moving too slowly.
Alternating Passes for Even Tension
After the top is snug, work the mid-panels by shrinking one side, then the other, alternating port and starboard. This keeps tension balanced and prevents the film from pulling asymmetrically. Wrinkles can usually be worked out by re-warming the area and gently smoothing the film with a gloved hand while the surface is still hot.
Finish the Skirt and Stress Points Last
The bottom skirt should be tightened only enough to remove flutter. Over-shrinking the hem can pull the strap out of position and create a scalloped edge that funnels water toward the boat. After the main panels are shrunk, go back and address stress points — bow and stern corners, strap junctions, and any area where the frame contacts the film. Apply tape or patches over any spot that shows thinning or excess tension.
A useful check: after shrinking, walk the full perimeter and look for "oil-canning" — large panels that flex inward when pushed. These indicate insufficient tension or a missing belly band. The fix is usually to add or tighten a strap and re-heat the section in alternating passes. Whether you are learning to operate your boat, maintaining its finish, or winterizing it, attention to detail at this stage carries into the next season.
Mid-Winter Maintenance and Inspection
Shrink wrap is not a set-it-and-forget-it solution. Heavy snow loads, wind storms, and freeze-thaw cycles all put stress on the cover. A quick visual inspection after the first major storm is worth the effort.
Check After the First Big Storm
Within a few days of a heavy snow, walk around the boat and check for sagging panels, torn seams, lifted vents, or straps that have loosened. Clear heavy snow off with a soft broom or brush rather than a metal shovel, which can puncture the film. If you spot a tear, patch it promptly before wind enlarges the hole.
Watch for Lifting Edges and Condensation
Cold temperatures can cause tape adhesives to peel at the edges. Press any lifted tape back down and add a patch if needed. Look inside through a vent or access door periodically. If you see standing water in the bilge or mildew forming on interior surfaces, ventilation is insufficient. Adding another vent mid-winter is more difficult but still possible, and it is better than allowing the interior environment to remain damp.
Keep the Wrap Documented for Next Year
Record the film size, vent locations, strap count, and any problem areas while the cover is still on the boat. Next fall, this information makes the job faster and avoids repeating mistakes. A simple one-page note stored with your marine gear is enough.
Spring Removal and Disposal
Removing shrink wrap cleanly is almost as important as installing it. Cut the film carefully with a blade that does not reach toward the gelcoat, and avoid dragging the plastic across the hull where trapped dirt can scratch. Some marinas and municipalities recycle shrink-wrap film through dedicated collection programs. Check with your local marine supply store, marina, or municipal waste authority for recycling options rather than sending the film to a landfill.
If you are transitioning to spring work, reviving the carpet and cleaning the hull are natural next steps before the boat goes back on the water. A boat that comes out of winter storage clean stays cleaner all season — and a good value pontoon or conventional hull that is properly maintained holds its resale value longer.
Cost Considerations and Whether to Hire Out
DIY shrink wrapping a boat typically costs between $200 and $600 in materials for a boat under 25 feet, depending on film thickness, vent count, and whether you need to buy a heat gun. Hiring a professional marina service generally runs higher — often $12 to $18 per foot — but includes labor, disposal, and the service's experience with local weather conditions.
The decision comes down to time, storage access, and your comfort level with a propane heat source near fiberglass and fuel systems. If you have the time and a calm weather window, the DIY route is repeatable and saves money over multiple seasons. If you store in a marina that offers wrapping as a package with haul-out and winterizing, the convenience can be worth the premium. Either way, understanding the process helps you evaluate the quality of the work.
Frequently Asked Questions
How tight should shrink wrap be?
The film should be drum-tight with no visible wrinkles, sagging panels, or areas that flutter in wind. However, over-shrinking thins the material and can cause tears. The goal is uniform tension that produces a glossy, smooth surface without browning or smoking.
How many vents does a shrink-wrapped boat need?
At minimum, two vents placed high on opposite sides for crossflow. Boats with enclosed cabins, large cockpits, or stored in humid climates typically need four or more. Vents should sit where air can move through open interior spaces rather than being blocked by bulkheads.
Can you shrink wrap a wet boat?
It is strongly discouraged. Trapped moisture leads to mildew, corrosion, and unpleasant odors. The boat should be washed, rinsed, and allowed to dry thoroughly before wrapping, with special attention to the bilge, lockers, and upholstery.
How long does boat shrink wrap last?
One winter season is the practical lifespan for shrink wrap. The film's UV inhibitors degrade with exposure, and by spring the material has lost flexibility. Attempting to reuse shrink wrap the following year usually ends with brittle film that tears during removal or fails in storage.
Can shrink wrap be recycled?
Many marinas and communities offer shrink-wrap recycling programs that accept clean, dry film free of tape and straps. Check with your local marina, marine supply store, or waste authority. Removing tape and bundled straps makes the film more likely to be accepted.
What happens if snow accumulates on shrink wrap?
A properly framed and shrunk cover with a steep enough pitch will shed most snow on its own. Heavy, wet snow should be removed with a soft broom before the weight stretches the film. A collapsed ridge or sagging panel after a storm indicates insufficient frame support.
Conclusion
Shrink wrapping a boat for winter storage is a process that rewards preparation and patience. The sequence matters: clean and dry the boat, build a frame that sheds water, pad every chafe point, secure the film with proper hems and straps, install ventilation before shrinking, and apply controlled heat from top to bottom. Skipping steps — especially ventilation and frame support — is where most problems begin.
The next step is to assemble your materials list and watch for a calm, dry weather window. One uninterrupted wrap session, done in the right order with the right tools, gives you a boat that stays dry, clean, and protected through the worst of winter — and a spring commissioning that starts with less work and fewer surprises.




One Comment