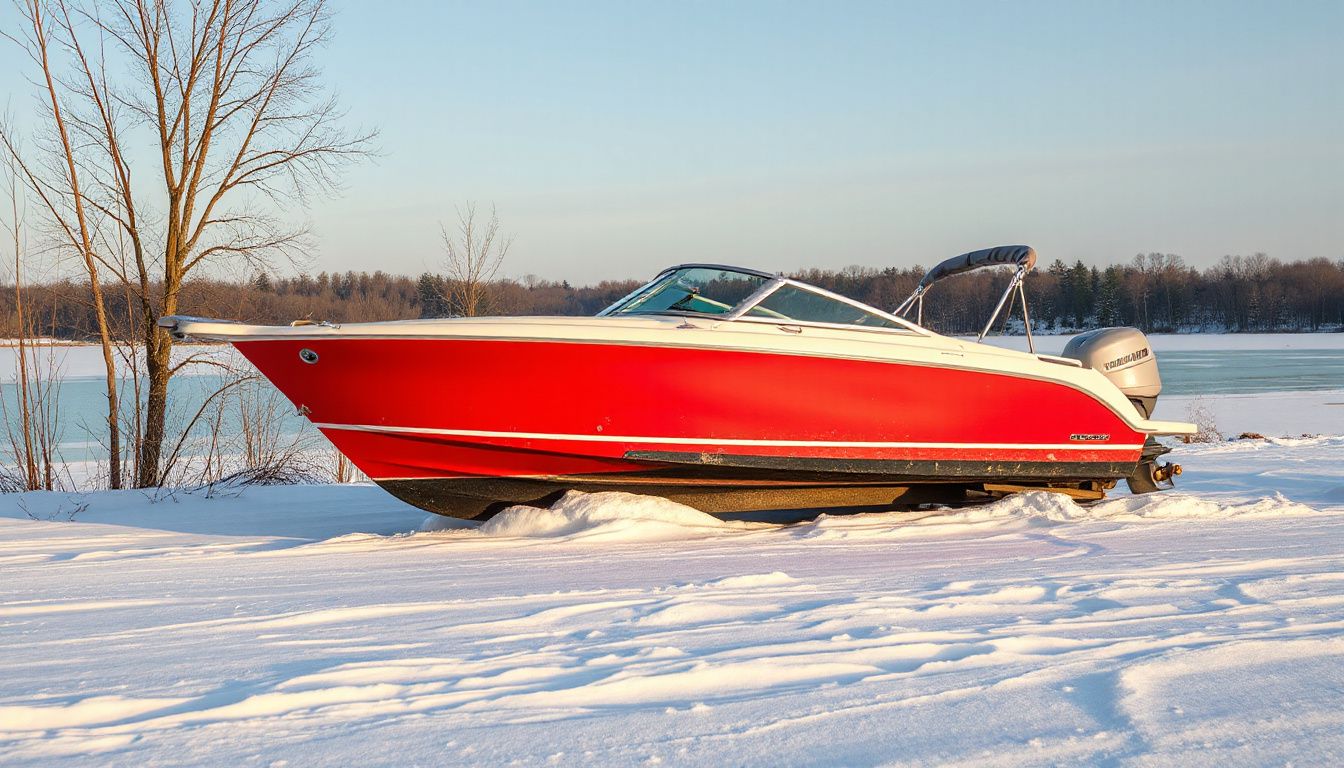
How Do You Start a Boat After Winterizing: Checklist
The first warm weekend of spring hits, the ramp is open, and you’re ready to launch. Then comes the moment of truth: you turn the key—and nothing happens, or worse, the engine coughs and dies at the dock. That moment separates prepared owners from those stranded in the parking lane while the line backs up behind them.
Starting a boat after winter storage isn’t just about cranking the engine. It’s a deliberate recommissioning process: reconnecting systems, verifying critical fluids and cooling flow, and protecting the engine from damage during those first vulnerable seconds. In practice, most failed spring launches trace back to skipped checks—not mysterious mechanical failures.
This step-by-step checklist walks you through exactly how to start a boat after winterizing, from the moment you uncover the hull to the first confident shakedown run. Work through it methodically, and you’ll catch the small issues before they become expensive ones.
Safety First: Ventilation, Fire Prevention, and the Right Workspace
Gasoline fumes are heavier than air and settle low in the bilge. After months of storage with closed hatches, even a tiny fuel leak can create an explosive atmosphere. That’s why ventilation and fire prevention come before any electrical switch gets flipped.
Ventilation protocol:
- Open all engine hatches and compartments fully before doing anything else.
- Run the bilge blower for at least four minutes on gas inboards and sterndrives—this is not optional. The U.S. Coast Guard emphasizes proper ventilation as a core fire-prevention practice in its boating safety guidance.
- Sniff at the lowest point of the bilge. If you detect any fuel odor, stop immediately. Do not turn on lights, chargers, or electronics until you locate and address the source.
Fire prevention essentials:
- Keep a marine-rated fire extinguisher within arm’s reach, not buried in a locker.
- Disconnect shore power before handling fuel lines or inspecting electrical connections.
- Inspect wiring for chafing, especially where harnesses pass through bulkheads or near engine mounts. Vibration over time wears insulation away.
- Tighten loose battery terminals. A loose terminal arcs, and an arc near fuel vapor is disastrous.
Prep kit to set out before you begin:
| Category | Items |
|---|---|
| Visibility | Flashlight or headlamp, small inspection mirror |
| Hand protection | Nitrile gloves, clean rags |
| Spares | Fuses, zip ties, hose clamps, absorbent pads |
| Documentation | Last season’s winterization notes, owner’s manual |
A common mistake is reaching for the key with a “just see if it turns over” mindset. That single crank can become a dry impeller failure, a fuel fire, or a dead battery—all completely avoidable with five minutes of preparation.
Full-Boat Visual and Systems Inspection
Before you dig into the engine, walk the entire boat. Winter is harsh: freezing cycles crack fittings, rodents nest in wiring, and moisture finds every unprotected connection. A methodical walkaround surfaces problems while they’re still cheap to fix.
Hull and running gear:
- Inspect the hull for new blisters, cracks, or stress marks, particularly around chines and strakes.
- Check the propeller for dings, fishing line wrapped at the hub, and secure cotter pins.
- Verify the drain plug is in and tight. Thousands of boats sink at the ramp every spring because this single step was skipped.
- Inspect sacrificial anodes; if they’re more than half depleted, replace them.
Through-hulls and fittings:
- Confirm all seacocks move freely and are in the correct position—open for engine and generator cooling intakes, closed for deck drains if stored unattended.
- Check hose clamps for rust or loosening. Double-clamp below-waterline fittings per ABYC standards.
Interior and electrical:
- Look for signs of moisture intrusion, mildew, or nesting material.
- Test all safety equipment: navigation lights, horn, bilge pump float switch, and VHF radio.
- If the boat has a cabin, air it out thoroughly before running any engine that draws intake air from enclosed spaces.
If you find hull damage or significant electrical corrosion, address it before launch. Getting the engine running won’t matter if the boat takes on water at the ramp. For deeper hull and cosmetic work, review guidance on restoring aluminum hulls with the right marine coating before you polish out minor scratches.
De-Winterize the Engine: Fluids, Belts, Hoses, and Cooling System
Now you shift the boat from “stored” to “ready.” De-winterizing is largely reversing the protection you applied in the fall—then verifying nothing dried out, cracked, or leaked in the months between.
Fluid verification:
- Engine oil: Check level and condition. Oil that looks milky or overfull suggests water intrusion; don’t crank until you diagnose it.
- Gear lube: Inspect on outdrives and lower units. Milky gear oil means water has entered through a seal—a problem that worsens quickly under load.
- Coolant: On closed-cooling engines, verify the level in the heat exchanger or expansion tank. Top off with the correct antifreeze mix if needed.
- Power steering and trim fluid: Top off if equipped, and note any fluid that appears aerated or dark.
Belts and hoses:
 Checking fluid level and condition is the first step before touching the key.
- Squeeze-test every hose. Soft, spongy, or cracked hoses fail when the engine heats up and pressure builds.
- Check raw-water hoses for internal collapse, especially older wire-reinforced hoses that delaminate from the inside.
- Press on belts with moderate thumb pressure—roughly half an inch of deflection is typical. Look for glazing, cracking, or shiny sidewalls that indicate slippage.
Cooling system specifics:
- If you winterized the raw-water side with antifreeze, confirm the seacock is open and the strainer is clean before starting.
- A dry raw-water pump impeller can destroy itself in under a minute. Know the impeller’s age: if it’s more than two seasons old, replace it proactively.
- On closed cooling systems, confirm the heat exchanger end caps are sealed and the sacrificial zinc pencil is intact.
Practical example: After launching, you start at idle and see no water at the exhaust. Shut down within 10 seconds, open the strainer, remove a leaf plug, restart, and confirm a steady flow. That ten-second discipline is often the difference between a five-minute fix and a $600 impeller replacement plus a tow.
Fuel System: Inspect, Prime, and Plan for Stale Gas
Fuel problems cause more post-storage starting failures than any other single issue. Today’s ethanol-blended gasoline attracts moisture, degrades over months, and leaves varnish deposits in carburetors and injectors. Treat the whole fuel path as suspect until proven otherwise.
Inspection sequence:
- Trace every fuel line from tank to engine. Look for brittleness, soft spots, cracks, and loose clamps.
- Check the primer bulb—if the rubber is stiff or cracked, replace it before you’re stranded.
- Inspect the water-separating fuel filter. If it’s translucent or you can drain a sample, drain a little fuel into a clear container. Water settles at the bottom and appears as a distinct layer or cloudiness.
- Verify the fuel vent is clear. Spiders and insects love to nest in vent fittings over winter, and a blocked vent starves the engine.
Priming procedure:
- Squeeze the primer bulb until it feels firm. If it never firms up, you have an air leak somewhere—don’t keep squeezing and hope.
- On engines with electric fuel pumps, cycle the key to “on” (not “start”) and listen for the pump’s brief priming whine. Repeat two or three times.
Fuel freshness rule: If fuel sat untreated for more than three to four months, it’s suspect. Small engines may run on old fuel with additives, but the safest move is to pump out stale fuel and refill with fresh, preferably ethanol-free gas. At minimum, top off with fresh fuel to dilute what’s in the tank.
Common failure point: A primer bulb that never gets firm often means a loose hose clamp at the water-separating filter or a sticking anti-siphon valve at the tank fitting. Fixing the air leak now prevents a lean start and stalling later.
Battery and Electrical: Reconnect, Clean, and Verify Voltage
A weak battery masquerades as a fuel problem. You’ll crank the engine, it won’t fire, and you’ll chase phantom carburetor issues when the real culprit is a battery that’s lost its charge over winter.
Reconnection order:
- Reconnect the positive cable first, then the negative. Reverse this order when disconnecting.
- Clean terminals with a wire brush or terminal cleaner before reconnecting. Corrosion builds resistance invisibly.
- Check the battery hold-down. A loose battery can tip or slide in rough water, damaging cables and surrounding components.
- If the battery is serviceable (has removable caps), check electrolyte levels. Top off with distilled water only.
Voltage verification:
- A healthy, fully charged lead-acid battery reads 12.6–12.8 volts at rest, measured with a multimeter at the posts.
- Anything below 12.4 volts is significantly discharged. Below 12.0, the battery may start a small outboard but will struggle with a V6 or V8 stern drive.
- Load-test any battery that reads below 12.4 volts. Auto parts stores and marine shops often provide this service free.
Protection after reconnection:
- Apply a light coat of dielectric grease to terminals and cable ends.
- Spray exposed electrical connections with a corrosion inhibitor suitable for marine environments.
- Confirm the charging system voltage after start: 13.8–14.4 volts at idle indicates the alternator is working.
If you’re using a battery charger or maintainer, disconnect it before cranking. Inrush current from the starter can damage some chargers or trigger error codes.
Cooling System Wake-Up: Seacocks, Strainers, and Impeller
The raw-water cooling system is the most fragile component during the first start. A dry impeller shreds its rubber vanes in seconds, and those fragments lodge in downstream passages, restricting flow and causing overheat conditions all season.
Pre-start cooling checklist:
- Open the raw-water seacock fully. On many boats this is a lever or ball valve near the engine on the intake through-hull.
- Remove and clean the raw-water strainer. Look for leaves, barnacles, zebra mussels, and dried antifreeze gel.
- If using a garden hose with flushing muffs or a flush port, turn the water on before the engine. Water pressure alone should force some water through the system and out the exhaust or telltale.
- Confirm the impeller’s age. Most manufacturers recommend replacement every two seasons regardless of appearance. A vane that’s taken a “set” from sitting all winter may pump poorly even if it looks intact.
During and after start:
- Verify water discharge at the telltale (outboard) or exhaust overflow (inboard/sterndrive) within 30–60 seconds of starting.
- If no water appears, shut down immediately and diagnose: closed seacock, clogged strainer, collapsed hose, or failed impeller.
- On engines with a raw-water flow alarm, know what it sounds like and respect it.
If you overheated or suspect impeller damage from a previous season, replace the impeller now. It’s a $30–$60 part and an hour of work—cheap insurance against a season-ending overheat. While you’re in a maintenance mindset, freshening up the boat’s carpet while it’s still out of the water is easier than scrubbing it afloat.
Pre-Start Checks: Oil Pressure, Kill Switch, and Leak Detection
The first 60 seconds after start-up reveal almost everything about engine health. You’re watching for three things: lubrication, cooling, and containment.
Before you touch the key:
- Re-verify the engine oil level is within the safe range on the dipstick.
- Confirm the kill switch lanyard is properly attached. This single oversight causes more no-start confusion than any other issue.
- Ensure the shifter is firmly in neutral. Most controls have a neutral safety switch that prevents cranking in gear—if it’s slightly out of position, the starter won’t engage.
- Verify the bilge is dry enough that any new drip is immediately visible. Wipe the area under the engine with a clean rag if needed.
What to monitor after start:
- Oil pressure: The gauge or warning light should respond within 3–5 seconds. No oil pressure? Shut down immediately.
- Water flow: Confirm the telltale or exhaust discharge is steady and strong. A weak stream at idle that improves with RPM may indicate a worn impeller.
- Leaks: Scan fuel fittings, filter seals, raw-water connections, and the transom assembly for drips. Fresh fuel smells or water seeping from a bellows are stop-and-investigate signals.
- Unusual sounds: Belt squeal, knocking, or a rattle from the flywheel area each have specific causes—none fix themselves.
A note on fogging oil: If you fogged the cylinders during winterization, expect a smoky start. That’s normal and should clear within a minute. Persistent heavy smoke after warm-up suggests a different problem.
Starting the Boat: Step-by-Step Procedures by Engine Type
The exact starting sequence depends on your engine type, but the goal is universal: a stable idle, clean water flow, and normal gauge readings within two to three minutes.
Outboard Engines
- Confirm the lanyard is attached and the shifter is in neutral.
- Connect the fuel line and squeeze the primer bulb until firm.
- If equipped, open the vent on a portable tank.
- Turn the key to “on” and pause two seconds for the fuel system to pressurize.
- Crank in 5–10 second bursts, allowing 30 seconds rest between attempts.
- Cold engines may need fast-idle or choke per the manual; don’t rev a cold outboard hard.
- When it starts, confirm the telltale stream and let it idle for 2–3 minutes before shifting.
Inboard and Sterndrive (I/O) Engines
- Run the bilge blower for at least four minutes before cranking.
- Confirm the shifter is neutral and the lanyard is set.
- Advance the throttle slightly to a fast-idle position if equipped; this helps cold engines catch.
- Turn the key to “on,” pause two seconds, then crank in 5–10 second bursts with rest periods.
- On carbureted engines, a brief pump of the throttle may be needed, but follow the owner’s manual.
- Once running, verify exhaust water flow and hold idle for several minutes before load.
- Check oil pressure and voltage within the first 30 seconds.
Diesel Inboard Engines
- Turn the key to “on” and wait for the glow plug indicator to extinguish.
- Do not pump or advance the throttle—diesels start at idle.
- Crank in 10-second bursts with rest between attempts.
- Once running, let the engine idle and build temperature gradually.
- Watch oil pressure and coolant temperature; diesel overheat damage is expensive and fast.
 Following the engine-specific starting sequence protects internal components during the first seconds of operation.
Post-Start Verification and Sea Trial Checklist
A clean start at the dock is only half the answer. The real test comes under load, where marginal fuel delivery, weak charging, and cooling restrictions reveal themselves.
Dock-side verification (first 5–10 minutes):
- Hold idle until the engine reaches normal operating temperature. Watch the temperature gauge climb and then stabilize.
- Check charging voltage: 13.8–14.4 volts indicates a healthy alternator.
- Shift into forward and reverse briefly while tied securely to the dock. Feel for clunks, grinding, or hesitation.
- Listen for new noises as the engine warms: lifter tick, exhaust leaks, belt chirp.
Sea trial protocol:
- Start with a no-wake run of 5–10 minutes near the ramp.
- Progress incrementally: 2,000 RPM for a few minutes, then 3,000 RPM, then a brief cruise at your normal operating range.
- Watch all gauges at every step. Note any surging, vibration, or temperature creep.
- Test steering in both directions and at varying speeds.
- Make a few gentle turns to check for cavitation or prop ventilation.
- Return to idle and confirm the engine settles down smoothly.
Post-run dock check:
- Recheck fluid levels while the engine is warm but off.
- Look for fresh drips under the engine, around the transom, and at fuel fittings.
- Feel the hub of the prop for excessive heat or roughness—this can indicate a bearing issue.
- Inspect the bilge for any water that accumulated during the run.
Use your phone to record gauge readings and any observations. This creates a baseline for future troubleshooting. If anything feels off during the shakedown, return to the dock and address it before planning longer trips. If you’re new to operating larger pontoons or runabouts, review the fundamentals of handling a pontoon boat safely before your first family outing.
Troubleshooting No-Start and Rough-Run After Storage
When the engine won’t cooperate, troubleshoot in a tight loop: start with the simplest causes and change only one variable at a time. Randomly replacing parts wastes money and complicates diagnosis.
Common no-start scenarios:
| Symptom | Likely Causes | Action |
|---|---|---|
| No click, no crank | Dead battery, neutral safety switch not engaged, lanyard not attached, loose battery cable | Verify battery voltage, confirm neutral and lanyard, tighten terminals |
| Click or slow crank | Weak battery, corroded grounds, loose starter cable, failing solenoid | Load-test battery, clean ground connections, check starter wiring |
| Cranks but won’t fire | Kill switch activated, no spark, stale fuel, empty carb bowl, air leak at primer bulb | Check kill switch first, then spark, then prime the fuel system |
| Starts, then dies | Blocked fuel vent, water in fuel, sticking anti-siphon valve, low idle setting | Test with fuel cap removed, drain fuel sample, clean or replace components |
| Rough idle after start | Contaminated fuel, partially clogged jet or injector, vacuum leak | Check fuel quality, run injector cleaner, inspect vacuum hoses |
Diagnostic discipline:
- Check the kill switch and neutral safety before anything else—they’re the most common and cheapest fixes.
- If the engine cranks strong but won’t fire, verify spark by removing a plug and grounding it while cranking (with proper safety).
- If spark exists, move to fuel: prime the system, check the fuel filter, and confirm fresh gas reaches the carburetor or injector rail.
- Water in fuel often causes surging or stalling under load—the engine idles fine but stumbles when you throttle up.
When to stop and seek help: If you hear knocking, grinding, or metal-on-metal sounds, shut down immediately. Continuing to crank or run a damaged engine turns a minor repair into a rebuild.
Ongoing Care: Maintenance Log, Impeller Intervals, and Seasonal Routines
The boat that fails you in July often shows warning signs in April. A simple maintenance log is your most underrated tool for catching problems early.
What to record:
- Date, engine hours, and what you did at each service interval.
- Gauge readings at idle and cruise—these create a baseline.
- Any new sounds, smells, or leaks, even if you decide they’re “probably fine.”
- Parts replaced, with brand and part number for future reordering.
Seasonal maintenance anchors:
- Impeller: Every two seasons, or annually if you boat in sandy or weedy water.
- Fuel filters: Replace annually or at the first sign of water.
- Gear lube: Check every 50 hours; change annually or per manufacturer.
- Battery: Load-test every spring; replace proactively at the 4–5 year mark.
- Anodes: Inspect seasonally; replace at 50% depletion.
Storage-to-launch mindset shift: Winterization protects; recommissioning verifies. When the two work together as a system, your first start becomes routine rather than stressful.
For owners with older boats in rough shape, sometimes the honest answer is that a hull isn’t worth the repair cost. If your spring inspection reveals more rot than structure, explore your options for disposing of an aging boat responsibly before investing in an engine that may outlast the hull.
Final Thoughts
Starting a boat after winterizing is a process, not a single turn of the key. The owners who get on the water first in the spring aren’t the ones who rush—they’re the ones who work through a repeatable checklist, respect the engine’s first seconds, and trust their own documentation.
Your confidence comes from knowing what “normal” looks, sounds, and smells like for your specific engine. That awareness is what separates a minor adjustment at the dock from a tow back to the ramp.
Next step: Print or screenshot this checklist, set aside one focused hour for the first start, and plan your first outing as a short, low-stress shakedown run close to shore. The water will still be there when you’re ready—and you’ll be ready sooner than the owners who skipped the basics.
Frequently Asked Questions
How long should I let the bilge blower run before starting?
Run the bilge blower for at least four minutes on gasoline inboard and sterndrive engines. This clears accumulated fumes from the engine compartment. If you smell fuel after four minutes, do not start the engine—locate the leak first. Outboards don’t require a blower since the powerhead is outside the hull.
What if there’s no water coming out of the telltale or exhaust?
Shut down immediately. The most common causes are a closed seacock, a clogged raw-water strainer, a collapsed intake hose, or a failed impeller. A dry impeller can destroy itself in under a minute, so do not run the engine without water flow, even briefly.
Can I use last season’s fuel that was treated with stabilizer?
Fuel that was treated correctly and stored for less than three to four months may still be usable, especially if topped off with fresh gas. If the fuel sat longer, or if you’re unsure whether stabilizer was added, pump it out and replace it. Stale fuel causes lean conditions, clogged jets, and expensive injection system repairs.
Why does my engine crank but not fire after winter?
Check the kill switch lanyard first—it’s the most common cause. Then verify the neutral safety switch, confirm spark at the plugs, and ensure fuel is reaching the carburetor or injectors. Stale fuel, a clogged water-separating filter, or an air leak at the primer bulb are also frequent culprits.
How often should I replace the raw-water impeller?
Every two seasons is the general recommendation, regardless of appearance. In sandy, weedy, or shallow-water conditions, replace it annually. An impeller that sat all winter can take a “set” with bent vanes that pump poorly, so if you’re unsure of its age, replace it before the first start.
Do I need to winterize again if I start the boat early and it’s still getting cold?
Yes. If freezing temperatures are still possible and you don’t plan to use the boat regularly, re-winterize the cooling system and prevent freeze damage. A single night below freezing can crack a raw-water-cooled engine block or manifold, causing catastrophic and expensive damage.