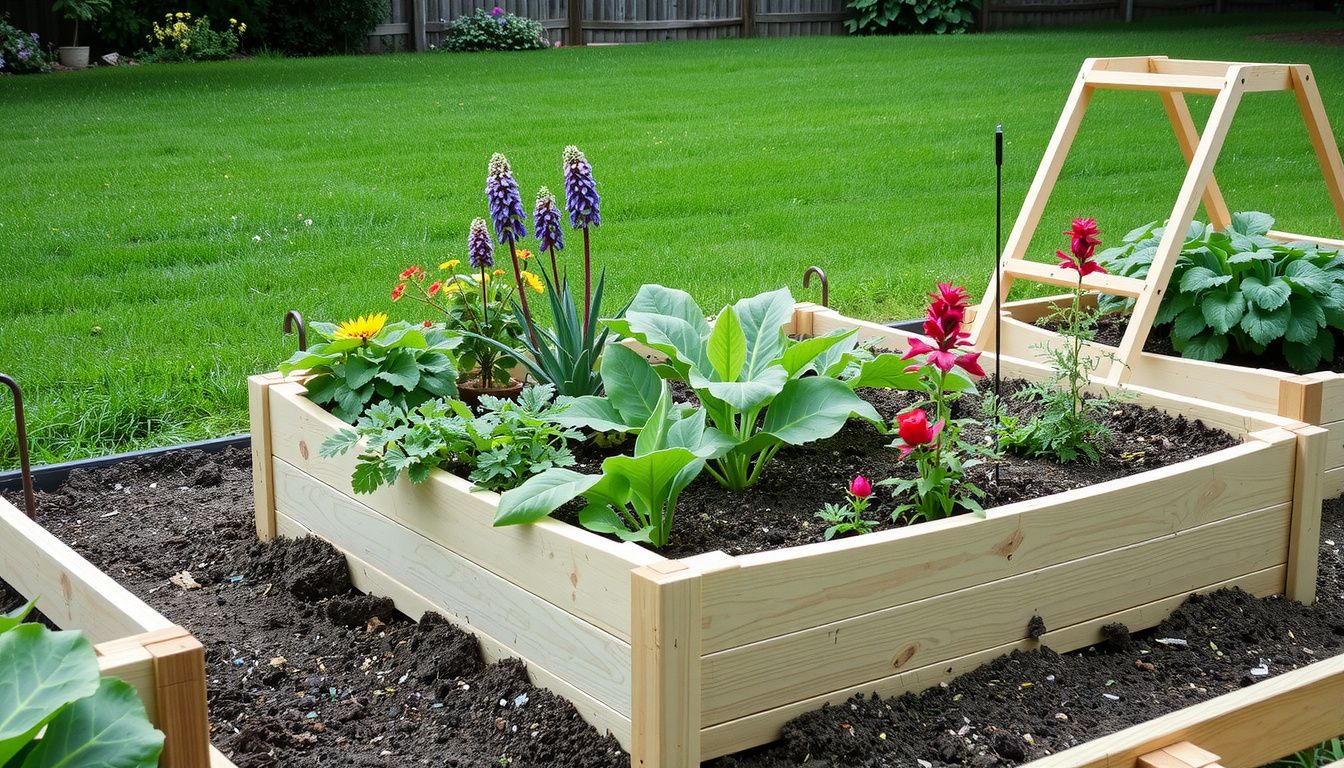
How to Fill a Raised Garden Bed Cheap for Rich Soil
Filling a raised garden bed shouldn’t cost more than the harvest it produces, yet a single 4×8-foot bed can easily swallow 20–30 cubic feet of material. If you’re buying premium bagged mixes at retail prices, that’s often $80–$200 per bed before a single seed goes in the ground. That sticker shock stalls more gardens than poor weather ever does.
The good news: rich, productive soil doesn’t have to come from a bag with a fancy label. The trick is thinking like an ecosystem builder, not a consumer. You’re not buying “dirt” — you’re assembling layers of organic matter, minerals, and microbiology that will feed your plants for years while shrinking in volume as they decompose.
This guide walks through the cheapest reliable methods, step-by-step layering techniques, budget soil recipes, sourcing strategies, and maintenance habits that keep your beds full and fertile without draining your wallet. Whether you have a single shallow planter or a dozen deep beds, you’ll finish with a concrete plan you can execute this week.
Why Cheap Fill Often Fails (And What Actually Works)
Most “cheap fill” disasters come from one of three mistakes: filling the entire bed with poor-quality material, using fresh organic matter that steals nitrogen from plants, or sourcing “free soil” that’s contaminated with weed seeds, herbicides, or construction debris.
A common mistake is treating all fill as equal. It’s not. The bottom half of a deep bed should be low-cost structural material that decomposes slowly. The top 6–8 inches — the root zone where plants actually feed — needs to be genuinely rich, well-draining, and biologically active. When you separate these roles, you stop spending premium money on filler that never touches a root.
In practice, the most reliable budget approach is a layered system. It replaces expensive soil volume with free or low-cost organic bulk below, then caps everything with a high-quality planting layer. This mirrors how natural forest soil builds: coarse woody debris below, leaf litter and humus on top.
The goal isn’t “free dirt” that performs like garbage. It’s a structured fill that stays productive for multiple seasons with only modest top-ups.
Plan Your Fill: Bed Size, Depth, and Crop Needs
Before sourcing a single wheelbarrow of material, calculate exactly what you need. Overspending usually starts with overestimating volume or buying the wrong material for your bed depth.
Bed Depth Matters More Than You Think
The ideal fill strategy changes dramatically based on how deep your bed is:
Shallow beds (8–12 inches): Best for lettuce, spinach, radishes, compact herbs, and shallow-rooted annuals. Skip heavy wood layers here — there’s no room for them. You’ll need mostly finished soil and compost, which means a higher per-inch cost but less total volume.
Standard beds (12–18 inches): This is the sweet spot for most mixed vegetable gardens. You can layer 6–8 inches of rough organic matter in the bottom and still have 8–10 inches of quality soil on top.
Deep beds (18–24+ inches): Ideal for carrots, potatoes, tomatoes, and long-season fruiting crops with extensive root systems. These beds offer the biggest savings opportunity because the lower half can be almost entirely free material.
Calculate Your Volume Before Buying
A raised bed’s volume is simple geometry: length × width × height. A 4×8-foot bed that’s 18 inches deep holds 48 cubic feet of material. That’s nearly 2 cubic yards, or about 54 bags of typical 1-cubic-foot bagged soil.
If you only need 8 inches of quality planting mix on top, that’s roughly 21 cubic feet, or about 24 bags. The remaining 27 cubic feet can be free branches, leaves, and wood chips. You’ve just cut your paid soil needs by more than half.
Practical example: A 4x8x18-inch bed filled with 8 inches of free branches and leaves in the bottom, then 10 inches of a bulk compost/topsoil blend on top, typically costs less than one-third of filling the entire bed with bagged raised-bed mix. The top layer is still deep enough for tomatoes and peppers while the lower layer slowly feeds the soil food web as it breaks down.
Match Fill to Crop Rooting Depth
Different crops pull nutrients and water from different zones. Leafy greens feed shallowly and benefit from a rich top layer. Fruiting crops like tomatoes and squash send roots deep and benefit from a well-structured transition zone between the bulk layer and the planting layer. Root crops like carrots need uniform, stone-free soil to at least 10 inches — another reason the top layer deserves priority.
The Cheapest Reliable Method: Hugelkultur-Style Layering
Hugelkultur is an old German technique that buries logs and woody debris under soil to create self-fertilizing, moisture-retaining mounds. A “lite” version of this works brilliantly in raised beds, especially deeper ones, and it’s the workhorse method for filling raised beds on a tight budget.
The principle is simple: wood acts as a slow-release sponge. As logs and branches decompose over several years, they absorb water, feed beneficial fungi, and gradually release nutrients. You replace expensive soil volume with material you’d otherwise pay to haul away.
Step-by-Step Layering Process
Step 1: Prepare the base (optional but smart). If burrowing pests are a concern where you live, lay hardware cloth across the bottom of the bed before adding anything else. Over that, lay one or two layers of plain cardboard to smother grass and weeds beneath the bed. Avoid glossy or heavily printed cardboard.
Step 2: Add the bulk wood layer. Fill the bottom 30–50% of the bed with logs, thick branches, and chipped limbs. Pack them as tightly as reasonable to reduce settling later. Avoid black walnut (allelopathic — it inhibits many plants), cedar and redwood in large quantities (they break down very slowly), and any lumber that might be treated or painted.
Step 3: Fill gaps with smaller organic matter. Once the large wood is in place, add smaller sticks, twigs, leaves, shredded paper, or straw to fill the air pockets between logs. This prevents the soil above from dropping into voids and creates a more even surface for the next layer.
Step 4: Add a nitrogen buffer. Spread 1–2 inches of finished compost, aged manure, or grass clippings over the wood layer. This feeds the decomposition process and prevents the classic “nitrogen tie-up” problem where microbes consuming fresh wood temporarily rob nitrogen from your plants’ root zone.
Step 5: Cap with 6–10 inches of quality soil/compost mix. This is the only layer where you should spend real money. Use the budget soil recipes below to build a fertile, well-draining planting zone.
Step 6: Water deeply and expect settling. Water each layer as you build, then give the bed a final deep soaking. Over the first two weeks, the surface will drop 1–3 inches as materials settle. Keep a small reserve of top-up mix on hand.
The University of Minnesota Extension offers solid guidance on building healthy garden soil using organic matter, which aligns with the decomposition principles behind this layering method: understanding soil amendments and organic matter.
What Not to Put in the Bottom Layer
- Fresh grass clippings in thick mats — they become anaerobic, smell terrible, and create a water-repellent barrier
- Uncomposted kitchen scraps — they attract rodents, raccoons, and flies
- Diseased plant material — pathogens can persist in the bed for years
- Weeds with seed heads — you’ll be pulling volunteers forever
- Treated lumber scraps — preservatives can leach into your food crops
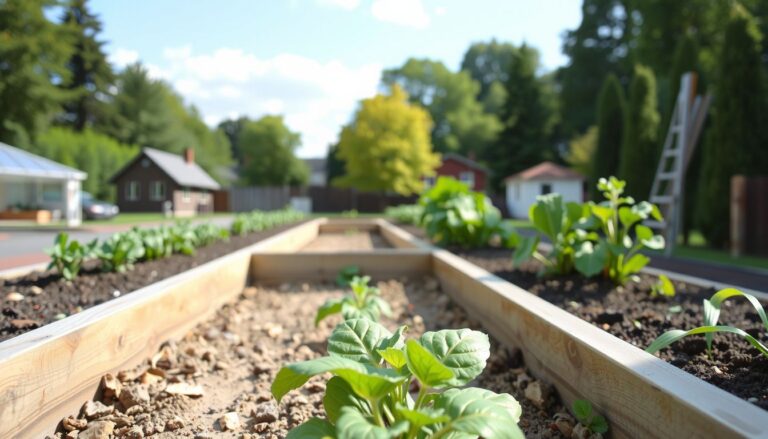
 Proper layering puts coarse woody material at the bottom and reserves rich, dark soil for the top planting zone.
Free and Low-Cost Fill Materials (And Where to Find Them)
The cheapest beds are built from smart sourcing, not bargain soil. Stack free bulk materials below with a clean, fertile top layer above, and your cash outlay shrinks dramatically.
Autumn Leaves
Fallen leaves are one of the most abundant free resources in suburban and urban areas. They break down into excellent leaf mold — a material with remarkable water-holding capacity and soil-building properties. Rake your own, ask neighbors, or collect clearly marked yard-waste bags from curbsides in the fall.
Pros: Truly free in season; excellent organic matter; improves moisture retention
Cons: Must be shredded or layered thinly to prevent matting; settles significantly; quality varies if trees were exposed to lawn herbicides
Tree Trimmer Wood Chips
Arborists constantly need to dispose of chipped branches and often welcome drop-off locations. Services like ChipDrop connect gardeners with local tree companies, though arrival timing and chip quality vary. These chips make excellent bottom-layer filler for deep beds.
Pros: High volume at zero or minimal cost; excellent slow-release organic matter; reduces paid soil needs dramatically
Cons: Nitrogen tie-up if mixed into the root zone; chips may be uneven in size; can include pine needles or material you don’t want
A tip from experience: keep a tarp or designated pile area ready before requesting chips. Tree crews appreciate an easy drop site, and you’ll avoid chips scattered across your driveway.
Municipal Compost and Leaf Mold
Many cities and counties offer compost, leaf mold, or well-rotted manure at deeply discounted rates compared to retail bagged products. Some give it away free to residents on designated days. This is usually well-made, hot-composted material that’s safe for vegetable beds.
Pros: Very low cost; nutrient-dense; supports local waste diversion
Cons: Availability varies by municipality; may contain small plastic fragments or debris; quality can shift season to season
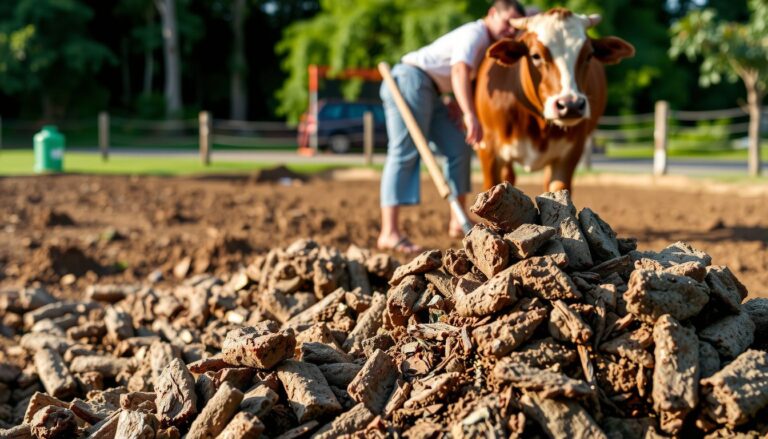
Aged Manure from Local Farms or Stables
Horse, cow, and chicken manure that has been composted for at least 6–12 months is excellent fertility for a top layer. Fresh manure will burn plants and should never go directly into a planting zone. Build a relationship with a local stable or small farm, and you may find an ongoing source for years. The breakdown timeline for poultry manure specifically is worth understanding if you source from chicken keepers: how long chicken waste needs to compost before it’s garden-safe.
Pros: Excellent nutrients when properly aged; often free if you haul it; builds long-term soil fertility
Cons: Must be fully composted; risk of herbicide carryover from treated hay or pasture; can be heavy to move
Cardboard and Newspaper
Plain brown cardboard makes an ideal weed-suppressing layer at the very bottom of a new bed. It breaks down slowly, blocks light from reaching grass below, and creates a welcoming environment for earthworms. Remove tape, staples, and labels first.
Pros: Free from retail shipments; effective weed barrier; earthworms love it
Cons: Breaks down faster than landscape fabric; some inks may contain questionable compounds (stick to plain brown)
What to Avoid: Contaminated, Weedy, and Pest-Prone Fill
Free doesn’t always mean good. Some “bargain” fill creates problems that cost far more to fix than buying quality material upfront would have.
Treated Wood and Lumber Scraps
Old railroad ties, painted wood, and pressure-treated lumber contain preservatives and heavy metals that can leach into soil and contaminate food crops. Never bury these in a vegetable bed. Untreated hardwood branches from pruning are excellent; construction debris is not.
Herbicide-Contaminated Soil or Compost
“Killer compost” is a real problem: grass clippings, hay, or manure from animals fed on herbicide-treated pasture can contain persistent chemicals that stunt or kill tomatoes, beans, and other sensitive crops for years. Ask your compost or manure source whether persistent herbicides were used on the material they’re giving you. If they don’t know, test with a small batch of beans before filling an entire bed.
Weed-Seeded Fill
Free “topsoil” from an unverified source often arrives loaded with weed seeds, roots, and rhizomes. A bed filled with this becomes a multi-year weeding project that no amount of money saved justifies.
Contaminated Urban Soil
Soil from demolition sites, old industrial areas, or near heavily trafficked roadways may contain lead, petroleum residues, or other contaminants. This is a particular concern if you’re growing leafy greens or root crops. When in doubt, have soil tested before using unknown urban fill: the USDA’s soil testing and amendment resources provide a starting point for understanding what to look for.
Pest-Prone Materials
Thick mats of fresh grass clippings create habitat for slugs and snails. Uncomposted food scraps attract rodents and raccoons. Hay (as opposed to straw) often carries seed heads. Use these materials sparingly or in thin layers where they won’t cause problems.
Budget Soil Mix Recipes for the Top Layer
The top 6–10 inches is where your plants live. This layer needs to balance water retention, drainage, fertility, and structure. Rather than buying premium “raised bed mix,” blend your own from bulk components.
The Universal Budget Base
Start with this core recipe, then adjust for specific crops:
Vegetable Mix (heavy feeders like tomatoes, peppers, squash):
- 40% finished compost
- 40% screened topsoil
- 20% aeration (perlite, pumice, coarse sand, or rice hulls)
This holds moisture well while still draining, and the 40% compost provides strong fertility for hungry crops.
Herb Mix (leaner, faster-draining for mediterranean herbs):
- 30% compost
- 40% screened topsoil
- 30% aeration
Rosemary, thyme, oregano, and sage prefer leaner soil that dries quickly between waterings. Too much compost here leads to soft growth and root rot.
Flower Mix (balanced for annuals and cut flowers):
- 35% compost
- 45% screened topsoil
- 20% aeration
Zinnias, marigolds, cosmos, and most cut flowers thrive in this middle-ground blend. It provides consistent growth without excessive nitrogen that produces foliage at the expense of blooms.
Why These Ratios Work
Compost feeds the soil biology and supplies slow-release nutrients. Topsoil provides mineral content, structure, and buffering capacity. Aeration prevents compaction and allows roots to penetrate easily. When any one component is out of balance, problems follow: too much compost holds excessive water in clay-heavy areas, while too much topsoil compacts into a dense mass that roots struggle through.
 Blending your own top layer from bulk compost, screened topsoil, and an aeration component costs far less than bagged mixes and performs just as well.
Vegetable waste breaks down into excellent compost over time — understanding how long kitchen and garden scraps take to decompose helps you plan when to start a bin so top-up compost is ready when you need it.
Full Soil Fill vs. Layering vs. Hybrid: Which Is Best?
Not every bed needs a layered approach. The right method depends on your depth, timeline, and budget.
Method 1: Full Soil Fill
The entire bed is filled with a uniform soil/compost blend.
Best for: Shallow beds under 12 inches, gardeners who want to plant immediately, or those who prefer simplicity over maximum savings.
Pros: Consistent moisture and nutrients throughout; no settling surprises; easiest to amend in future seasons
Cons: Highest upfront investment; heavy to move; overkill for deep beds
Method 2: Layered Fill (Hugelkultur-style)
As described above: wood and rough organics below, quality soil on top.
Best for: Deep beds (12 inches or more), gardeners with yard waste access, and anyone who wants the lowest cash outlay.
Pros: Biggest cost reduction; reuses free material; improves long-term moisture retention
Cons: Settles in year one; can tie up nitrogen if you skip the compost buffer; not suitable for shallow beds
Method 3: Hybrid Fill
A compromise that uses a modest layer of cheap bulk (wood chips, leaf mold, partially finished compost) below, with a thicker quality top zone (10–12 inches) than full hugelkultur.
Best for: Most home gardeners who want solid savings without aggressive settling or nitrogen management.
Pros: Cheaper than full soil; more stable than heavy wood layering; better early growth than pure hugelkultur
Cons: Still requires purchasing significant top-layer material; needs planning to get layer ratios right
Cost Comparison at a Glance
| Method | Relative Cost | Settling Risk | Time to Plant | Best Bed Depth |
|---|---|---|---|---|
| Full soil fill | Highest | Low | Immediate | 8–12 inches |
| Hybrid fill | Moderate | Low-moderate | 1–2 weeks | 12–18 inches |
| Layered fill | Lowest | Moderate | 2–3 weeks | 18–24+ inches |
If you’re also planning container gardens alongside raised beds, the best pot colors for keeping roots cool can influence where you place heat-sensitive herbs and leafy greens.
Maintaining the Bed: Settling, Top-Ups, and Long-Term Fertility
A layered bed isn’t “set and forget.” It settles as organic matter decomposes, and it needs periodic topping to maintain the planting zone depth.
Expect Settling in the First Season
A hugelkultur-style bed can drop 2–4 inches in its first year as wood compresses and begins decomposing. Hybrid beds settle less, typically 1–2 inches. Full soil beds barely move.
Plan for this: keep 2–3 inches of headroom below the bed rim when first filling. After the initial watering cycle (about two weeks of deep, regular irrigation), regrade the surface and add top-up material where needed. Then check monthly through the first season and after heavy rains.
Top Up Without Burying Plant Crowns
When adding material to an established bed, work around plant stems rather than burying them. A thin 1/2–1 inch layer of compost each spring is usually enough to refresh fertility without disturbing roots. More aggressive top-ups are easier between plantings when beds are temporarily empty.
Feed the Soil, Not Just the Plants
Each fall, add a 1–2 inch layer of shredded leaves or compost to the surface. Earthworms and soil organisms pull this organic matter down into the root zone over winter. This mimics natural forest soil cycles and means you’ll rarely need synthetic fertilizer.
If you have lawn clippings available, they make an excellent surface mulch in thin layers — understanding how long grass clippings take to break down helps you apply them at the right rate to avoid matting.
Wood Chips Need Time
If you used wood chips in the bottom of your bed, expect them to take 2–4 years to fully break down, depending on chip size and climate. During that time, keep adding nitrogen-rich amendments like compost or grass clippings to the top layer to offset the ongoing decomposition below. For more context on this timeline, see how long wood chips need to decompose in garden settings.
Buying Guide: What to Purchase vs. What to Scavenge
The smart budget rule: buy what controls outcomes, scavenge what doesn’t.
Buy: Finished Compost or Aged Manure
This feeds your plants and builds soil structure. Look for dark, crumbly material that smells earthy, not sour or ammonia-like. Buy from reputable landscape supply yards where you can see and smell the product before committing to bulk delivery.
Buy: Screened Topsoil (Not “Fill Dirt”)
Screened topsoil has been run through a mesh to remove rocks and debris. It’s the mineral backbone of your top layer. Avoid “fill dirt,” which is often subsoil with poor structure and low fertility. Ask your supplier whether the topsoil is blended or straight from excavation — blended tends to be more consistent.
Scavenge: Leaves, Wood Chips, Cardboard, and Twigs
These are your bulk fillers. They don’t need to be pristine because they’re not touching your plants’ root zones. Leaves can be bagged from curbs in fall. Wood chips can be sourced from local arborists. Cardboard comes free with deliveries.
Realistic Budget Example
A 4x8x18-inch bed needs roughly 48 cubic feet of material. Using the hybrid method:
- Bottom 6 inches (16 cubic feet): free leaves, twigs, and wood chips — $0
- Top 12 inches (32 cubic feet): bulk compost and topsoil blend — approximately $40–60 at municipal or landscape yard prices
- Total: around $40–60 versus $200+ for bagged mix
Common Mistakes That Sabotage Cheap Fill
Skipping the Nitrogen Buffer
When you bury fresh wood without adding a compost or manure layer above it, the microbes that decompose that wood pull nitrogen from the soil above. Your plants turn yellow and struggle despite rich-looking soil. Always add 1–2 inches of finished compost between wood and your planting layer.
Using “Free Topsoil” Without Screening
Not all free topsoil is created equal. Soil from unknown sources may contain weed seeds, clay clods, or construction debris. Screen it through 1/2-inch hardware cloth before using, and consider a simple germination test: put some in a pot, water it, and see what sprouts before committing it to your bed.
Filling Too High (or Too Low)
A bed filled flush to the rim looks neat but leaves no room for mulch and makes watering messy as soil spills over. Leave 1–3 inches of headroom, then use that space for a thick mulch layer once plants are established.
Skimping on the Top Layer
The temptation with cheap fill is to make the quality top layer as thin as possible. Resist it. Most vegetables need at least 6–8 inches of rich, well-draining soil for healthy root development. Below that, cost-cutting is fair game; above that, don’t sacrifice performance.
Ignoring Drainage Needs
Rich soil that never drains is a recipe for root rot, especially in humid climates or clay-heavy areas. If your native soil below the bed drains poorly, consider raising the bed height or adding extra aeration to your top-layer mix.
Frequently Asked Questions
How much does it cost to fill a 4×8 raised garden bed?
A 4×8 bed that’s 12 inches deep holds about 32 cubic feet of material. Using a hybrid method with free bulk fill in the bottom half, expect to spend roughly $30–50 on compost and screened topsoil for the top layer. Filling entirely with bagged mix typically runs $120–200.
Can I fill a raised garden bed with just compost?
Pure compost is too rich and too water-retentive for most plants. It compacts, drains poorly, and can burn roots with excess nutrients. Best practice is blending compost with topsoil and an aeration component — typically 30–40% compost by volume in the planting zone.
What can I put in the bottom of a raised garden bed to save money?
Untreated logs, branches, twigs, leaves, wood chips, and plain cardboard are all excellent free fillers for the bottom half of deep beds. Add a 1–2 inch layer of finished compost above them to prevent nitrogen tie-up, then cap with quality soil.
Will a hugelkultur bed work in a shallow raised bed?
Hugelkultur-style wood layering works best in beds at least 12 inches deep. In shallow beds under 10 inches, adding wood leaves too little room for roots. Stick with a uniform soil/compost blend for shallow planters.
How long does a layered raised bed last before you need to refill it?
The bulk wood layer decomposes over 3–7 years, causing gradual settling. Expect to top up the bed with 1–2 inches of compost annually to maintain depth and fertility. After several years, the wood layer becomes rich, moisture-retentive humus that continues feeding the soil for years longer.
Can I use grass clippings as raised bed fill?
Grass clippings work well as a thin nitrogen-rich layer between wood and soil, or as a surface mulch. Avoid thick mats of fresh clippings — they become anaerobic, smell terrible, and create a water-repellent barrier. Let them dry and apply in thin layers only.
Conclusion
Filling a raised garden bed cheaply isn’t about finding a magic discount soil. It’s about matching your fill strategy to your bed depth and crop needs, then spending money only where plants actually grow: the top 6–10 inches. Bulk wood, leaves, and chips handle the rest — often for free — while slowly breaking down into long-term fertility.
The biggest wins come from planning before you buy. Measure your bed volume, decide whether full soil, hybrid, or layered fill fits your depth and timeline, then source free bulk materials before purchasing your compost and topsoil. A well-planned layered bed can cut fill costs by 50–70% compared to bagged mixes while producing equally strong harvests.
Your next step: measure your bed, choose one approach from this guide, and start collecting materials this week. If you’re still in the planning phase, think through what you’ll actually grow — a bed full of leaf lettuce needs very different fill than one destined for tomatoes and peppers. Once the bed is filled, the same care principles apply to keeping your garden producing all season and beyond.