How to Grow Vegetable Seedlings: Step-by-Step Indoors
How to grow vegetable seedlings can feel tricky when a tray that looked perfect on Monday turns leggy or moldy by Friday. They’ve watched seeds sprout fast, then stall, topple, or vanish under a fuzzy film. The result is wasted time, wasted seed, and a growing suspicion that “starting indoors” is only for experts.
This guide shows a repeatable way to get sturdy starts: the right containers, a clean seed-starting mix, steady moisture, and strong light at the right distance. Look, seedlings don’t need complicated gear. They need consistent conditions and a few non-negotiables.
For example, a gardener starting tomatoes in a 72-cell tray can prevent stretch by placing a shop light 2–3 inches above the leaves and running it 14–16 hours daily, then brushing a hand over the tops once a day to mimic wind. Small changes like that produce thicker stems and faster recovery after transplanting.
They’ll learn how to grow vegetable seedlings with clear steps that cover:
- Germination basics: temperature, depth, and timing
- Seedling care: light, airflow, and watering rhythm
- Transplant readiness: hardening off and root health checks
Gather Supplies and Set Up a Clean Seed-Starting Area
Now the focus shifts to preventing problems before they start. A simple, clean setup keeps damping-off, algae, and fungus gnats from gaining traction.
They’ll need a few core items, and each one has a job. Skimping usually shows up later as weak roots or uneven moisture.
- Containers with drainage (cell packs, soil blocks, or small pots) plus a waterproof tray
- Seed-starting mix (fine-textured, low in large wood chunks) and a spray bottle
- Light source (LED shop light) and a small fan for airflow
- Labels, pencil, and a thermometer; heat mat if the room runs cool
Before sowing, they should sanitize reusable trays and tools. A quick scrub, then a 10-minute soak in a mild bleach solution (about 1:9 bleach to water), followed by a clear rinse, cuts disease risk.
Look at the space itself. They should place lights 2–3 inches above the tray, keep cords away from water, and set the fan to a gentle breeze. Common mistake: starting on a windowsill; it’s rarely bright enough and encourages leaning.
Practical example: A grower sets a $20 LED shop light on a shelf, adds a boot tray underneath, and runs a clip-on fan on low. Seedlings stay stocky, and the surface dries faster after watering.
Choose Seeds and Time Sowing for Strong Transplants
With the station ready, they can make seed choices that match the calendar. The goal is a transplant that’s vigorous, not oversized and stressed.
They should start by checking the seed packet and local frost dates. Most vegetables list “weeks before last frost” for indoor sowing, but that’s only half the story; growth rate changes with light, temperature, and pot size.
- Fast growers: lettuce, brassicas (broccoli, cabbage), basil
- Warm-season crops: tomatoes, peppers, eggplant need heat and time
- Usually direct-sown: beans, peas, corn, carrots (they dislike root disturbance)
They should prioritize fresh seed and varieties suited to their region. Older seed can sprout unevenly, creating a tray of mixed sizes that’s hard to water and light correctly.
Common mistake: sowing tomatoes too early. When they outgrow their cells, they stretch, tangle roots, and stall after planting out.
Practical example: If the last frost is May 10, they might sow tomatoes around late March (6–7 weeks prior) and peppers in early March (8–10 weeks). They’ll schedule a second sowing of lettuce every 2 weeks for steady harvests.
Mix and Moisten Seed-Starting Medium for Even Germination
Now the work gets hands-on: the starting mix has to hold air and water in balance. If it’s too dry, seeds stall. If it’s soggy, they rot or invite fungus gnats.

Use a sterile, fine-textured seed-starting medium, not garden soil. Before filling trays, pre-moisten it in a clean bucket so moisture is uniform from top to bottom. The goal is “damp sponge,” not “dripping towel.”
Follow a quick, repeatable method:
- Pour mix into a tub and break up clumps with gloved hands.
- Mist or sprinkle water, then fold the mix over itself several times.
- Squeeze a handful: it should hold shape, with only 1–2 drops released.
- Let it sit 5 minutes, then re-check; dry peat-based mixes hydrate slowly.
Pack the medium lightly into cells, then level it. Over-compaction reduces oxygen and slows root growth, while under-filling leads to uneven moisture and settling after watering.
Practical example: When they’re starting onions in 72-cell trays, many growers pre-moisten the mix, fill the tray, then bottom-water once to finish settling. That prevents the “crater” effect where dry pockets collapse around tiny seeds after the first heavy top-watering.
Pro tip: Use lukewarm water for faster hydration. Common mistake: soaking the tray until water pools on top; it creates anaerobic conditions and patchy germination.
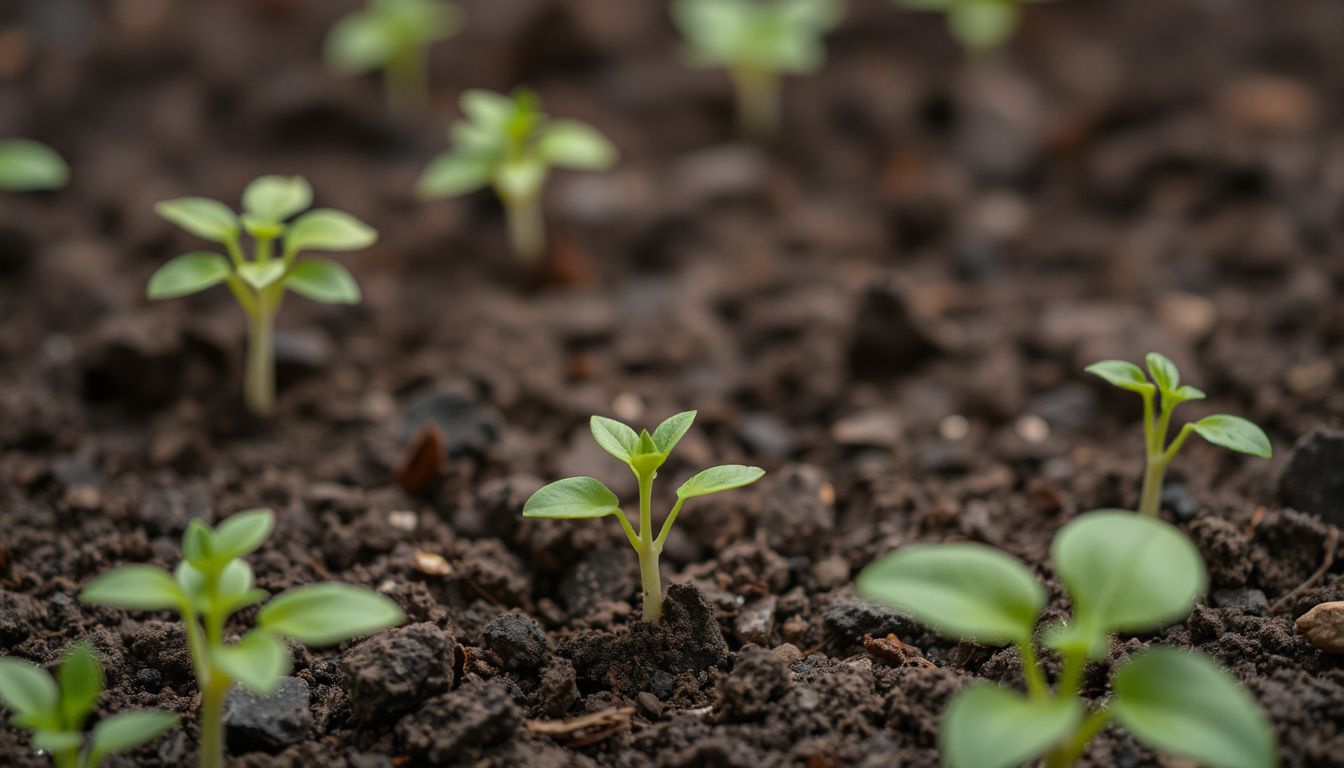
Sow Seeds at the Right Depth and Label Everything
With the tray filled, accuracy matters. Seed depth controls temperature exposure, oxygen access, and how much energy a sprout burns before reaching light. Getting it right produces more uniform seedlings and simpler watering.
Use the packet as the primary reference, then apply a dependable rule: sow at about 2–3× the seed’s diameter. Tiny seeds often need light, so they’re pressed onto the surface and barely covered with fine mix or vermiculite.
Handle sowing like a checklist:
- Make shallow furrows or dimples with a dibber or pencil eraser.
- Drop 1–2 seeds per cell (more only for very old seed).
- Cover to the correct depth and gently firm the surface for seed-to-soil contact.
- Mist the top, then bottom-water to avoid dislodging seeds.
Practical example: If they sow tomato seed 1/4 inch deep but accidentally bury it 1 inch, emergence can be delayed and uneven, especially in cooler rooms. The fix is simple: scrape back excess mix and re-firm lightly.
Label immediately—before moving to the next variety. Use waterproof tags and include crop, variety, and sow date. Common mistake: relying on tray position memory; one bump and every flat becomes a mystery.
Control Temperature and Humidity to Speed Germination
Once the seeds are tucked in, the environment decides how fast they wake up. Temperature drives enzyme activity, while humidity keeps the seed coat from drying mid-germination.
Most vegetables germinate fastest with warm, steady soil, not warm room air. A heat mat with a thermostat is the cleanest way to hold the mix in range, especially on cold windowsills.
- Warm-season crops (tomato, pepper, eggplant): aim for 75–85°F soil.
- Cool-season crops (lettuce, brassicas): aim for 60–70°F soil.
- Moisture: keep the surface evenly damp, never soggy.
For humidity, a dome helps early on, but it can also trap stagnant air. Look for condensation: light fogging is fine; heavy dripping signals too much humidity and raises mold risk.
Pro tip: vent the dome as soon as most seeds sprout, then remove it within 24–48 hours. Common mistake: leaving the dome on for a week “to be safe,” which often leads to damping-off.
Practical example: a grower starting peppers in a 62°F basement can place the tray on a thermostat-controlled heat mat set to 80°F. Germination often drops from 14–21 days to about 7–10, with fewer stalled seeds because the mix never chills overnight.

Provide Strong Light and Proper Airflow to Prevent Leggy Growth
Now the seedlings need intensity and movement. Weak light makes them stretch; still air keeps stems soft and invites fungal problems.
Seedlings should get bright light immediately after emergence. A dedicated LED grow light positioned close beats a sunny window, which changes angle and intensity through the day.
- Light duration: 14–16 hours daily on a timer.
- Light distance: keep LEDs about 2–4 inches above the canopy, adjusting as they grow.
- Rotation: if using a window, rotate trays daily to reduce leaning.
Airflow matters just as much. A small oscillating fan on low for a few hours daily strengthens stems by triggering gentle mechanical stress, and it helps the surface dry slightly between waterings.
Pro tip: aim the fan so leaves barely flutter, not whip. Common mistake: blasting seedlings with constant high airflow, which can desiccate the mix and scorch tender cotyledons.
Practical example: when tomato seedlings start leaning toward a window, a grower can switch to an LED 3 inches above the tray and run a low fan for 2 hours each morning. Within a week, new growth typically thickens, internodes shorten, and the tray looks uniform instead of spindly.
Water, Feed, and Thin Seedlings for Steady Development
Now the seedlings’ routine matters more than the germination setup. Consistent moisture, light feeding, and timely thinning prevent stalled growth and weak stems.
Water when the surface turns lighter in color and the tray feels noticeably lighter. They should keep the mix evenly damp, not saturated; roots need oxygen. Bottom-water for 10–20 minutes, then drain fully so cells don’t sit in runoff.
- Pro tip: Water in the morning so foliage dries fast.
- Common mistake: “Sipping” daily from the top, which leaves roots shallow.
- Common mistake: Letting trays dry hard once, which can stunt seedlings.
Begin feeding after the first true leaves appear (not the seed leaves). Use a balanced liquid fertilizer at 1/4 to 1/2 strength every 7–10 days, adjusting by plant response. Pale green growth often signals underfeeding; dark, soft growth suggests too much nitrogen or low light.
Thin early so each cell holds one strong plant. Snip extras at the soil line instead of pulling, which can tear roots. Example: if three lettuce seedlings sprout in one cell, they should keep the thickest stem and cut the other two, then water lightly to settle the mix.
Harden Off and Transplant Seedlings Without Shock
Once seedlings are sturdy, they need a controlled transition outdoors. Hardening off builds tolerance to wind, sun, and temperature swings so transplants don’t stall.
Start 7–10 days before planting out. They should place trays in bright shade for 1–2 hours on day one, then increase outdoor time daily. Move toward morning sun first; harsh afternoon sun can scorch tender leaves.
- Protect from wind with a porch, cold frame, or a simple screen.
- Reduce watering slightly, but never let plants wilt.
- Hold fertilizer during the last few days to avoid lush, fragile growth.
Transplant on a calm, overcast day or late afternoon. They should water seedlings 1–2 hours beforehand, then slide out the root ball intact and plant at the same depth (tomatoes are the exception; they can be set deeper). Firm soil gently and water in to eliminate air pockets.
Pro tip: Use a starter solution or plain water, not strong fertilizer, at planting. Example: a gardener hardening off pepper seedlings can keep them outside for 6–8 hours by day five, then transplant at dusk and cover with row fabric overnight if temperatures dip below 55°F.
What to Do Now
Now the focus shifts from learning to doing. For anyone serious about how to grow vegetable seedlings, the fastest progress comes from setting a repeatable routine and tracking results from the first tray onward.
They should block 20 minutes today to prep the next cycle and remove guesswork. Keep this checklist visible near the growing area:
- Set a weekly calendar for sowing dates, expected sprout windows, and transplant targets.
- Record observations (germination rate, color, growth speed) in a simple notebook or phone note.
- Standardize supplies so each batch uses the same trays, labels, and measuring tools.
- Plan space for the next two weeks so seedlings aren’t crowded as they size up.
Example: if they start three tomato varieties, they can note which one reaches transplant size first and reserve garden space accordingly. Next step: pick one crop, schedule the sowing date, and start the first log entry today.