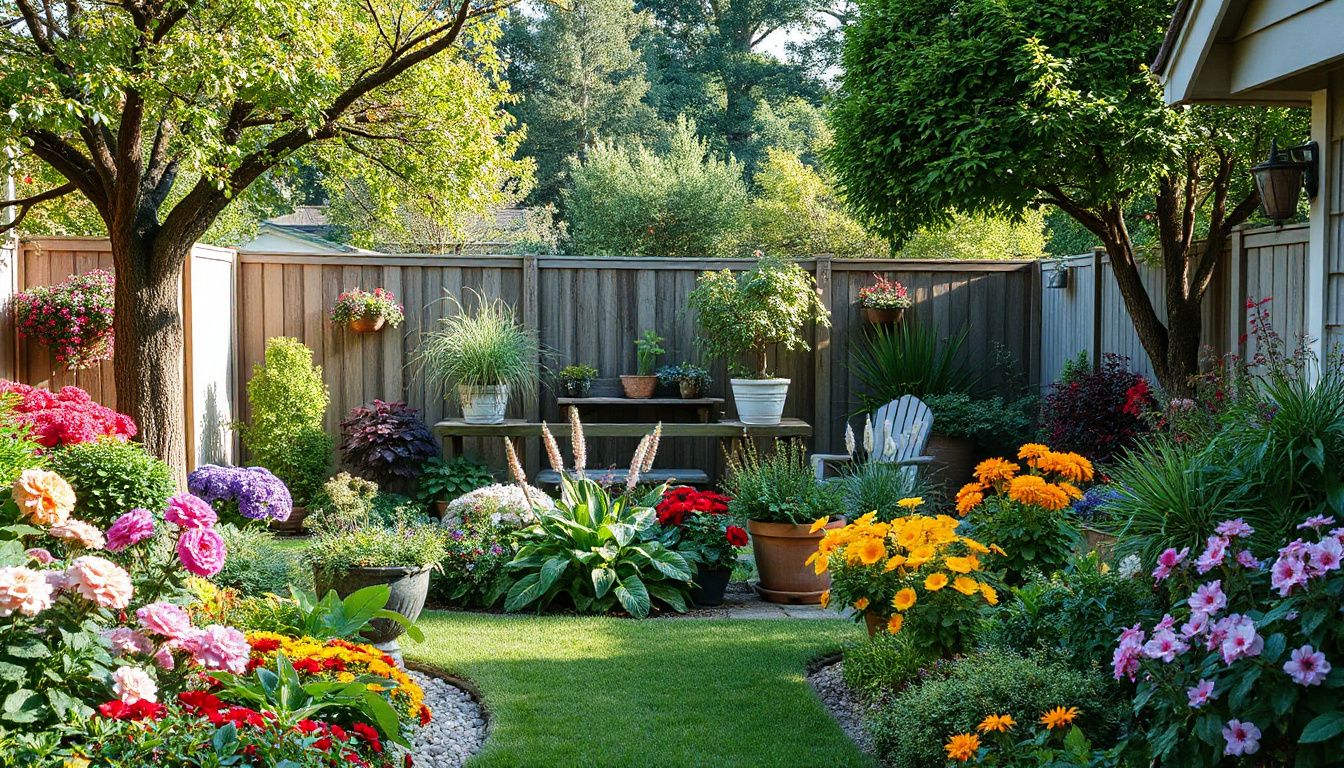
How to Plan a Family Friendly Garden Step-by-Step Layout
Most people assume a family friendly garden means adding a swing set, some bright flowers, and a patch of lawn. That approach creates yards that look pleasant but quickly become frustrating: prickly shrubs next to play routes, slippery stepping stones, fragile beds that children are told not to touch, and no shaded place for an adult to sit and supervise.
The better way is to design for safety, access, and shared use first. You plan clear zones, choose non-toxic and resilient plants, build wide non-slip paths, and then add play or growing features that support those goals. A successful layout gives kids “yes spaces” to dig, run, and touch, while also giving adults a low-maintenance outdoor room they actually want to use.
This step-by-step guide shows you how to plan a family friendly garden step-by-step layout from a blank site check through planting and long-term care. You don’t need a design background. You need a measuring tape, a simple sketch, and a realistic view of how your household uses the yard on a normal Tuesday afternoon.
Start With a Family Goals and Site Audit
Before you buy plants or mark out beds, you need a clear read on the space and the people using it. The most common mistake is designing for an ideal weekend barbecue rather than daily life with strollers, wet shoes, muddy hands, and a tired adult who wants a quiet corner.
Measure What You Actually Have
Walk the garden at three different times of day: mid-morning, early afternoon, and late afternoon. Note where sun and shade land, where wind tunnels through, where water pools after rain, and which routes people already take when carrying groceries, taking out bins, or running to a shed.
Write down real dimensions. Do not rely on “about 10 steps across.” Use a 25-foot or 8-meter tape and record:
- Usable length and width, subtracting sheds, bins, air-conditioning units, and narrow side passages
- Sun exposure by zone: full sun, part shade, or deep shade
- Soil condition: compaction, puddling, slope, and whether water drains within an hour or two
- Existing hazards: ponds, thorny shrubs, unstable edging, low branches, or damaged fence panels
- Utilities: outside tap location, outdoor power outlet, basement vents, and any underground lines you already know about
In practice, photograph the space from the back door and each corner. A phone photo taken at 9 a.m. and again at 4 p.m. is more reliable than trying to remember shadow lines later.
 Documenting sun and shade at different times of day makes zone planning far more accurate.
Set Ranked Priorities, Not a Wish List
Write down what each family member needs from the space. Be specific and time-based. “Fifteen minutes of care on weekdays” is a goal; “easy garden” is not. “A shaded seat where I can see the kids” is a goal; “somewhere to sit” is not.
Then sort every idea into three columns:
- Must-haves: secure boundaries, clear sightlines, safe circulation, a place to store tools
- Nice-to-haves: raised beds, a sand or dig patch, a hammock, bird feeders, outdoor dining
- Not now: anything that adds significant maintenance, cost, or risk without solving a current problem
For example, a family with a toddler and an older relative measured 7 m by 9 m of usable space and found afternoon shade from a neighbour’s tree. Their must-haves became a flat non-slip loop path, a small dig zone in sight of the kitchen window, and a shaded seat near the back door. That simple decision shaped every later layout choice.
Sketch a Step-by-Step Zoned Layout
A family garden works best when it is zoned like a small park. Each area has one job, and the transitions between areas are obvious. Zoning reduces accidents, protects plants, and keeps play from spilling into fragile borders.
Step 1: Draw a Base Map
Use graph paper or a free garden-planning app. Draw the house, doors, windows, fences, gates, existing trees, paths, and utilities to scale. One square can equal 30 cm or 1 foot. This base map is the only drawing you need for the first season.
Step 2: Mark Circulation Paths First
Map the routes people already use: back door to bins, patio to shed, gate to washing line, kitchen door to outdoor eating area. Turn those desire lines into firm paths before placing beds or play equipment.
Aim for these practical rules:
- Paths: 1.0–1.2 m wide for passing, pushchairs, and a walking frame or wheelchair
- Turning space: allow a wider node near doors, gates, and seating for easy maneuvering
- Surface: firm, non-slip, and easy to sweep; avoid loose pea gravel on main routes
- Edges: flush edging rather than raised metal or sharp timber edges that trip small feet
Step 3: Assign Four Core Zones
Divide the remaining space into four functional zones:
- Active zone: the flattest, most open ground for running, ball games, digging, and play equipment
- Quiet zone: shaded or partially sheltered seating for reading, eating, and supervising
- Growing zone: beds, containers, herbs, and fruit near the water tap for quick care
- Service zone: bins, compost, storage, and clutter screened but easy to reach
Place the quiet zone where an adult can see the active zone without turning constantly. A common mistake is hiding the play area behind dense shrubs “to keep the garden tidy.” That blocks supervision, invites damage to plants, and makes the garden feel less safe for everyone.
Step 4: Test Sightlines and Sun Patterns on Paper
Draw a sightline from the main window and the back door to the active zone. If a fence panel, large shrub, or shed blocks it, move the active zone or lower the obstruction. Then check that the growing zone gets at least six hours of sun for vegetables and herbs, while the quiet zone gets afternoon shade in hot months.
Practical example: on a narrow 5 m-wide yard, a straight 1.1 m path can run along the house to a back shed, with a 2 m-wide play strip on the sunnier side and raised planters on the shadier side. The family keeps mulch under play equipment and places thorny plants only in the front garden, away from children’s routes.
Choose Safe Plants, Surfaces, and Boundaries
Once the zones and paths are on paper, select plants and materials that reduce avoidable hazards. Think “touchable,” “non-toxic,” and “low-splinter,” then layer in year-round interest.
Child- and Pet-Safe Plant Palette
If toddlers, visiting children, or pets might nibble leaves or berries, avoid known toxic ornamentals and anything with tempting fruit that could be mistaken for food. Prioritise plants that tolerate handling and recover quickly from a snapped stem.
Skip high-risk picks: foxglove, oleander, yew, castor bean, lily-of-the-valley, and many euphorbias with irritating sap.
Choose resilient, kid-friendly options: sunflowers, nasturtiums, calendula, lavender, rosemary, strawberries in a netted or fenced bed, and clumping grasses without sharp leaf edges.
Reduce stings and scratches: keep roses, barberry, and spiky yuccas out of play routes. If you love them, place them behind a low barrier or in a front garden bed.
Verify scientific names if you are unsure. Common names vary by region, and a plant called “wild cherry” in one area may be harmless while another is not. The USDA Plants Database can help you confirm a species and its known characteristics before you plant it near a play zone.
Plant palette table for a mixed family garden:
| Zone | Safe options | Why it works |
|---|---|---|
| Sunny play edge | Sunflowers, calendula, nasturtiums, clumping fountain grass | Sturdy, touchable, fast-growing, no sharp edges |
| Herb and sensory bed | Rosemary, thyme, mint in a contained pot, lemon balm | Fragrant, resilient, useful for cooking |
| Shaded seating | Ferns, hostas, astilbe, hellebores | Soft texture, no thorns, child-safe if not eaten in quantity |
| Berry area | Blueberries, strawberries, alpine strawberries | Edible reward, but net fruit to avoid wasp interest |
| Avoid near play | Roses, yew, foxglove, euphorbia, holly, barberry | Toxic, spiky, or irritating |
Keep a written plant list on your phone or inside a shed door. If a child or pet ever tastes something questionable, that list speeds up advice from a poison control centre or veterinarian.
Low-Risk Paths, Mulch, and Edging
For paths, compacted decomposed granite, smooth pavers, brushed concrete, or bonded gravel are much easier to sweep than loose pea gravel and provide better footing after rain.
For mulch, untreated wood chips or certified playground mulch work well in active zones. Avoid cocoa mulch if dogs are present because it can be harmful if eaten. Understand how raw wood mulch ages before you spread a thick layer; fresh arborist chips settle and decompose differently than aged bark, so budget for a top-up within the first year.
Wood needs scrutiny. Use rot-resistant cedar, black locust, or heat-treated timber for raised beds. Avoid older pressure-treated lumber for edible beds unless it is certified for ground contact and food-growing use. For any finish, choose low-VOC exterior stains or natural oils and let everything cure fully before children use the space.
 Safe, touchable plants and a smooth path reduce common family-garden hazards.
Fencing, Gates, and Water Safety
Secure boundaries matter more than almost any plant choice. Check that gates close firmly and latches are high enough that small children cannot open them but adults can. Repair wobbly fence panels before adding play features.
If you have any pond, water barrel, or open water feature, treat it as a supervision hazard. A small child can drown in very shallow water. Cover or fence open water, use a rigid safety grid just below the surface, or remove the feature until children are older. The same caution applies to unsecured buckets left out after rain.
Build the Garden in Phases Without Overcommitting
The best family gardens are never “finished.” They are built to handle change. Kids grow, interests shift, and maintenance time expands or disappears depending on the season of life. Build in three low-regret phases rather than trying to complete everything in one expensive weekend.
Phase 1: Hardscape and Irrigation
Install edging, paths, and any irrigation before planting heavily. Drip lines and soaker hoses are cleaner to install now than after roots establish. Keep outside taps accessible, and run a hose reel or short hose near the growing zone.
Before digging, call your local utility locating service to mark underground lines. This step is free in many areas and prevents a dangerous and expensive mistake.
Phase 2: Soil, Beds, and First Planting
Add compost to existing beds or fill raised beds with a mix of topsoil and compost. Plant the “must-have” growing zone first: a few herbs, a salad bed, or two sturdy shrubs. Leave space between plants. Overplanting in year one is the most common cause of crowded, unhealthy beds.
If you are using containers, choose ones large enough for mature roots and place them where they will not tip over. In hot climates, containers in lighter colors reduce soil temperature swings and need less frequent watering than black plastic pots.
Phase 3: Play and Seating Features
Add the swing, sandbox, mud kitchen, or seating area only after paths and beds are in place. Position play equipment over a soft surface such as certified playground mulch or loose-fill rubber, and anchor it properly. Choose modular elements—movable planters, bolt-on trellises, lightweight chairs—so the layout can evolve without demolition.
Budget and Timeline Reality Check
A realistic starting budget for a small family garden, excluding major play equipment, often falls between a few hundred and a few thousand dollars. The biggest costs are usually hardscape materials, fencing repairs, soil, and irrigation, not plants.
Break spending into three phases rather than buying everything at once. A first weekend can install edging and a small herb bed. The next month can add a path and mulch. The following season can add a raised bed or seating area. This staged approach keeps waste low and lets you test how the family actually uses the space before committing to expensive features.
Maintenance Systems That Survive a Busy Week
A low-maintenance family garden is not one with no work. It is one where the work fits into a predictable weekly rhythm and never becomes a multi-hour rescue mission.
Weekly 15-Minute Reset
Use a short checklist rather than a vague “tidy the garden.” Scan for trip hazards, remove fallen fruit, check gates and latches, sweep the main path, and top up mulch where it has thinned. Teach one child one small task each week: watering a container, picking ripe herbs, or putting toys back in the storage bin.
For muddy patio spots, a foam gun on your hose makes rinsing play areas and paving much faster than a bucket and brush.
Seasonal Jobs and Adaptations
In spring, refresh mulch, prune dead growth, and repair winter path damage. In summer, check irrigation timers weekly and move containers out of hot afternoon sun if needed. In autumn, clear leaf litter from drains and cut back anything that blocks sightlines. In winter, store hoses and lock away tools, and review the layout for the next year.
If you keep a compost pile, know how long different inputs take. Turning kitchen scraps into compost typically takes longer than people expect, while aging poultry manure safely is essential before it touches edible beds. Most family gardens do not need a large compost system; a single enclosed bin or a small worm bin usually handles the load.
Grass clippings can stay on the lawn as a nitrogen source if you mow regularly, but breaking down clippings into usable mulch requires drying and layering them thinly, or they mat and smell. Use a mulching mower rather than bagging.
Age-Appropriate Garden Tasks
Give children real jobs based on their physical abilities and attention span. Rotate tasks so the garden does not become one child’s chore.
| Age | Appropriate tasks |
|---|---|
| 2–4 | Picking large leaves, putting toys away, watering with a small can under supervision |
| 5–7 | Sowing large seeds, sweeping paths, filling a bird feeder, harvesting soft herbs |
| 8–10 | Planting seedlings, measuring rainfall, spreading mulch, checking a compost bin |
| 11+ | Pruning with guidance, mowing with safety gear, planning a small raised bed |
A shared routine keeps the garden from becoming “another chore” and turns it into a source of ownership and pride.
Common Family Garden Mistakes to Avoid
Even thoughtful layouts fail when these practical issues are ignored.
Blocking sightlines with tall planting. If you cannot see the play zone from the back door, children will move to where you cannot see them, or you will stop using that area.
Using loose gravel on main paths. It shifts underfoot, fills shoes, and makes pushchairs and wheelchairs miserable. A firm bound surface is usually worth the small extra cost.
Choosing plants for a single season. A garden that looks great in June but has bare soil and no berries in October will not hold a family’s interest. Mix early, mid, and late-interest plants.
Letting compost or soil pile up against timber fences. This rots fence bases and invites pests. Keep soil at least 15 cm below the top of a raised bed and leave a gap behind compost bins.
Treating the garden as a static project. Children’s needs change rapidly. A sandbox that was perfect at age three may be abandoned by age seven. Plan modular features so you can shift from digging to hanging out to vegetables without rebuilding everything.
Conclusion
A family friendly garden works because you plan circulation, safety, and clear zones before you buy a single plant. Start with a measured base map and ranked priorities, then design wide non-slip paths, assign active and quiet zones, and choose resilient non-toxic plants that children can touch. Build in phases, keep maintenance to a predictable weekly rhythm, and adapt the layout as your family grows.
Your next step is simple: spend 20 minutes this week walking the yard with a tape measure and a phone camera, then draw one base map. Use that sketch to mark your paths and the four core zones before any plant shopping. That single step moves you from vague ideas to a layout your whole household can actually use.
Frequently Asked Questions
What does a family-friendly garden actually need?
It needs secure boundaries, clear sightlines from the house, wide non-slip paths, a soft play surface, and plants that are safe to touch or accidentally nibble. A layout with separate active, quiet, growing, and service zones works better than a single mixed-use lawn. Shade and easy tool storage prevent frustration.
Which plants should I avoid around children and pets?
Avoid foxglove, oleander, yew, castor bean, lily-of-the-valley, holly with berries, and euphorbias with milky sap. Also keep roses, barberry, and spiky succulents away from play routes. When in doubt, verify the scientific name in a plant database and keep a written list for poison control.
How wide should paths be in a family garden?
Main paths should be 1.0–1.2 metres wide so two people can pass, a pushchair fits, and a walking frame or wheelchair can turn comfortably. Use firm, non-slip surfaces such as smooth pavers or compacted decomposed granite. Avoid loose pea gravel on the busiest routes.
What is the safest mulch for a play area?
Certified playground mulch or untreated wood chips are good options. Avoid cocoa mulch if dogs are present because it can be harmful if eaten. Check the fall-height rating if you have swings or climbing equipment, and refresh the layer every year as it settles and breaks down.
How can I make a small backyard family-friendly?
Prioritise zones over size. Use a loop path, one compact active zone, a narrow raised bed, and a corner shaded seat. Choose vertical growing space on fences or trellises, and use containers that can be moved as needs change. Avoid large lawn areas that add mowing but little play value.
When should I let kids help in the garden?
Children can help from toddler age with simple supervised tasks like watering a container or putting toys away. Increase responsibility gradually: sowing, sweeping, harvesting, spreading mulch, and eventually planning a bed. Match the task to attention span, and rotate jobs so the garden stays engaging rather than punitive.





2 Comments