How to Cook Pork Ribs on BBQ: Step-by-Step Tender Ribs
How to cook pork ribs on bbq becomes the only thing on someone’s mind when guests are due in an hour, the coals are lit, and the ribs still look stiff and pale on the tray. They’ve seen ribs turn out dry, burnt on the outside, and chewy in the middle. Now they want that clean bite, glossy bark, and steady smoke flavor without guessing.
This guide gives a clear, repeatable method for cooking ribs on a barbecue, from setup to slicing. It focuses on heat control, timing, and simple checkpoints so they can cook with confidence on charcoal or gas. Look, ribs aren’t hard; they just punish shortcuts.
They’ll learn how to:
- Choose the right rib cut and prep it for even cooking
- Build two-zone heat for slow cooking and controlled finishing
- Use smoke, spritzing, and saucing without washing off the bark
- Test doneness with bend and probe checks, not guesswork
Practical example: on a standard kettle grill, they can bank charcoal to one side, hold the indirect zone near 250–275°F, and cook a rack for about 4–6 hours, saucing only in the last 15–20 minutes to prevent burning.
Gather Tools, Ingredients, and Set Up the BBQ (Before You Start)
Now the prep work starts, and it’s the part that keeps ribs from turning into a last-minute scramble. They’ll get better results by staging tools, ingredients, and the grill setup before the meat ever hits heat. That’s how timing stays predictable.
They should first confirm what kind of BBQ they’re using—charcoal kettle, offset smoker, pellet grill, or gas—because airflow and fuel control change everything. For most backyard cooks, a two-zone setup (hot side + cool side) is the safest path to tender ribs without scorching. Look, it also buys forgiveness when flare-ups happen.
Tools to have within arm’s reach:
- Instant-read thermometer (for spot checks) and/or a probe (for longer cooks)
- Long tongs, heat-resistant gloves, and a small spray bottle (water or apple juice)
- Rib rack (optional), aluminum foil or butcher paper, and a drip pan
- Chimney starter (charcoal) or extra pellets/propane (backup fuel)
Ingredients should be staged like a line cook would. They’ll want ribs, a binder (mustard or oil), rub, and a finishing sauce or glaze if they’re using one. For smoke flavor, mild woods like apple or cherry stay forgiving; hickory is stronger and can overpower if they overdo it.
BBQ setup checklist:
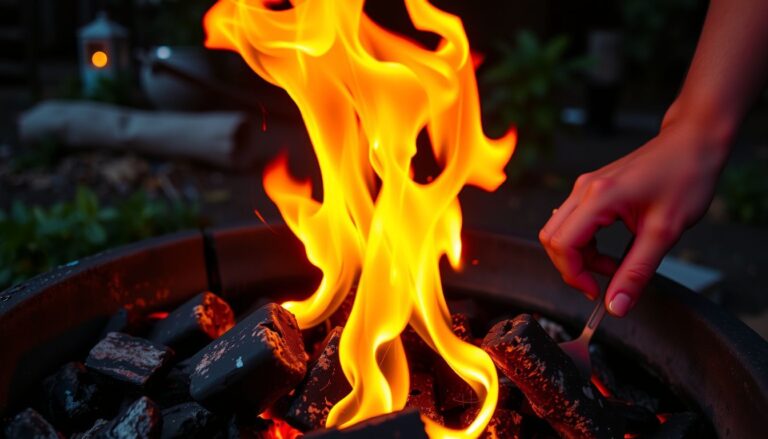
- Preheat and stabilize: 250–275°F for low-and-slow ribs
- Set a drip pan on the cool side to reduce flare-ups and keep the cooker cleaner
- Vent management: don’t choke airflow; dirty smoke makes bitter bark
Practical example: if they’re cooking on a 22-inch kettle for six guests, they can bank a full chimney of lit coals to one side, place a foil drip pan opposite, and add two small apple wood chunks. That setup holds steady heat while leaving a safe zone for slower rendering.
Prep the Ribs: Trim, Remove Membrane, and Choose a Cut
With the BBQ stable, they can focus on the ribs themselves. Good rib prep isn’t fussy; it’s precise. Small steps here prevent chewy bites and uneven cooking later.
First, they should choose the cut that fits the schedule. Baby back ribs cook a bit faster and leaner; St. Louis-style spare ribs run meatier with more fat to render.
Country-style “ribs” are different (they’re more like pork chops) and won’t follow the same timing.
Quick cut guidance:
- Baby back: curved rack, tender, typically 4–6 lb per rack, slightly shorter cook
- St. Louis: rectangular rack, more fat and flavor, great for consistent slicing
- Full spares: larger, includes extra flap/trim; best if they don’t mind more prep
Next comes trimming. They should square loose edges that will burn, and remove dangling fat pockets that won’t render. They don’t need to “clean” ribs like a brisket; over-trimming reduces moisture and flavor.
Then remove the membrane (silver skin) from the bone side. They can slide a butter knife under it near a middle bone, grab it with a paper towel, and pull in one sheet. If it tears, they should restart from a new spot; leaving membrane on often causes rubbery texture and blocks rub from seasoning the meat.

Practical example: if they bought a full spare rack from a warehouse club, they can trim it into a St. Louis rectangle, save the rib tips for snacks, peel the membrane, then apply a thin mustard binder and rub. That single workflow improves bite-through and makes the rack cook evenly from end to end.
Season Properly: Apply Binder, Rub, and Rest for Better Bark
Now that the ribs are trimmed and ready, the seasoning step decides whether the bark turns out deep and savory or flat and patchy. Consistency matters more than clever ingredients. The goal is even coverage, controlled salt, and enough rest time for the surface to tack up.
A binder isn’t there for flavor; it’s there for adhesion. A thin coat helps the rub stick through handling and early rendering. Yellow mustard, hot sauce, or a neutral oil all work, but the key is using just enough to lightly gloss the meat, not drown it.
They should apply rub in two passes. First, a light base layer to “prime” the surface. Second, a more deliberate layer to build color and texture without caking.
Press the rub in gently; rubbing hard can clump spices and create bald spots.
- Salt first mindset: If the rub is salt-heavy, they should avoid extra salting.
- Even edges: Season the sides and ends; bark forms there too.
- Hands-off after: Once seasoned, stop touching the surface.
Resting is where the rub hydrates and bonds. They should rest the ribs 20–40 minutes at room temp (or 2–12 hours uncovered in the fridge for a drier, better bark). The surface should feel tacky before it hits the grill.
Practical example: For two racks of St. Louis ribs, they can use a tablespoon of mustard per rack, then apply about 3–4 tablespoons of rub each. After a 30-minute rest, the color darkens slightly and the rub stops looking dusty—perfect timing to move to the cooker.
Common mistakes: Using a thick binder layer, oversalting with multiple salty products, and rushing straight to heat before the rub sets.
Cook Low and Slow: Control Heat, Add Smoke, and Maintain Temperature
Look, the cook is where patience pays. Low-and-slow barbecue is simple in concept: steady heat, clean smoke, and minimal lid lifting. Ribs don’t need extreme temperatures; they need time for fat to render and collagen to relax.
They should set up for indirect cooking and target 225–275°F at grate level. On a kettle, that means coals banked to one side with a drip pan on the other. On a gas grill, it means one or two burners on low and the ribs parked over the unlit zone.
- Temperature control: Use vents (charcoal) or burner knobs (gas) in small moves.
- Moisture management: A water pan can stabilize temps, but it won’t “make ribs juicy.”
- Lid discipline: If they’re lookin’, they aren’t cookin’.
Smoke should be light and clean, not harsh. They can add 1–2 chunks of fruitwood (apple, cherry) or a small piece of hickory for stronger flavor. Chips work, but chunks burn slower and require less babysitting.
They should maintain a steady temp by making changes early. If it’s climbing, close vents slightly before it overshoots. If it’s dropping, add a small amount of lit fuel or open airflow gradually rather than dumping a full chimney.
Practical example: On a 22-inch kettle, they can run a “snake” of briquettes two-wide around half the rim, light 8–10 briquettes, and place them at the start. With one cherry chunk near the lit section, the grill holds near 250°F for hours with only minor vent tweaks.
Common mistakes: Heavy white smoke from too much wood, chasing temps with big vent swings, and opening the lid every 10 minutes to check color.
Wrap, Glaze, and Finish: Build Tenderness Without Losing Texture
Now the ribs have color, a set bark, and steady smoke flavor. The next phase is about pushing tenderness while protecting that bark from turning soft or muddy.
Wrapping is optional, but it’s the fastest way to accelerate rendering and soften connective tissue. They should wrap only after the rub has “set” and the surface looks dry, not wet.

How to wrap: lay out heavy-duty foil (or butcher paper), place ribs meat-side down, and add a small braising boost. Keep liquids minimal so the bark doesn’t wash off.
- Foil: fastest tenderness, softer bark
- Butcher paper: good tenderness, better bark texture
- No wrap: best bark, longest cook
Use a light add-in, not a bath. A common combo is 2–3 tbsp brown sugar, 1–2 tbsp butter, and a small splash (1–2 tbsp) of apple juice or cider vinegar per rack.
After wrapping, they should return the ribs to the BBQ at the same pit temp. Start checking after 45 minutes; some racks need 60–90 minutes, depending on thickness and the cut.
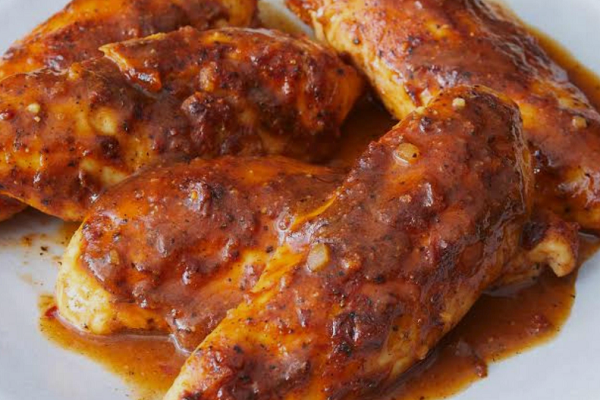
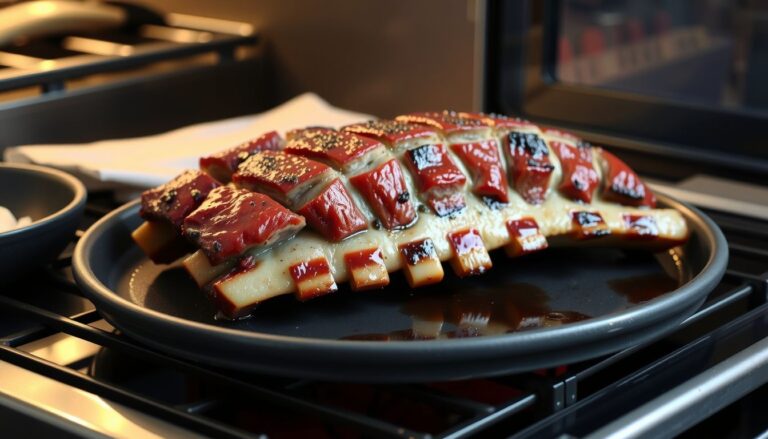
Glazing comes after the ribs are tender enough to bend easily but not fall apart. They should vent the wrap for a minute to stop steaming, then brush a thin layer of sauce and set it uncovered.
- Brush sauce in thin coats to avoid a gummy finish
- Let each coat tack up for 10–15 minutes
- Keep the lid closed to prevent sugar scorching
Practical example: when a backyard cook is feeding eight guests, they might foil-wrap two racks to hit the schedule, leave one unwrapped for firmer bark, then glaze all three for the last 20 minutes so the finish matches on the platter.
Common mistakes: wrapping too early, adding too much liquid, and glazing over high heat. Each one trades texture for speed, and the ribs can end up soft with a sticky, burnt sauce layer.
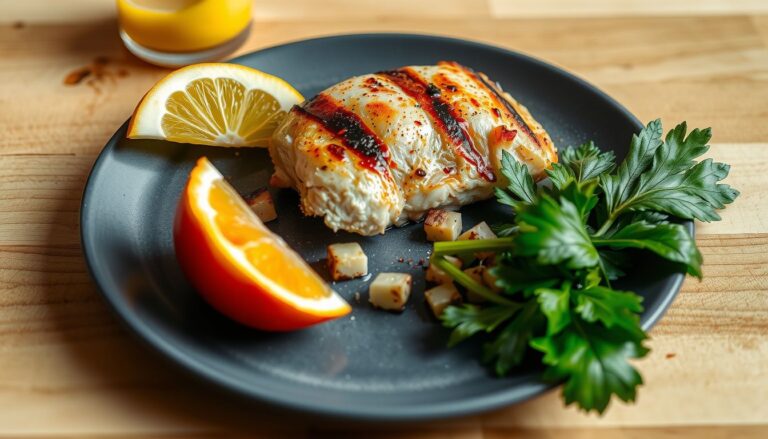
Rest, Slice, and Serve: Check Doneness and Cut for Clean Bones
Once the glaze is set and the color looks right, the last job is control. Resting stabilizes juices, and slicing correctly keeps the meat from shredding off the bone.
Doneness should be confirmed with feel, not just time. They should probe between the bones with a thermometer or skewer; it should slide in with little resistance, like softened butter.
- Bend test: lift from the middle; the rack should arc and the surface may crack slightly
- Probe test: probe between bones; resistance should be minimal
- Temp guide: many ribs feel right around 195–203°F, but texture wins
Rest the ribs 10–20 minutes, loosely tented with foil. If they’re wrapped, they should be unwrapped for the rest so the bark doesn’t steam and go soft.
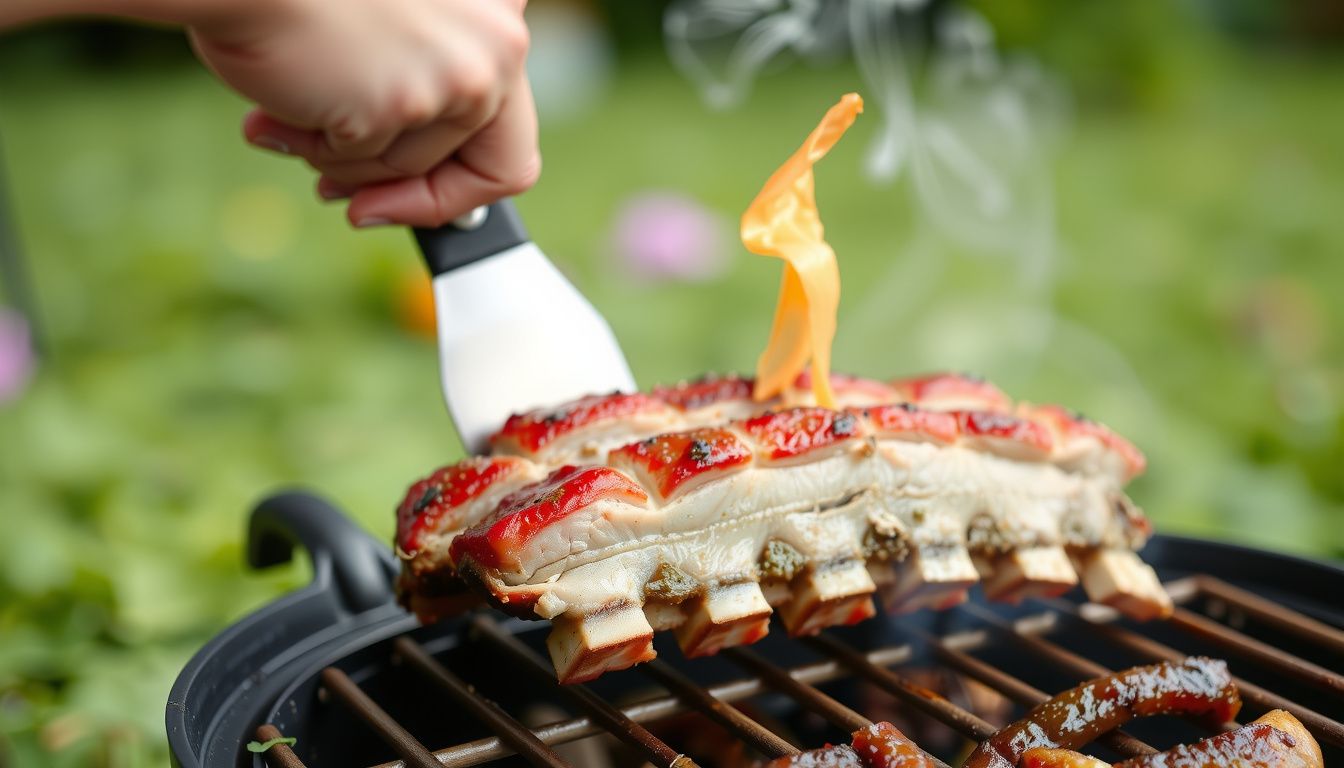
For clean slices, they should flip the rack bone-side up and cut from that side. The bones act like a map, making it easier to center the knife and avoid ragged edges.
Use a long sharp knife and wipe the blade between cuts. If the knife drags, the ribs may be underdone; if the meat collapses and falls off in chunks, they’ve gone too far.
Practical example: at a family cookout, a pitmaster rests two racks on a sheet pan while the corn finishes. They slice bone-side up into single ribs, then serve with sauce on the side so the bark stays intact for anyone who prefers a drier bite.
Common mistakes: slicing immediately off the grill, pressing down hard (which squeezes juices out), and drowning ribs in sauce before serving. A light hand keeps the texture they worked for all day.
What to Do Now
Now it’s time to lock in consistency and make every cook repeatable. When someone learns how to cook pork ribs on bbq, the biggest upgrade is treating the process like a checklist, not a guess. Keep simple notes so the next rack is even better.
Before the next cook, they should do three quick actions:
- Write down the rib cut, total cook time, and the moment they liked the color best.
- Rate tenderness, bark, and sweetness on a 1–5 scale to pinpoint what to tweak.
- Standardize one variable at a time (rub level, sauce amount, smoke intensity) for clean comparisons.
Real-world example: if guests loved the flavor but wanted a softer bite, they can keep the same seasoning and adjust only the finishing stage next time, then compare results side-by-side. Next step: pick a date for the next cook, buy two similar racks, and run a controlled “A/B” test.
Related read: Charcoal BBQ How to Cook: Step-by-Step Juicy Results