How Long Does It Take for Compost to Decompose at Home
If you’ve ever peered into a compost bin and wondered why those banana peels still look suspiciously intact, you’re not alone. The timeline for compost to break down at home can range from a rapid few weeks to a patience-testing couple of years. The real answer isn’t a single number—it’s a set of conditions you control.
The good news? Once you understand what drives the process, you can predictably speed it up or let it take its natural course. This guide walks through realistic timelines for every method, the factors that matter most, and how to know when your compost is genuinely ready for the garden. You can also read our guide on how deep does a raised garden bed need to be.
What "Finished" Compost Actually Looks Like
Before tracking time, it helps to know the finish line. Decomposition is the breakdown of organic matter by bacteria, fungi, and soil organisms. But "finished" compost isn't just old scraps—it's stable humus that won't break down further or steal nitrogen from your plants.
You'll know it's ready when:
- Color: Deep dark brown to nearly black
- Texture: Crumbly and soil-like, not sticky or clumpy
- Smell: Earthy and pleasant, like a forest floor after rain
- Volume: Reduced by 30–60% from your starting ingredients
- Temperature: No longer heats up significantly after turning
A simple test: seal a handful in a plastic bag for 24 hours. If it smells sour or ammonia-like upon opening, it needs more time or more oxygen. If it smells earthy, you're good to go. For more on this, see our guide on how long does chicken poop take to compost.
Realistic Timelines by Composting Method
Your chosen method determines your timeline more than almost anything else. Here’s the honest breakdown:
Hot Composting: 3–8 Weeks (Plus Curing)
Hot composting is the fastest route. By maintaining a pile of at least 3x3x3 feet, you create conditions where microbes generate internal temperatures of 130–160°F (55–71°C). With proper aeration and a balanced mix of greens and browns, active decomposition takes 3–8 weeks, followed by 2–6 weeks of curing.
This method works best with a dedicated bin, a compost thermometer, and a regular turning schedule—ideally every 2–3 days when temperatures peak.
Cold Composting: 6–18 Months
The "set it and forget it" approach relies on ambient temperature and infrequent mixing. It's the easiest method but demands patience. Expect usable compost in:
- 6–12 months in warm climates with occasional stirring
- 12–18 months in cooler regions or if you rarely touch the pile
- Up to 2 years if you add large, woody materials like whole branches
Cold piles are forgiving but slow. The trade-off is minimal effort and zero maintenance.
Vermicomposting: 2–4 Months
Worm bins (typically using red wigglers) produce finished castings faster than cold piles because worms continually process material through their digestive systems. A well-managed bin yields usable castings in about 2–4 months, depending on worm population, feeding rates, and how finely you chop scraps.
The advantage of vermicomposting is that it works indoors year-round, meaning temperature never stalls the process. The worm castings are also exceptional for seed starting and container plants.
Tumbler Composting: 4–8 Weeks
Tumbling composters are an intermediate option. They provide better aeration than static piles but less insulation than ground-level hot compost. With daily turning and a good ratio of ingredients, you can expect finished compost in 4–8 weeks during warm months.
Check the moisture levels in your tumbler regularly—they dry out faster than ground piles.
Six Factors That Speed Up or Slow Down Decomposition
Understanding these levers lets you adjust your timeline intentionally:
1. Carbon-to-Nitrogen Ratio
Microbes need both energy (carbon) and protein (nitrogen). The sweet spot is roughly 25–30 parts carbon to 1 part nitrogen.
- Too much carbon (leaves, straw, cardboard): slow, cool decomposition
- Too much nitrogen (grass clippings, food scraps): slimy, smelly, anaerobic conditions
Aim for a layer of browns to every layer of greens—visually it should look about two-thirds brown.
2. Surface Area and Particle Size
Smaller pieces break down faster because they expose more surface area to microbial activity. Chop melon rinds into 1–2 inch chunks, run a mower over autumn leaves, and snip woody stems into thin segments. Wood chips and whole branches can take years without being shredded first.
3. Moisture Content
Your pile should feel like a wrung-out sponge—damp but not dripping. Microbes need water to function, but waterlogged piles suffocate aerobic bacteria and create putrid conditions. In practice, this means watering during dry spells and adding dry browns during rainy ones.
4. Oxygen and Turning
Aerobic decomposition is fast and odor-free; anaerobic decomposition is slow and stinky. Turning your pile introduces oxygen and redistributes material. For hot piles, turn every few days. For cold piles, a monthly stir is plenty.
5. Temperature and Insulation
Microbial activity roughly doubles with every 10°C (18°F) increase—up to a point. Larger piles hold heat better than small ones. During winter, insulating your bin with straw bales or a layer of leaves keeps decomposition active months longer.
6. The Right Ingredients
Soft, green materials (vegetable scraps, fresh grass, coffee grounds) decompose quickly. Woody, lignin-rich materials (branches, oak leaves, pine needles) resist breakdown. Mixing both types gives you a balanced pile that heats up and breaks down efficiently.
How to Speed Up Decomposition (Without the Smell)
Faster compost doesn't mean a stinky, pest-attracting mess. Here's how to accelerate the process while keeping things pleasant:
- Chop and shred: Break materials into smaller pieces before adding them
- Layer properly: Alternate wet greens with dry browns to maintain airflow
- Turn regularly: Weekly turning for hot piles keeps oxygen flowing
- Maintain size: Keep your pile at least 3 feet in all directions to trap heat
- Add activators: A sprinkle of finished compost, garden soil, or a small handful of alfalfa meal introduces beneficial microbes and adds a nitrogen boost
A practical rhythm: keep a countertop bucket for kitchen scraps, empty it every few days, bury the contents under a layer of shredded leaves, and turn the pile every weekend. Burying scraps not only speeds decomposition but also prevents fruit flies and unwanted visitors.
What slows things down—avoid these mistakes:
- Adding whole fruits or unshredded branches
- Letting the pile dry out completely
- Waterlogging it during rains
- Turning too frequently in cold weather (which releases built-up heat)
- Adding meat, dairy, or oily foods that attract pests and create anaerobic pockets
Ready or Not? Simple Tests for Garden-Ready Compost
Skip the guesswork with these practical checks:
The squeeze test: Grab a handful and squeeze. A properly moist pile holds its shape but releases no water. If it crumbles on touch, you've done it right.
The heat test: After turning, monitor the center temperature. Ready compost hovers near ambient temperature. If it reheats significantly, it's still breaking down.
The seed sprout test: Sow a handful of fast-growing seeds (radish or cress) in a small pot with your compost. If they sprout well and grow vigorously, the compost is stable and safe. Poor germination signals excess salts or immature material.
The look test: You shouldn't recognize most of the original ingredients. A few woody twigs or leaf veins are fine, but intact food scraps mean more time needed.
When in doubt, screen your compost through a half-inch mesh. Use the coarse fraction as mulch and the fine material for seed starting or soil amendment.
When Compost Takes Too Long: Troubleshooting Guide
If your pile seems stuck, diagnose it like this:
| Symptom | Likely Cause | Fix |
|---|---|---|
| Dry, dusty, no heat | Not enough moisture | Water while turning; aim for sponge-like dampness |
| Sour smell, slimy texture | Too wet, poor aeration | Add dry browns (shredded cardboard, leaves) and turn thoroughly |
| Cool center, scraps intact | Pile too small or too many browns | Increase volume to 3x3x3 feet; add fresh greens or nitrogen source |
| Matted clumps, slow breakdown | Large particles, no turning | Break up mats, chop materials, start a turning schedule |
| Cold in winter | Temperature too low | Insulate with straw bales or move bin to a sunny, sheltered spot |
| Flies or odors | Exposed food scraps | Bury food under 6–8 inches of browns or finished compost |
In practice, most stalled piles are simply too dry or too wet. Correcting moisture alone often restarts activity within 48–72 hours.
Seasonal Considerations for Home Composting
Spring and Summer: Your pile works hardest during warm months. Keep it moist, turn it often, and you'll see quick results. This is the season for hot composting.
Autumn: An excellent time to stockpile shredded leaves for next year's browns. Mix fresh leaves into the pile for structure and carbon balance.
Winter: Cold piles essentially go dormant. Hot piles can continue if well-insulated—surround the bin with bales of straw or bags of leaves. You can also store food scraps in a covered bucket over winter and add them all at once in early spring for a fast compost start.
Frequently Asked Questions
Does compost break down faster in the sun or shade?
Sun-warmed piles decompose faster, but they also dry out quickly. Partial shade with good airflow often works best. If your bin is in full sun, check moisture frequently.
Can I compost year-round indoors?
Absolutely—vermicomposting with a worm bin works perfectly indoors. You'll produce finished castings every 2–4 months regardless of outdoor temperatures.
How does kitchen waste compare to yard waste for speed?
Soft kitchen scraps (vegetable peels, coffee grounds, fruit pulp) decompose faster than most yard waste. Grass clippings are quick; wood chips and woody stems are slowest. Combining both types creates the most balanced pile.
Is smaller compost always faster?
Within reason, yes. Chopping increases surface area and speed. But dust-fine material can compact and suffocate microbes. Aim for pieces between marble and golf-ball size for the best balance.
When is the best time of year to start a compost pile?
Spring and early summer are ideal for hot composting because consistent warmth helps build momentum. However, you can start any time—just adjust your expectations for seasonal temperature dips.
Composting on a Schedule: A Realistic Home Plan
Here's what a practical 12-week timeline looks like for a home hot-composting system:
Weeks 1–2: Build your pile with alternating layers of shredded leaves (browns) and fresh food scraps/grass (greens). Water as you build until it's sponge-damp. Add a thermometer and monitor.
Weeks 3–6: Turn every 3–4 days. The pile should heat to 130–150°F within the first week. Maintain moisture as you turn. Add more greens if the temperature doesn't rise; add browns if it smells.
Weeks 7–8: The pile stops reheating and shrinks noticeably. Let it cure untouched for the next 2–4 weeks. This crucial step stabilizes the material and allows fungi to finish the job.
Weeks 9–12: Screen, test, and use. Your compost is ready for mulching beds, mixing into vegetable rows, or top-dressing lawns.
Beyond the Bin: Handling Manure and Yard Waste
If you're branching out from kitchen scraps, different feedstocks come with their own timelines:
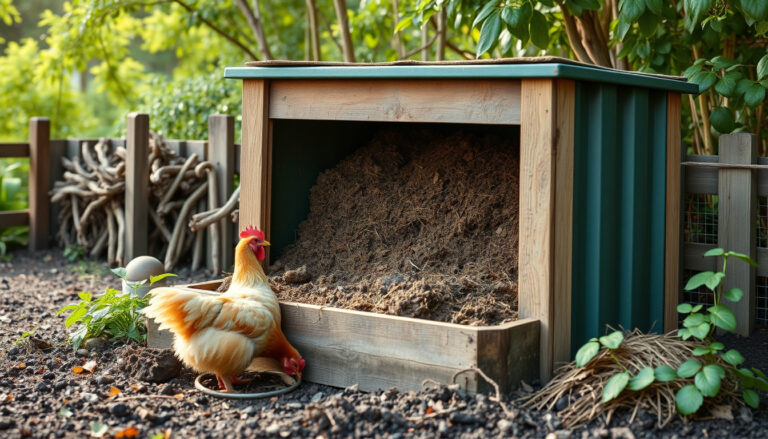
Chicken manure: This nitrogen-rich input can be composted and ready in as little as 2–3 months when managed hot. Fresh manure should never be applied directly to edible gardens due to pathogen risks. The composting process heats the pile enough to kill harmful bacteria.
Grass clippings: These green materials break down quickly—often within a few weeks when mixed with sufficient browns. Piled thickly alone, they turn slimy and anaerobic.
Wood chips and sawdust: The slowest common input due to their high carbon content and woody structure. Expect 6–18 months in a warm pile. Use them as mulch rather than expecting fast decomposition.
The Bottom Line
How long compost takes at home depends mainly on the method you choose and the effort you invest. Hot compost can be garden-ready in as little as 6 weeks with consistent attention, while a cold pile may need 12–18 months of patient waiting. Neither is wrong—they simply suit different lifestyles and needs.
If you want fast results: chop your scraps, balance greens and browns, turn regularly, and keep the pile at 3x3x3 feet. If you're happy to wait: just keep adding to the pile and let nature take its course.
The most important step is simply starting. Take your countertop bucket, collect those kitchen residuals, and build that first layer. In a few months—or a few seasons—you'll harvest dark, crumbly compost that your plants will visibly thank you for.