How Long To Bake BBQ Chicken Tenders (Time And Temperature Guide)
Baking BBQ chicken tenders should be simple, but the margin between juicy and dry is often only a minute or two. Because tenders are thin, irregular cuts, they go from undercooked to overdone faster than most other poultry. The fix isn’t guesswork — it’s a reliable method built around oven temperature, tender thickness, internal temperature, and when you add the sauce.
This guide gives you exact bake times, the science behind why they vary, and a step-by-step workflow for consistent results. Whether you’re working with fresh, thick-cut, or frozen tenders, the goal is the same: a sticky, caramelized barbecue exterior with a fully cooked, moist center. You can also read our guide on how long does it take to bbq a whole chicken.
The Short Answer: Bake At 425°F Until 165°F Internal
For most home ovens, the sweet spot is 425°F (218°C). Standard chicken tenders usually finish in 16–22 minutes, depending on thickness and whether you use a wire rack. The real target isn’t the timer, though — it’s the internal temperature.
The USDA food safety guidelines recommend cooking all poultry to a minimum internal temperature of 165°F (74°C), measured in the thickest part of the meat. You can also read our guide on how long does it take to bbq chicken legs.
Here’s a practical breakdown:
| Tender Thickness | Oven Temperature | Approximate Bake Time |
|---|---|---|
| Thin (under ¾ inch) | 425°F | 12–15 minutes |
| Standard (about 1 inch) | 425°F | 16–19 minutes |
| Thick (1¼–1½ inches) | 425°F | 20–24 minutes |
| Frozen (any thickness) | 400°F | 25–32 minutes |
These times assume the tenders are arranged in a single layer with space between each piece. Crowding the pan traps steam, lowers the effective cooking temperature, and extends bake time significantly.
Why Internal Temperature Matters More Than The Clock
You can’t judge chicken tenders by color alone. A deeply bronzed exterior — especially one coated in sugary barbecue sauce — does not guarantee that the center has reached a safe temperature. The sauce caramelizes quickly and can make the surface look finished long before the meat inside is ready.
An instant-read thermometer removes the guesswork. Insert the probe into the side of the thickest tender, aiming the tip toward the center. Avoid touching the pan or running the probe all the way through. When checking a tray, measure the largest piece: if it reads 165°F, the thinner pieces are certainly done.
In practice, I start checking 2–3 minutes before the shortest listed time. Carryover cooking will usually add a few degrees after the tray leaves the oven, but with small cuts like tenders, carryover is less predictable than with whole roasts. For safety, pull the tray only after you see 165°F on the thermometer.
If you’re also cooking dark-meat pieces, the method shifts slightly because thighs hold more fat and do well with a few degrees of extra internal temperature — I cover that in the barbecue method for dark-meat thighs.
Why Chicken Tender Thickness Changes Everything
Bake time is not a fixed number. Heat travels from the outside of each tender toward its center, so thicker pieces take longer to reach 165°F. A ¾-inch tender at 425°F might be done in 14 minutes, while a 1½-inch tender from the same package could need 22 minutes.
This is why mixing very different sizes on one tray causes problems. The thin pieces dry out while the thick centers lag behind. A common mistake is baking a mixed package as if every tender were identical.
What to do instead:
- Group similarly sized tenders together.
- Put thicker pieces toward the back of the oven, where most ovens run hotter.
- Use two sheet pans if needed rather than forcing everything onto one tray.
- Pound especially thick tenders to an even ¾–1 inch before seasoning.
When all pieces are close to the same thickness, they finish within a minute or two of each other, so one thermometer check usually tells you the state of the entire tray.
The Step-By-Step Baking Method
Follow this workflow for juicy, evenly cooked barbecue chicken tenders.
1. Preheat The Oven To 425°F
Place a wire rack over a rimmed baking sheet. The rack lifts the tenders so hot air circulates underneath, which prevents soggy, steamed bottoms and encourages browning on all sides.
2. Dry The Tenders Thoroughly
Pat the tenders completely dry with paper towels. Surface moisture creates steam, which delays browning and can make seasonings or sauce slide off. Dry meat browns faster and holds a glaze better.
3. Season Before Baking
Season lightly with salt, pepper, and any dry spices you like. If you’re using a barbecue spice rub, apply it now, not after baking. A dry rub benefits from direct heat contact and will form a flavorful crust.
4. Arrange With Space
Lay tenders in a single layer with at least ½ inch between pieces. If the tenders touch, they steam instead of roast. The trapped moisture slows heat penetration and prevents the exterior from caramelizing.
5. Bake Until Almost Done
For standard 1-inch tenders, set a timer for 14 minutes. When the timer goes off, start checking the internal temperature of the largest tender.
6. Add The Sauce At The End
This is the most common mistake. Barbecue sauce is high in sugar, and sugar burns at high heat. Applying sauce at the start of a 20-minute bake almost guarantees a bitter, charred exterior and an undercooked middle.
Brush a thin layer of sauce on the tops of the tenders during the final 3–5 minutes of baking. This warms the sauce, lets the sugars caramelize slightly, and prevents scorching.
7. Confirm Doneness And Rest
Pull the tray when the thickest tender reads 165°F. Let the tenders rest for 3–5 minutes off the heat, preferably on a clean plate or cutting board rather than the hot pan. This lets the juices redistribute so they don’t run out when you cut or bite into the meat.
Oven Temperature: Why 425°F Works Best
Roasting chicken tenders at 425°F strikes the right balance between a browned exterior and a moist interior.
- 350°F–375°F will cook the meat eventually, but the long bake time gives moisture more opportunity to escape. The result is often dry, pale chicken.
- 400°F is more forgiving and works well for frozen or thicker tenders, but you may sacrifice some of that crisp, caramelized surface.
- 425°F produces fast browning and a short cook time, which helps keep the inside juicy.
- 450°F and above can darken the outside before the center reaches a safe temperature, especially with sugary sauces.
Most home ovens don’t run exactly at the dial temperature. An inexpensive oven thermometer placed on the middle rack gives you a much more accurate picture. If your tenders consistently brown too fast or bake too slowly, the dial may be off by 10–25 degrees. Adjust the oven setting accordingly and your bake times will become far more predictable.
BBQ Sauce Timing: The Secret To Caramelization Without Burning
The biggest factor separating mediocre tenders from excellent ones is when you add the sauce. BBQ sauce contains sugar, molasses, honey, and sometimes fruit purees — all of which burn quickly at high oven temperatures.
A better approach is a two-stage process:
- Bake the tenders bare until they reach about 155–160°F internally.
- Brush a thin layer of sauce on the tops and return the tray to the oven for 3–5 minutes.
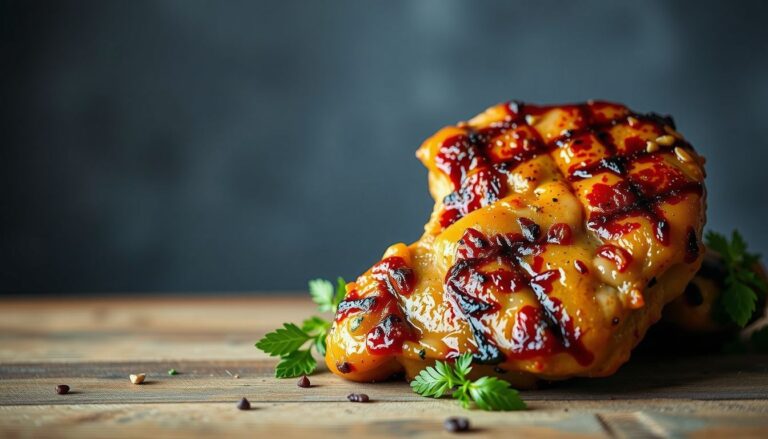
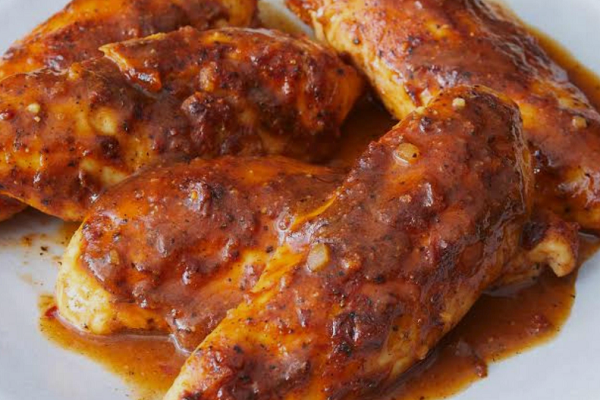
During those final minutes, the sauce warms, thickens, and caramelizes just enough to create a sticky glaze without turning into a burnt crust.
If you prefer extra-saucy tenders, add a second thin coat after pulling the tray from the oven. The residual heat will set the fresh sauce without further baking. This gives you layered barbecue flavor and a glossy finish with no bitterness.
For a full weeknight protein lineup, a beginner-friendly steak option can round out the meal with very little extra prep.
Conventional Oven, Convection Oven, And Air Fryer Compared
The tool you use changes both cooking time and texture.
| Cooking Method | Temperature | Approximate Time | Key Consideration |
|---|---|---|---|
| Conventional Oven | 425°F | 16–22 minutes | Most forgiving, reliable browning |
| Convection Oven | 400°F | 12–16 minutes | Faster heat transfer, check early |
| Air Fryer | 375°F | 10–12 minutes | Crispiest exterior, dries out faster |
Convection ovens circulate air with a fan, which transfers heat more efficiently than a conventional oven. This shortens cook time but also speeds up browning. When using convection, reduce the temperature by about 25°F and start checking for doneness about 25% earlier than the times listed above.
Air fryers use the same convection principle in a smaller chamber, which makes them even more aggressive. Tenders that take 20 minutes in a conventional oven might be done in 11 minutes in an air fryer. The trade-off is texture: air fryers produce a crunchier coating, but lean chicken can dry out quickly if left unattended.
If your tenders have a thick sauce coating or your oven has pronounced hot spots, the conventional method generally produces the most reliable results. If maximum crispness is your priority, the air fryer is worth trying — just check a minute or two earlier.
Common Mistakes That Ruin BBQ Chicken Tenders
1. Skipping The Thermometer
Color tells you about browning, not safety. A tender can look deeply bronzed and still be undercooked at the center, especially when barbecue sauce darkens the surface quickly. A good instant-read thermometer is the single best tool for consistent poultry.
2. Saucing Too Early
Adding sauce at the beginning creates a sticky layer that scorches at the edges while the center of the tender remains undercooked. The sugars in the sauce darken long before the meat is done. Keep the sauce for the final few minutes.
3. Crowding The Pan
When tenders touch, they steam instead of roast. The trapped moisture prevents browning and slows heat penetration, so you end up baking longer to compensate — and often overcompensating at the edges. Use two trays if necessary, or bake in batches.
4. Ignoring Oven Hot Spots
Most ovens have uneven heat distribution. The back corner may run 20–25°F hotter than the front of the tray. Rotate the sheet pan halfway through cooking to promote even browning. If this happens repeatedly, check the oven thermometer and adjust your rack position.
5. Skipping The Rest
Resting tenders for just 3–5 minutes after baking allows juices to redistribute throughout the meat. Cut into them immediately and the juices run out onto the cutting board, leaving the chicken dry. The resting window is short but makes a real difference.
6. Baking On A Bare Sheet Pan
Without a wire rack, the underside of each tender sits directly on hot metal and can steam or burn unevenly. A rack elevates the meat, encourages airflow, and produces more even results. If you don’t have a rack, flip the tenders halfway through and drain any liquid that pools on the pan.
Thawing Frozen Tenders Before Baking
Baking frozen chicken tenders works, but it takes longer and often produces less even results. Starting from frozen adds roughly 8–12 minutes to the total bake time because the meat must first warm through ice crystals before the center can climb toward 165°F.
If you’re short on time, the fastest safe method is thawing in a bowl of cold water for 30–45 minutes, then patting dry and baking. Avoid thawing at room temperature, which invites bacterial growth. Change the water every 20–30 minutes if the tenders are still partially frozen.
If you bake from frozen:
- Reduce the oven temperature to 400°F.
- Bake for about 20 minutes before checking the internal temperature.
- Hold off on sauce until the tenders are nearly done.
- Add 5–8 minutes if the tenders are frozen in a solid block rather than separated.
The texture difference between properly thawed and still-frozen tenders is noticeable, so a little advance planning pays off.
Make-Ahead Prep, Storage, And Reheating
You can streamline weeknight cooking without sacrificing quality.
Season ahead: Pat the tenders dry, season them, and refrigerate uncovered on a wire rack for up to 4 hours. The surface dries slightly, which improves browning.
Sauce after baking, not before storage: Store cooked tenders plain or lightly sauced. Reheat them before adding a fresh glaze so the barbecue sauce doesn’t scorch on the second heat cycle.
Reheating: Bake leftover tenders at 350°F for 8–10 minutes, or until the center reaches 165°F again. Add sauce during the last 2 minutes. The microwave works in a pinch, but it softens the exterior.
Frequently Asked Questions
How long do you bake BBQ chicken tenders at 400°F?
At 400°F, expect 18–24 minutes for standard-sized tenders. The lower temperature means a slightly longer bake, but it’s more forgiving if your oven tends to run hot. Always verify with a thermometer reading of 165°F at the thickest point.
Do you bake chicken tenders covered or uncovered?
Uncovered. Covering the tray traps steam, which softens any coating and prevents browning. The goal is dry heat that evaporates surface moisture and caramelizes the sauce. If the tenders are browning too quickly, loosely tent them with foil for the last few minutes rather than removing them from the oven.
How do I know when tenders are done without cutting into them?
Use an instant-read thermometer. Insert the probe sideways into the thickest portion of the largest tender, making sure the tip sits in the center of the meat without touching the pan. At 165°F, they’re safe to eat regardless of how they look on the surface.
Should I flip chicken tenders while baking?
Not strictly necessary if you’re using a wire rack. If baking directly on a sheet pan, one flip at the halfway point promotes even browning and helps prevent a soggy bottom.
Can I use frozen pre-cooked tenders?
Yes. Pre-cooked frozen tenders only need to be reheated, not fully cooked. Bake them at 400°F for about 10–12 minutes, then glaze with sauce and return to the oven for 3–4 minutes. Check that they reach 165°F, since product thickness and oven temperature vary.
Why did my barbecue sauce burn even though I added it late?
The sauce may have been applied too early, too thick, or the oven may be running hotter than the dial shows. Use a thin layer during the final 3–5 minutes, check your oven thermometer, and move the rack to the middle position. Very sweet sauces burn faster than vinegar-based sauces.
A Quick Note On Internal Links To Related Cooking Guides
If you’re building a full barbecue menu, these guides use the same fundamental temperature-and-timing logic:
- Burger doneness guide for ground beef that reaches a safe internal temperature.
- Oven-roasted pork chops for a lean cut with a similar browning challenge.
- Low-and-slow pork option when you want sauce to develop over hours instead of minutes.
- Smoking fish from a cold start for another protein that rewards patience and internal-temperature checks.
Bake With Confidence
Perfect BBQ chicken tenders come down to three principles: bake hot at 425°F, measure doneness by internal temperature rather than the clock, and add the sauce at the end so it glazes instead of burning.
Set a timer for the low end of the recommended range — around 14–15 minutes for standard tenders — and start checking with your thermometer. Once you know how your oven runs and how thick your tenders usually are, you can stop relying on guesswork and start pulling the tray at exactly the right moment.
The first batch becomes your reference point, and after that, consistent barbecue chicken tenders are simply a repeatable process rather than a gamble.