How Long Does Chicken Poop Take to Compost for Safe Use?
Fresh chicken manure is one of the most valuable soil amendments a backyard gardener can produce—but only if it’s handled correctly. Apply it too early, and you risk burning plants, spreading pathogens, or stinking up the neighborhood. The real question isn’t just how long composting takes; it’s how long until the compost is safe to touch your garden.
In a well-managed hot pile, chicken manure can be garden-ready in about 8 to 11 weeks total (active composting plus curing). In a passive pile, expect 6 to 12 months. The difference comes down to heat, carbon balance, moisture, and how often you turn the pile. This guide breaks down every factor so you can predict your timeline—and trust the result.
Why Timing Matters for Safe Use
Chicken manure is a “hot” nitrogen source. That’s not a metaphor: it heats up rapidly during decomposition, and raw manure contains high levels of ammonia and soluble salts. When applied directly to soil, those compounds can draw moisture out of roots, scorch leaves, and create an environment where E. coli, Salmonella, and other pathogens survive.
Composting solves these problems through two distinct phases:
- Active heating reduces pathogen levels. The USDA National Organic Program specifies that compost containing animal manure should reach 131°F (55°C) for at least 3 days in a turned pile, or 131°F for 15 days in a static aerated pile, to be considered safe for crops intended for human consumption. You can review USDA organic standards for the full technical requirements.
- Curing then stabilizes the material so it won’t rob nitrogen from your soil or stress young roots. Compost that hasn’t cured is still biologically active and can actually compete with plants for nutrients.
Skipping either stage is the most common reason people see stunted seedlings, yellowing leaves, or a sour smell around their beds. The good news: once you understand the timeline, you can plan your pile around planting dates with confidence.
Typical Composting Timelines for Chicken Manure
How long does chicken poop take to compost? The honest answer depends on your method. Here’s a realistic breakdown for a backyard setup:
| Composting Method | Active Composting | Curing Time | Total Time | Turning Frequency |
|---|---|---|---|---|
| Hot (managed) | 4–8 weeks | 3–6 weeks | 8–11 weeks | Every 3–7 days |
| Warm (semi-passive) | 3–6 months | 4–8 weeks | 4–8 months | Every 2–4 weeks |
| Cold (passive) | 6–12 months | 2–3 months | 8–15 months | Rarely or never |
These are ranges based on typical home conditions. Your actual time will shift depending on pile size, weather, bedding type, and how consistently you maintain moisture and air.

A hot compost pile with balanced carbon and nitrogen can finish active composting in as little as four weeks, but curing is still required before garden use.
Cold and warm piles are more forgiving if you have space and time, but they require patience. Hot composting is the fastest route to a safe product, and it’s the method we’ll focus on most in this guide. For a deeper dive into the overall process, see this overview of composting chicken litter.
Key Factors That Speed Up or Slow Down Composting
Composting is a biological process, and microbes only work as fast as their environment allows. Chicken manure is already rich in nitrogen, so the limiting factors are almost always carbon, oxygen, moisture, and heat.
1. Carbon-to-Nitrogen Balance
Fresh chicken droppings have a carbon-to-nitrogen (C:N) ratio around 6:1 to 10:1—far too low for efficient composting. You need to add “browns” like dry leaves, straw, shredded cardboard, or wood shavings to bring the overall pile closer to 25:1 or 30:1. A practical rule: mix one part manure and bedding with two parts dry leaves or straw by volume.
Too much nitrogen creates a slimy, ammonia-smelling pile that stalls. Too much carbon dries it out and slows decomposition to a crawl. The sweet spot smells earthy and feels like a wrung-out sponge.
2. Moisture
Microbes need water, but not too much. The ideal moisture content is 40–60%—that’s the “wrung-out sponge” feel. If you squeeze a handful and water drips out, it’s too wet and will go anaerobic. If it crumbles instantly, it’s too dry and microbial activity stops.
3. Oxygen
Composting is an aerobic process for the pathogens and odors you care about. Turning the pile introduces oxygen, releases excess heat, and moves outer dry material into the hot center. Without air, the pile goes anaerobic, producing hydrogen sulfide and slowing dramatically.
4. Pile Size and Insulation
A pile smaller than 3x3x3 feet (one cubic yard) won’t hold enough heat to reach the pathogen-killing zone. Larger piles may overheat or compact. Covering the pile with a tarp in cold weather or heavy rain also plays a role.
5. Temperature Management
Heat is both a result and a requirement. A compost thermometer is the single most valuable tool you can buy—it tells you when to turn, when the pile is too hot, and when active composting is finished. Aim for a core temperature between 131°F and 150°F for sustained pathogen reduction.
Hot Composting: The Fastest Safe Method
If you want garden-ready compost this season, hot composting is the answer. It requires more attention, but the payoff is predictable timing and safer results.
Step-by-step process:
- Collect materials. Save coop clean-outs (manure plus pine shavings or straw) in a covered bin until you have enough for a 3x3x3-foot pile.
- Layer the pile. Alternate 3–4 inches of manure/bedding mix with 6–8 inches of dry carbon material like leaves, straw, or shredded cardboard. Keep the ratio roughly 2 parts brown to 1 part manure mix.
- Moisten as you build. Spray each layer until it feels damp but not soggy.
- Monitor temperature. Insert a compost thermometer into the core. It should reach 131°F within a week. If it doesn’t, the pile needs more nitrogen, moisture, or air.
- Turn on schedule. When the core temperature starts to fall below 120–130°F (usually every 3–7 days), turn the pile thoroughly—outside to the center, center to the outside.
- Repeat for 4–8 weeks. After the pile stops reheating significantly, active composting is done.
- Cure. Let the pile sit for 3–6 more weeks, lightly moist, turning once halfway through. Then it’s safe for planting.
For pathogen control, the heat doesn’t just need to spike—it needs to hold. Turning helps every part of the pile reach that 131°F threshold at some point during the process. University extension guidance from Penn State Extension offers additional technical details on manure composting and food safety.
Common mistake: turning too early because the outside feels cool. Check the core before assuming the pile has cooled. The center is where the biology happens.
Cold Composting: What to Expect
Cold composting is simpler, but it asks for patience and space. In this method, you build the pile and mostly leave it alone, adding fresh coop clean-outs to the top as they accumulate. Microbial activity continues slowly, and the pile never gets hot enough to kill all pathogens—so the curing time becomes even more important.
With cold composting:
- Texture changes happen over months, not weeks. Bedding fibers soften, then disappear into a crumbly mass.
- Volume drops by a third or more as carbon is digested.
- Odor shifts from sharp ammonia to a mild, earthy smell—but only after several months.
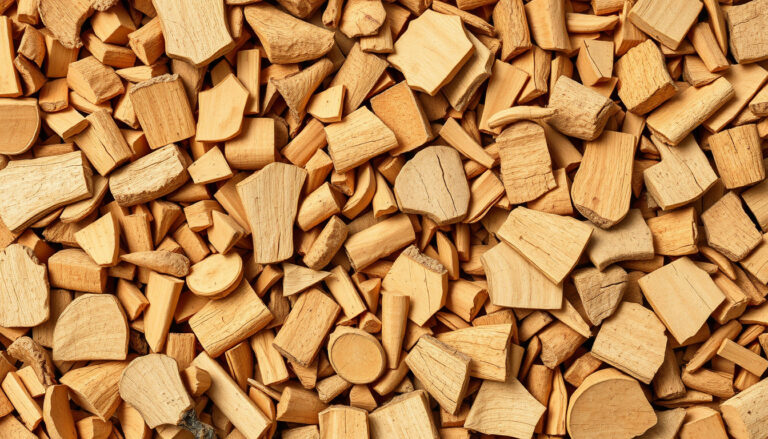
If you choose this route, keep the pile damp, cover it during downpours, and turn it at least once every 4–6 weeks. Even an occasional turn dramatically speeds breakdown compared to a completely neglected heap. Woody bedding like pine shavings or wood chips breaks down even slower—see this comparison of wood chip decomposition timelines for what to expect.
Cold composting is best for gardeners with a second, out-of-the-way bin and no urgent need for compost. It’s also a good fallback if you can’t maintain a hot pile through winter.
How to Tell When Chicken Manure Compost Is Finished and Safe
“Finished” is not about the calendar—it’s about stability. Unfinished compost can still burn plants or carry pathogens, even if it looks dark. Use these five signals before applying chicken manure compost to any bed:
1. Temperature check. The pile stays at ambient temperature for a full week after turning. If a handful taken from the center still feels warm, it’s not done.
2. Smell test. A sour, ammonia, or “hot” poultry litter smell means excess nitrogen is still present. Finished compost smells like a damp forest floor—earthy and pleasant.
3. Texture. The material should be dark, crumbly, and uniform. You shouldn’t be able to pick out recognizable manure clumps or large bedding flakes. A few small woody bits are fine, but they shouldn’t dominate.
4. Germination test. Fill a small pot with your compost, sow fast-germinating radish or lettuce seeds, and keep it moist. If seedlings emerge evenly and stay green for 10–14 days without scorched tips, the compost is stable. If they wilt or turn yellow, cure for 4 more weeks and retest.
5. Volume reduction. Expect at least a 30–50% reduction from the original pile. If the pile hasn’t shrunk noticeably, decomposition likely stalled.

A handful of finished compost should be dark, crumbly, and smell like rich soil—if it still resembles bedding or manure, it needs more time.
When in doubt, cure longer. An extra month of curing costs nothing but time, and it’s far cheaper than replacing damaged plants. For more on balancing materials, see how grass clippings break down as a green that needs the same carbon balance.
Using Finished Compost Safely in Your Garden
Composted chicken manure is nutrient-dense, not a bagged potting mix. Apply it like a soil builder, not a fertilizer spike. Over-application is the second most common mistake after using it too early.
Safe application guidelines:
- New beds: Spread 1–2 inches of finished compost and work it into the top 6–8 inches of soil 2–4 weeks before planting heavy feeders like tomatoes, squash, or peppers.
- Established plants: Side-dress with a thin layer (½ inch), keeping it 2–3 inches away from stems and crowns to prevent rot and salt stress.
- Containers: Mix no more than 20–25% compost into potting soil. Too much can hold excess moisture and raise salt levels. If you’re filling decorative pots, choosing the right container plant colors can also help manage soil temperature and moisture.
- Storage: Keep finished compost covered and slightly moist until use. Bone-dry compost loses microbial life and can blow away.
If your plants show dark green leaves but few flowers after applying composted manure, that’s a sign of nitrogen overload—pause feeding and add a carbon-rich mulch to rebalance. Always wash produce grown in manure-amended soil, even when compost is fully matured.
After you’ve used your finished product, you can keep the cycle going by adding vegetable scraps to your next pile for a steady supply of balanced compost.
Common Mistakes and How to Avoid Them
Most composting failures come from a handful of repeatable errors. Recognize them early and you’ll save months of frustration.
| Mistake | What Happens | How to Fix It |
|---|---|---|
| Too much nitrogen | Ammonia smell, slimy texture, flies | Add dry leaves, straw, or shredded cardboard immediately and turn the pile. |
| Too much moisture | Anaerobic smell, no heat, mushy pile | Add dry browns, cover from rain, and turn to reintroduce oxygen. |
| Pile too dry | Little or no heat, visible dry manure | Water evenly while turning until “wrung-out sponge” damp. |
| Not turning enough | Hot core but cold exterior, uneven breakdown | Turn every 3–7 days for hot piles, or at least monthly for cold piles. |
| Using it too early | Burnt seedlings, yellowing, stunted growth | Run the germination test; if it fails, cure another 4–8 weeks. |
| Poor location | Runoff into wells or drains, nutrient leaching | Site the pile on high ground at least 50 feet from water sources. |
A common mistake is assuming a finished-looking pile is safe. Always verify with temperature and smell before applying. For a complete picture of what can go wrong and how pH and moisture interact, the detailed guide to composting chicken manure walks through more scenarios.
Frequently Asked Questions
Can I put fresh chicken poop directly on my garden?
No. Fresh chicken manure is too high in nitrogen and ammonia and may contain pathogens. It will burn roots and leaves and can contaminate produce. Compost it first—either hot compost for speed or age it in a cold pile for 6–12 months until stable and earthy.
How long until chicken manure stops smelling?
In a hot pile, the sharp ammonia odor usually fades within 2–3 weeks as carbon materials absorb nitrogen and microbial activity ramps up. In a cold pile, it can take 3–6 months. If the pile still smells after 4 weeks, add more dry browns and turn it.
Is chicken manure compost safe for vegetable gardens?
Yes—if it has been properly composted. Hot composted manure that held 131°F for at least 3 days (turned) meets USDA organic standards for food crops. Always cure afterward and wash produce before eating. Cold composted manure should age at least 6–12 months before use on vegetables.
What’s the fastest way to compost chicken poop?
Use the hot composting method. Build a 3x3x3-foot pile with a 2:1 ratio of carbon (leaves, straw, shavings) to manure, keep it damp, and turn every 3–7 days. Active composting can finish in 4–8 weeks, followed by 3–6 weeks of curing for a total of about 8–11 weeks.
Can I use chicken manure compost on houseplants?
Use sparingly. Mix no more than 20% finished compost into potting soil. Too much holds moisture and raises salt levels, which can damage roots. Also ensure the compost is fully cured and smell-tested before bringing it indoors.
Does chicken manure compost need to be covered?
Covering the pile with a tarp helps in rainy climates by preventing waterlogging and nutrient leaching, and in cold weather by retaining heat. However, it shouldn’t be airtight—allow some airflow to keep the pile aerobic. In dry climates, uncovered is fine as long as you monitor moisture.
Conclusion
How long does chicken poop take to compost for safe use? In a managed hot pile, plan for 8–11 weeks from start to garden-ready compost. If you take a hands-off approach, expect 6–12 months or more. The key is to balance carbon and nitrogen, maintain sponge-level moisture, and verify completion with temperature and smell—not just the calendar.
Your next step is simple: choose your method, gather your materials, and start the pile today. Track temperatures weekly, turn on schedule, and run a quick germination test before planting. The result is a free, safe, nutrient-rich amendment that your garden will thank you for.
For a complete walkthrough of the process from coop to garden, revisit the full guide on composting chicken manure before you build your first pile.