How To Winterize An Outboard Boat Engine: Step-By-Step Checklist For Safe Cold-Weather Storage
Winterizing an outboard engine is the most important maintenance task in the boating year — and the one most often delayed until it’s too late. Freeze damage, fuel varnish, and internal corrosion are predictable failures: they happen when water gets trapped, fuel is left untreated, and unprotected metal sits for months in a humid environment. None of these issues are mysterious, and all of them are preventable with a disciplined, step-by-step process.
This guide walks through a complete cold-weather storage routine for carbureted and fuel-injected outboards. I’ll cover the real risks, the exact supplies to gather, inspections worth doing before you start, and a detailed seven-step sequence you can follow in an afternoon. I’ll also cover the mistakes that routinely lead to spring-start failures, so you can avoid learning the hard way. You can also read our guide on how to winterize a stroke outboard motor.
By the end, you’ll have a usable checklist, not just a list of ideas. The goal is simple: put the boat away properly, walk away with confidence, and have the engine start readily when the weather warms up.
Why Winterizing Matters: The Real Risks of Cold-Weather Storage
Winterization protects against three primary threats: internal corrosion, fuel degradation, and freeze water-expansion freeze damage — often working in combination. You can also read our guide on how much does it cost to winterize a boat.
Water left in the cooling system is the most destructive risk. When water freezes inside an engine block, manifold, or cooling passage, it expands with tremendous force. The result can be a cracked block, a warped head, or a damaged water pump housing — often not visible until spring. Smaller cracks may even go unnoticed until the engine overheats on the first run.
Untreated fuel in the tank, fuel lines, and carburetor or injector rails breaks down through oxidation. Ethanol-blended gasoline, common at many fuel docks and gas stations, is especially problematic. As fuel ages, it forms varnish and gum that clogs jets and injectors. In severe cases, it forms a sticky residue that requires a full fuel-system teardown and professional cleaning. You can also read our guide on how to get rid of an old boat.
Internal moisture causes rust on cylinder walls, bearings, and other precision surfaces. Without a protective fogging oil film, condensation cycles — warm days followed by cold nights — lead to oxidation that shows up as rough starts and reduced compression in the spring.
A cracked block, corroded powerhead, or seized fuel system can easily cost more than a season of routine maintenance. The hour or two required for proper winterization is cheap insurance by comparison. You can also read our guide on how to drive pontoon boat.
The timing also matters. Complete winterization before the first hard freeze, while you still have easy access to the boat and water systems. Many people wait until “one last day on the water,” only to be surprised by an early cold snap. In practice, once sustained overnight temperatures dip near freezing, you’re already late.
Gather Your Supplies: What You Need Before You Start
Running to the store mid-job creates an easy excuse to skip steps. So gather everything first. I’ve broken this into two lists: core materials and inspection-focused items.
Essential Tools and Materials
Fuel stabilizer — Choose a product rated for ethanol-blended gasoline. Read the dosage label, which commonly ranges from 1 ounce per 5 gallons to 1 ounce per 10 gallons, depending on the brand.
Engine fogging oil — Aerosol designed to coat internal cylinder surfaces for storage. Some marine brands also offer a storage seal product.
Gear oil — Manufacturer-specified lower unit lubricant, typically SAE 90 or a multi-viscosity marine gear oil. Check the manual.
Gear oil pump — Fits the fill and drain fittings on the lower unit.
Flush muffs or a manufacturer-recommended flush attachment — For running the engine safely on land with a garden hose.
Corrosion inhibitor spray — For exposed metal, electrical connections, and fasteners.
Dielectric grease — Seals electrical connectors against moisture.
Basic hand tools — Socket set, wrenches, screwdrivers, torque wrench.
Catch pan and absorbent pads — For draining oil and catching drips.
Clean shop rags — For inspecting fluids, wiping surfaces, and handling drain screws.
Funnel — Keeps fuel stabilizer and gear oil clean.
Marker and notebook — Label hoses, note torque specs, and record service intervals.
Inspect Before You Turn a Wrench
Before starting, secure the boat on a trailer or lift and remove the ignition key. Then walk through a focused inspection:
- Check the lower unit for signs of water intrusion — milky or emulsified oil around the drain screw is the classic warning sign.
- Look at fuel lines for brittleness, cracks, or loose clamps.
- Inspect the prop for nicks, bent blades, or fishing line wrapped around the shaft.
- Move the shift linkage through its range and confirm smooth movement.
- Check the telltale hose and outlet for blockages from mud, salt, or insect nests.
These inspections are small, but they reveal issues that can become expensive emergencies in freezing conditions. A cracked telltale hose, for example, can cause the engine to overheat during your cooling-system flush — long before winter even arrives.
Storage location: Choose a dry, ventilated area. A shed or garage is ideal. If告 covers are used, make sure air can circulate; a plastic tarp pulled tight against the cowling traps humidity. Tilt the engine to the manufacturer’s recommended storage position so water can drain from cooling passages and the exhaust.
If your boat lives outside, consider investing in fitted covers rather than struggling with generic tarps — for related guidance on preparing a boat for storage conditions, how to clean a boat thoroughly first.
Step 1: Flush the Cooling System
Flushing clears salt, sand,森的 and accumulated debris from the cooling passages and replaces corrosive seawater with fresh water. For saltwater boats, this step is non-negotiable. Salt residue attracts moisture and accelerates corrosion, even when temperatures stay above freezing.
The process:
- Connect flush muffs to the lower unit and a garden hose.
- Turn on the water before starting the engine, then start it at idle.
- Run long enough for the thermostat to open — typically 10 to 15 minutes.
- Watch the telltale stream. It should be steady and strong. A weak or intermittent stream mayays indicate a partial blockage.
- Turn off the engine, then turn off the water. Running the engine first and shutting down last is a critical safety sequence; shutting off water prematurely can cause overheating.
After flushing, tilt the engine up and down several times to help drain low-point water from the cooling passages and exhaust housing.

A steady telltale stream confirms the cooling system is circulating water properly before fogging.
A common mistake is assuming the visible discharge is the only water. Low-point hoses and the water pump area can hold water even after the flow stops. Tilt the engine fully to the manufacturer’s storage angle, and verify the drain path remains clear.
Step 2: Stabilize the Fuel System
Fuel is the most common point of spring failure in stored outboards. It doesn’t matter if the engine runs fine in October; untreated fuel left in lines and the carburetor bowl can gum up by March.
How to Stabilize Correctly
1. Fill the tank to about 90% full. A nearly full tank minimizes the air space inside, which reduces condensation that introduces water into the fuel. Don’t fill to the brim — fuel expansion in warm weather can force leaks.
2. Add the correct dose of fuel stabilizer. Check the label for exact ratios. Use a funnel to avoid spilling concentrate onto painted surfaces. If the tank is large, calculate the dose precisely rather than estimating.
3. Run the engine for 10 to 15 minutes. This pushes treated fuel through the entire delivery path — the tank, fuel lines,焉 fuel pump, and into the carburetor or injector rails. The goal is to protect every surface the fuel touches. Without this run, stabilizer sits in the tank while untreated fuel remains lines.
Carbureted vs. Fuel-Injected Engines
Carbureted: After running the treated fuel through, consider draining the float bowl. This is especially important if the engine will sit for more than six months. A small drain screw on the bowl makes this easy, but check the manual first — some manufacturers recommend against draining because it can dry out seals.
Fuel-injected: Most fuel-injected outboards should not be drained or have their lines disconnected. Doing so can introduce air into the high-pressure system and make spring starting a headache. Follow the manual’s advice for your specific model. In practice, a fuel-injected outboard that has been run on stabilized fuel and then shut down normally has the best chance of smooth spring starts.
When Old Fuel Is the Problem
Fresh stabilizer does not undo degradation that has already happened. If the existing fuel is more than a few months old, or if phases have separated, drain the tank and dispose of the old fuel properly. Adding fresh treated fuel on top of suspect fuel only wastes the stabilizer.
Step 3: Fog the Engine
Fogging coats cylinder walls, pistons, and moving internal components with a protective oil film. This is the layer between bare metal and cold-season condensation. It’s essential, but it only protects the combustion chamber — not the cooling system, fuel system, or lower unit.
Fogging Techniques for Different Engines
For carbureted engines: With the engine running at a fast idle, spray fogging oil directly into the carburetor intake. Use short bursts — enough to produce visible smoke, but not so much the engine stalls. While the final burst the engine off. The result: a heavy oil coating on the cylinder walls.
For fuel-injected engines: The intake path is not a reliable fogging point on many EFI outboards. Instead:
- Remove the spark plugs.
- Spray a generous amount of fogging oil into each cylinder.
- rotate the flywheel by hand a few times to distribute the oil.
- Reinstall the spark plugs (another thin coat of anti-seize is optional but helpful).
When to Fog
Fog after the cooling system flush and after stabilized fuel has run through the engine. Familiar order matters. If you fog too early, you risk leaving residual water in the cooling system; if you fog too late (after storage has started), you miss the opportunity.
After fogging, disconnect the fuel line if your setup allows it. On portable tanks, this prevents pressure buildup and fuel siphoning during storage.
Step 4: Change the Lower Unit Gear Oil
The lower unit contains gears, bearings, and the driveshaft — all precise金属 components that must remain lubricated and water-free. Water intrusion here is insidious: if it freezes, it can crack the housing and destroy the gears.
The correct procedure:
- Position a catch pan beneath the lower unit.
- Remove the fill screw first, then the drain screw. This creates a vacuum break that allows smooth drainage.
- Inspect the draining oil. The color should be clean and amber. Milky or grey oil indicates water entry; further inspection is needed, as a seal may have failed.
- If the the oil is工作了, replace during storage. If it’s clean but the interval is due, change it now — fresh oil is a cheap insurance policy against unseen moisture.
- Refill from the bottom drain hole using a pump. Fill until oil begins to seep from the fill hole. That’s the correct level.
- Replace the fill and drain screws with new O-rings (if specified) and torque to the manufacturer’s value.
A practical observation: even if the gear oil appears clean, changing it at every winterization is a good habit. During the process you learn whether water has entered the gearcase — information you want before freezing temperatures arrive. A low-priced rebuild is far more expensive than a bottle of marine gear oil.
Step 5: Protect the Electrical System and Battery
Cold weather is hard on batteries. A fully charged battery left in freezing temperatures can lose charge and, in worst cases, freeze internally. Corroded terminals create voltage drops that mimic fuel problems.
Battery Care and Charging
- Disconnect the negative cable first, then the positive. This order avoids shorting against the engine block.
- Clean the terminals with a wire brush until bright, then apply a light coat of dielectric grease.
- Store the battery in a cool, dry place — on a bench, wooden block, or shelf is fine. Keep it off the bare ground, especially a concrete floor.
- Charge fully before storage. Then check the voltage monthly with a voltmeter. A maintenance charger designed for long-term float charging is ideal; a standard automotive charger left connected indefinitely can overcharge.
For AGM or lithium batteries, follow the manufacturer’s storage guidance. These require different charging profiles and should not be糟 treated like flooded lead-acid.
Wiring and Connectors
Inspect the wiring for chafing, loose connections, or green corrosion at the terminals. Clean any corrosion with a wire brush or a dedicated terminal cleaner. Apply dielectric grease to seal out moisture. Check throttle, shift and trim wiring for pinch points. Secure loose harnesses with zip ties or clips.
Step 6: Apply Corrosion Protection and Cover the Engine
Once internal systems are protected, address the exterior. Spray a corrosion inhibitor on exposed metal: driveshaft, trim cylinders, fasteners, and any areas where paint has worn through. Pay special attention to saltwater boats, where a dusty salt film can attract moisture. Clean the bilge and wipe down the cowling before covering. A bilge left wet promotes rust and mildew.
Cover Choice
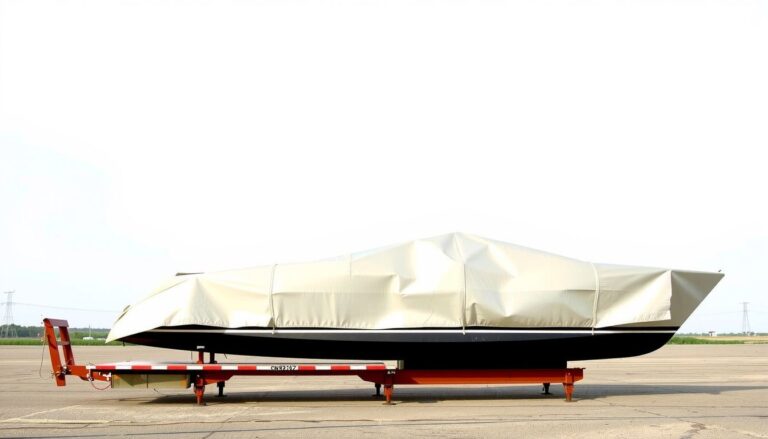
A breathable cover种植 best. A fitted boat cover or a breathable tarp allows air circulation while keeping rain, snow, and debris out. A solid plastic sheet pulled tight against the engine traps moisture and creates a greenhouse effect — condensation forms on metal surfaces and undermines the winterization work. If a plastic tarp is your only option, raise it slightly with supports to create air space.

A ventilated cover allows condensation to escape while blocking rain and snow.
Step 7: Final Pre-Storage Checklist
This checklist is designed to catch missed steps before you walk away. Run through each stage in order.
Stage 1: Fluids and Internal Protection
- Fuel stabilized at the correct dose and run through the the entire fuel path.
- Engine fogged through the intake or spark plug holes per manufacturer guidance.
- Gear oil changed and at the correct level.
- Lower unit drain and fill screws re-torqued to the manufacturer’s spec.
Stage 2: Cooling and Water Removal
- Cooling system flushed with fresh water and drained.
- Engine tilted to the storage angle.
- Telltale stream stopped completely when the时 engine was off and tilted.
- No water visible at drain holes, telltale, or prop hub after tilting.
Stage 3: Electrical and Battery
- Battery removed, cleaned, charged, and stored on a maintainer.
- Terminals coated with dielectric grease.
- All connectors sealed and wiring secured.
Stage 4: Exterior and Cover
- Corrosion inhibitor applied to exposed metal.
- Bilge clean and dry.
- Breathable cover installed and secured.
Common Winterization Mistakes That Cause Spring-Start Failures
Learning from other boaters’ mistakes is cheaper than repeating them. These are the most common failure patterns I see each spring.
Fuel Stabilizer Misuse
Some boaters treat fogging as a substitute for fuel stabilization. These are separate jobs: fogging doubt oil protects internal metal; stabilizer protects the fuel system. Another frequent mistake is adding stabilizer but not running the engine long enough. If treated fuel never reaches the carburetor bowl or injector rails, those components remain vulnerable while you think the job is done.
Trapped Water in the Cooling子 System
A weak telltale stream during the flush is a red flag. it should be addressed before storage, not after. A blocked cooling passage may trap water even after the visible discharge stops. That water later freezes and expands. Always verify a strong, steady telltale during the flush and tilt the engine through its full range before covering.
“I’ll Deal With It In Spring”
Delaying battery removal, fuel treatment, or gear oil inspection is the root cause of most spring-start failures. A boat stored and forgotten for months is often a boat that won’t start when you need it. The whole point of winterization is front-loading the effort so spring is trouble-free.
Frequently Asked Questions
What is winterizing an outboard boat engine?
Winterizing is a systematic process of preparing an outboard for extended cold-weather storage. It involves treating fuel, flushing the cooling system, protecting internal components with fogging oil, servicing the lower unit, and protecting the electrical system. The goal is to prevent corrosion, fuel varnish, and freeze damage during months of inactivity.
How do I winterize an outboard with fuel still in the tank?
“Fill the tank to about 90% with fresh fuel, add the correct dose of stabilizer, and run the engine for 10 to 15 minutes to circulate treated fuel through all fuel-handling components. For carbureted engines, draining the float bowl may also be advised, but check the manual first.
Is fogging an outboard enough by itself?
No. Fogging protects cylinder walls and moving internal engine parts, but it does nothing for the cooling system, lower unit, or fuel system. Complete winterization requires all steps: flush, fuel, fog, lower unit service, and electrical protection.
How long should I run the outboard to circulate antifreeze or treatment?
The goal is to allow the thermostat to open and the treated fuel to reach every fuel-handling component. This typically takes 10 to 15 minutes at idle. Watch for a steady telltale stream to confirm the cooling系统 is functioning normally during the run.
Should I’m change the lower unit gear oil before winter storage?
Yes. Changing the gear oil every season — or at least inspecting it thoroughly — tells you whether water has entered the gearcase. Milky or grey oil means water contamination, and the early warning is invaluable before freezing temperatures arrive.
Conclusion
Winterizing an outboard engine is not complicated, but it is sequential. Treat the fuel, flush and drain the cooling system, fogging the cylinders, service the lower unit, protect the electrical system, and only then cover the boat. Each step protects a distinct system, we skipping any one leaves a specific vulnerability.
The payoff comes in spring: turn the key, hear it start, and head out without the frustration of sour fuel, corroded terminals, or worse. The hour or 두 spent now returns itself many times over in avoided repair bills and lost weekends.
Before you lock the boat away, review your engine manual’s storage guidance one more time. Note exact fogging procedures, torque specs, and drain locations. Then schedule an early-spring inspection for the first warm day. For more on keeping your船 in top shape, cleaning and maintaining the hull and boat surfaces is a natural next step, and if you’re planning an upgrade, a reliable pontoon on a budget can change your whole season.
When spring arrives, you’ll find the effort was worth it.