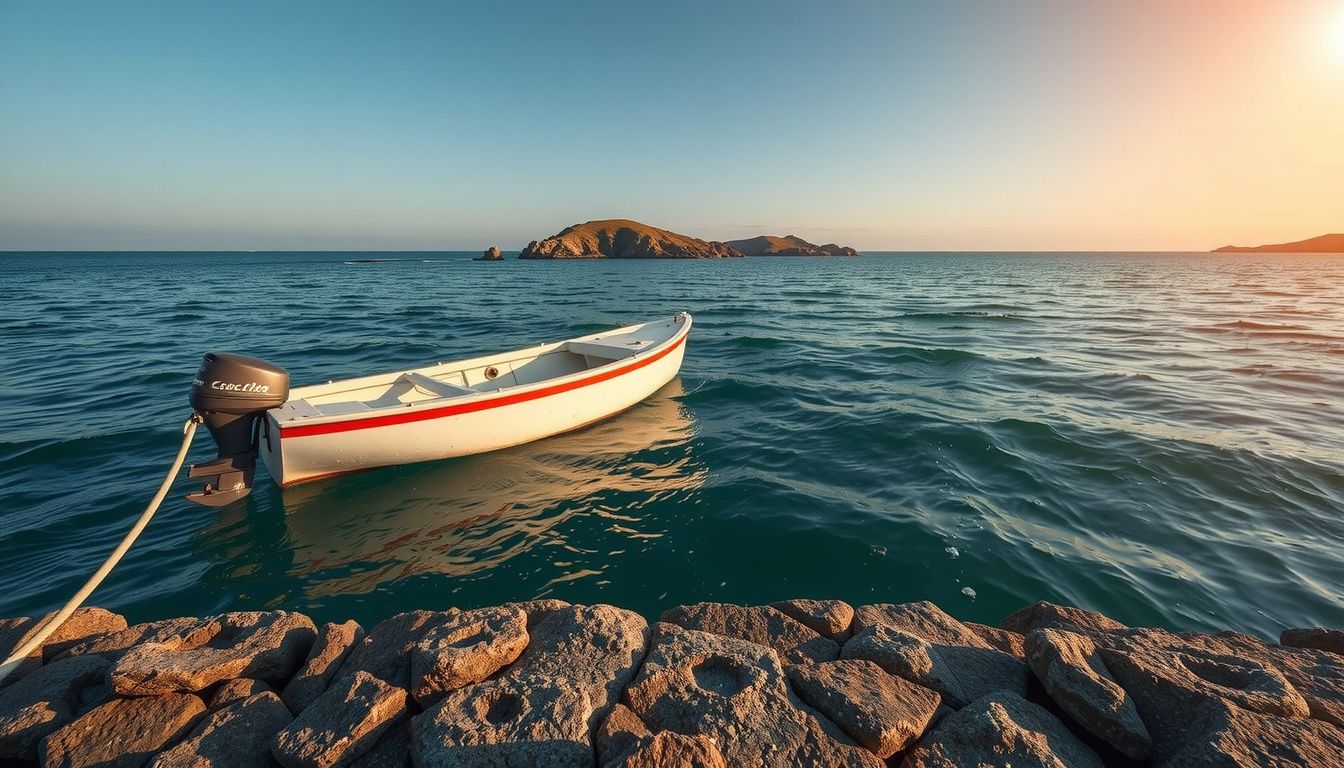
How to Anchor a Boat Step-by-Step for a Secure Hold
Anchoring looks simple until the wind picks up at 2 a.m. and you're not sure if the boat is creeping toward the rocks. Most dragging incidents aren't caused by bad luck — they're caused by skipped steps, rushed sets, and scope that was guessed instead of calculated.
This guide breaks down anchoring into a repeatable sequence: choose the right spot, deploy the correct amount of rode, set the anchor under load, verify it's holding, and retrieve it without drama. Whether you're stopping for a lunch swim or staying overnight in a cove, the process is the same — only the margins change. You can also read our guide on how long to finance a boat.
You'll learn how to match your anchor to the seabed, calculate scope properly, avoid the mistakes that cause dragging, and build a routine that keeps the boat exactly where you left it.
Understand Anchor Types, Rode, and Scope Basics
Before dropping anything overboard, you need to understand the three components that determine whether your anchor holds: the anchor design, the rode (line or chain), and the scope (ratio of rode to depth). These work as a system — get one wrong and the entire set is compromised. You can also read our guide on how often do you clean a betta fish tank.
Common Anchor Styles and Where They Work
Most recreational boats carry one or two anchor designs. Each performs differently depending on the bottom:
| Anchor Type | Best Bottom | Weaknesses | Notes |
|---|---|---|---|
| Fluke (Danforth-style) | Sand, soft mud | Poor in weeds, rock, hard clay | Excellent holding-to-weight ratio; popular on smaller boats |
| Plow (CQR/Delta) | Sand, mud, grass | Can struggle in very soft mud | Resets well after wind shifts; good all-around choice |
| Claw (Bruce-style) | Sand, mixed bottoms | Less bite in hard mud, clay | Sets quickly; forgiving of imperfect technique |
| Mushroom | Soft mud, silt | Nearly useless in sand or rock | Only for small boats, moorings, or temporary use |
| Grapnel | Rock, reef | Poor holding in sand | Folding design; more of a retrieval tool for debris |
In practice, a fluke anchor with a chain leader is a solid choice for most lake and protected-bay anchoring. If you routinely anchor in areas with weeds or shifting wind, a plow or claw design will reset more reliably when the boat swings.
Rode: Chain, Nylon, or Both
The rode is the connection between your boat and the anchor. It serves two purposes: transmitting load and absorbing shock. You can also read our guide on best family boat for lake.
- All-chain rode: Heavy, abrasion-resistant, and keeps the pull angle low (which improves holding). Best for larger boats with windlasses, but expensive and heavy.
- Chain-and-nylon combination: A short chain leader (10–30 feet) followed by nylon line. The chain adds weight and chafe resistance at the anchor end; the nylon provides stretch to absorb wave shock. Most practical setup for recreational boats.
- All-nylon rode: Light and stretchy, but prone to chafe on rocks and doesn't keep the shank as low. Only recommended for small boats in calm conditions.
A common mistake is using all-nylon rode without a chain leader. Without chain weight, the pull angle on the anchor rises quickly in gusts, which can trip the anchor out of the bottom.
Scope: The Number That Prevents Dragging
Scope is the ratio of rode length to water depth (including the height of your bow above the water). The right scope keeps the pull on the anchor horizontal rather than upward — and horizontal pull is what digs an anchor in.
- 5:1 scope: Minimum for calm daytime stops with light wind.
- 7:1 scope: Standard for overnight anchoring or building weather.
- 10:1 scope: Storm conditions or when holding is marginal.
Example calculation: If the water is 10 feet deep and your bow roller is 3 feet above the water, your effective depth is 13 feet. At 7:1 scope, you need 91 feet of rode (13 × 7). At 5:1, you need 65 feet.
Many boaters underestimate how much rode this actually requires. An anchorage that feels deep enough at 15 feet needs over 100 feet of rode for a secure overnight set — far more than the 50-foot line many boats carry.
Prepare Before You Start: Gear Check and Safety Setup
Anchoring is a system, and the system only works if the gear deploys cleanly. Tangled rode, a loose shackle, or a bitter end that isn't secured can turn a routine stop into a dangerous situation.
Pre-Deployment Gear Check
Run through these checks before you approach the anchorage:
- Anchor shackle: Verify it's moused (wired or zip-tied) so it can't unscrew under load.
- Rode condition: Look for chafe, knots, or frayed strands. Nylon that's stiff or discolored has UV damage and should be replaced.
- Bitter end: Confirm the end of the rode is tied off inside the anchor locker. Many boats have lost an anchor because the bitter end ran free.
- Bow roller or chock: Check for cracks, sharp edges, and clear lead.
- Windlass (if equipped): Test it under no load before you need it.
Crew Communication and Safety
One person should handle the helm; another should manage the rode. Hand signals work better than shouting, especially in wind. Establish these basics before deployment:
- Never wrap rode around your hand or arm. A loaded line can crush fingers or pull someone overboard.
- Keep feet clear of coils on deck.
- Use gloves — chain and wet nylon can burn or cut.
- Brief the crew on what "drop," "snub," and "break out" mean before anyone moves.
In practice, a 24-foot bowrider anchoring in a crowded cove benefits from pre-flaking 80–100 feet of rode on deck in a figure-eight pattern, with the anchor staged on the roller and a spotter forward. When the helm eases into position, the drop happens smoothly — no pileups, no shouting, no surprises.
Choose a Safe Anchoring Spot Using Depth, Bottom, and Swing Room
Where you anchor matters as much as how you anchor. A good spot protects the boat, holds reliably, and leaves room for changing conditions.
Depth: Plan for Low Water
Always calculate depth at the expected low water, not the depth right now. Check the chart and sounder, then factor in tide range or reservoir drawdown so the keel won't touch bottom overnight.
A boat anchored in 8 feet at high tide with a 4-foot tide range has only 4 feet of water at low tide — and if your draft is 3 feet, that's dangerously tight.
Bottom Type: What Holds and What Doesn't
Sand and firm mud are the most reliable holding grounds. Weeds, rock, and hard clay often prevent the anchor from digging in properly.
- Good holding: Sand, firm mud, clay-sand mix.
- Risky: Thick grass or weed, rubble, smooth rock, hard-packed clay.
- Watch for: Submerged cables, pipelines, and restricted areas marked on the chart.
If the water is clear, verify the bottom visually. If not, read the chart's bottom notation (S for sand, M for mud, Rk for rock) or use a depth sounder's bottom return. What comes up on the anchor when you test it also tells you a lot.
Swing Room: Picture the Full Circle
Your boat will rotate around the anchor as wind or current shifts. Calculate swing room using a full circle with a radius equal to rode length plus boat length — not just the distance to the nearest obstacle right now.
Example: In 12 feet of low-tide water, you plan 7:1 scope (84 feet) for a 28-foot boat. You need roughly 112 feet of clear radius — over 200 feet of open diameter — away from shore, moorings, and other boats.
A common mistake is anchoring too close to a neighbor, then discovering that when the wind shifts, both boats swing on different radii and collide. Leave more room than you think you need.
Plan the Approach: Position Upwind or Upcurrent
The approach controls how cleanly the anchor sets. Arrive slowly, aligned with the force that will load the rode.
Wind vs. Current: What Dominates?
Identify what dominates — wind or current — then approach from directly upwind or upcurrent. In strong current, current usually wins; in light current, wind typically dictates the boat's heading.
- Line up on the intended drop point and reduce speed early.
- Idle forward until the boat is nearly stopped over the target.
- Shift to neutral and let the boat settle straight.
- Lower the anchor under control — never free-fall it near other boats.
- Allow the boat to drift back, feeding rode smoothly.
A common mistake is approaching too fast, then "stopping" with reverse. That can skip the anchor along the bottom and start the set in the wrong direction.
Practical example: A skipper in a tidal river aims upstream of the target, drops as the boat loses way, then pays out rode as the current carries them back. The rode straightens cleanly, and the set begins aligned with the flow.
Lower the Anchor Correctly and Pay Out the Rode in Control
Once you're lined up on the approach, get the anchor down without tangles, shock loads, or a sloppy set. The key is control: the anchor reaches the bottom first, then the rode follows at a steady pace.
Lower the anchor — never throw it. Tossing can flip flukes, wrap the rode around the anchor, or chip the gelcoat. Once it touches bottom, ease the boat astern using idle reverse or natural drift, paying out rode as the boat moves back.
- Feed rode in sync with backward motion, not in big dumps.
- Call out depth and rode marks to hit the planned scope.
- Snub briefly every few feet to help the chain lay out straight.
- Keep light tension so the rode doesn't pile on top of the anchor.
If using chain, feel for a smooth feed; jerks may signal a snag on the bow roller or a cleat. Gloves help, and hands stay clear of pinch points.
Pro tip: In gusty wind, pause at 2:1 scope for 10–15 seconds, letting the anchor orient before paying out to full scope. This prevents the anchor from tumbling and gives it a chance to start digging in the right direction.
A common mistake is locking the rode too early. That can "ski" the anchor across the bottom instead of letting it bite.
 A boat at anchor with rode extending forward, showing proper tension and alignment.
Set the Anchor: Back Down, Build Tension, and Confirm It's Holding
With the rode at the planned scope, you can set the anchor by applying load in stages. Done right, the anchor digs in and stays put when wind or current rises.
The Two-Stage Set
First, snub the rode on a cleat or windlass and let it come taut. Then back down at idle for 10–20 seconds, watching for the bow to swing and the rode to straighten. If it holds, increase power to a firm reverse — often 1,500–2,000 RPM on many cruisers — for another 10–20 seconds.
- Watch shoreline transits or a GPS anchor alarm for movement.
- Feel for vibration: a shuddering rode can signal dragging.
- Check the bow: it should "load up" and stay steady.
Pro tip: Take two bearings (or line up two fixed objects) and recheck after 2–3 minutes. No change usually means it's set.
Common mistake: Jumping straight to high reverse. That can trip some anchors or overload gear before it's aligned.
Practical example: After paying out to full scope, back down in two steps and confirm the same dock piling stays lined up with a tall tree ashore. When the alignment doesn't shift, the anchor is holding.
 Confirmation check using shoreline landmarks while anchored securely.
Verify and Monitor the Anchor: Bearings, Alarms, and Rechecks
Setting the anchor is not the end of the job. Verification keeps the boat from quietly creeping while you're below deck or asleep.
Visual Bearings First
Start with two fixed bearings. Pick shore objects that won't move — a light pole and a roofline, for example — and line them up. If the alignment changes over a few minutes, the boat is likely dragging. Visual bearings often reveal movement sooner than GPS in tight anchorages.
Electronic Alarms as Backup
Set an anchor alarm on your chartplotter or phone with a radius that matches your actual swing room. Recheck the alarm after any change: wind shift, current reversal, or a squall line.
- Feel the rode: steady tension is normal; rhythmic jerks can signal the anchor tripping.
- Verify the alarm radius using actual scope and depth, not guesswork.
- Recheck bearings every 30–60 minutes in changing conditions.
Common mistake: Setting the alarm too tight, then ignoring it after repeated false alerts. If the alarm goes off, check the visual bearings before dismissing it.
Practical example: After sunset, a skipper notices the bearing between a marina flagpole and a hillside house slowly opens. They bump the engine in neutral, confirm the track shows a steady slide, then reset by easing more rode and backing down again before the boat reaches a neighbor's swing circle.
Retrieve the Anchor Cleanly and Store Gear for the Next Set
When it's time to leave, clean retrieval protects the windlass, deck hardware, and rode. It also prevents mud and weeds from turning the foredeck into a slip hazard.
The Retrieval Sequence
Bring the boat slowly up to the anchor using engine power while a crew member takes in rode. The rode should come in as the boat moves forward — the windlass shouldn't be used to "pull" the boat. When the rode goes near-vertical, the anchor is typically ready to break out.
- Pause with the rode vertical and "bump" ahead to pop the anchor free.
- Rinse mud and grass as the anchor comes aboard; keep hands clear of the gypsy.
- Secure the anchor with a pin or strap, and stow the snubber and chain hook.
Pro tip: If the anchor is fouled on a cable or snag, circle gently to change the pull angle before applying more force. Powering hard astern with the rode tight can damage cleats or the windlass.
Practical example: In a muddy river, a crew hoses the flukes as they reach the bow roller, flakes the rode into the locker to avoid tangles, and double-checks the anchor is locked before accelerating.
Regular anchor and rode care also matters. When you're maintaining the rest of the boat, take time to keep your ground tackle in good condition — the same way you'd approach keeping the hull and topsides clean after a season on the water.
Anchor for Different Conditions: Current, Tides, and Busy Anchorages
Most anchoring guides cover calm conditions. Real-world anchoring means adapting to current, tide changes, and boats crowding the same cove.
Strong Current or Tidal Flow
In tidal areas, current reverses every 6 hours or so. Your anchor should reset when the boat swings — which is why plow and claw anchors that reset reliably are preferred over fluke anchors that can break free and fail to re-engage.
- Use 7:1 scope or more in tidal areas.
- Set the anchor in both directions by backing down, then waiting for slack tide and testing again.
- Monitor at current reversal — this is when most dragging happens.
Crowded Anchorages
In busy anchorages, you're dealing with other boats' swing circles, not just your own. Boats anchored at different times with different scope lengths will swing differently.
- Match the scope of nearby boats when possible so everyone swings together.
- Communicate with neighboring skippers if you're anchoring close.
- Use a bow and stern anchor (Bahamian moor) in very tight, tidal locations.
Overnight Anchoring
Overnight anchoring raises the stakes. You need redundancy: an anchor alarm, visual bearings you can check from the cockpit, and a plan for what to do if a squall hits at 3 a.m.
- Set the anchor twice — test it, reset it, test again.
- Brief the crew on the watch schedule and what dragging looks like.
- Consider setting a second anchor if the forecast is uncertain.
If you're anchoring from a pontoon boat, the same principles apply, but you'll want to account for higher windage and different handling. A pontoon-specific guide covers those nuances in detail.
Common Anchoring Mistakes and How to Avoid Them
Some mistakes in anchoring are obvious, but others are subtle and only show up when conditions change.
Mistake 1: Insufficient Scope
Many boaters underestimate depth or bow height, then set too little rode. At 3:1 or 4:1 scope, the anchor can't get enough horizontal pull to bite.
Fix: Use the 5:1 minimum for lunch stops and 7:1 for overnight, calculated from the bow roller, not the waterline.
Mistake 2: Setting Too Fast
Backing down hard before the anchor has time to orient can trip it or slide it along the bottom. The anchor needs a moment to catch.
Fix: Apply tension in stages — idle first, then firm reverse only after the anchor shows signs of holding.
Mistake 3: Ignoring Swing Room
Boats swing wider than most people expect, especially with all-chain rode that lies on the bottom in light wind.
Fix: Calculate a full circle with radius equal to rode length plus boat length. If there's not enough room, move or reduce scope if conditions allow.
Mistake 4: Not Securing the Bitter End
If the bitter end isn't tied off, the entire rode can run out — and the anchor with it.
Fix: Check the bitter end before every anchoring session. It takes five seconds.
Mistake 5: Assuming "Set" Means "Set Forever"
An anchor that holds for an hour can drag when the wind shifts or current reverses. The anchor may not reset properly.
Fix: Recheck bearings after any significant change, and set an anchor alarm with a realistic radius.
Anchor Maintenance: Keep the System Ready
Ground tackle takes a beating from salt, sun, and load. A little maintenance prevents gear failure at the worst possible moment.
- Rinse with fresh water after saltwater use to slow corrosion.
- Inspect shackles and swivels for cracks, rust, and looseness.
- Check nylon rode for chafe and UV damage — replace if stiff, discolored, or frayed.
- Test the windlass before trips; lubricate per the manufacturer's schedule.
- Touch up galvanizing or paint on the anchor shank and flukes to prevent rust.
If your anchor gear is stored in a compartment that's hard to reach, improving access makes routine checks far more likely to happen. Keeping the boat's carpet and interior clean also reduces the chance of dirt and grime hiding developing problems.
For aluminum boats, the anchor locker and bow area can corrode if the paint is damaged. A quality coating for aluminum hulls protects the area where the anchor rests and where rode passes through the chock.
Choosing the Right Ground Tackle for Your Boat
If you're starting from scratch or upgrading, match the gear to your boat size and typical anchoring conditions.
- Boats under 20 feet: A 4–8 lb fluke or plow anchor with 6–10 feet of chain and 150–200 feet of 3/8-inch nylon rode.
- Boats 20–30 feet: An 8–16 lb plow or claw anchor with 10–20 feet of chain and 200–250 feet of 1/2-inch nylon rode.
- Boats 30–40 feet: A 16–35 lb plow, claw, or modern scoop anchor with 25–50 feet of chain and 250–300 feet of 1/2–5/8-inch nylon rode.
- Boats over 40 feet: Consider all-chain rode, a 35+ lb anchor, and an electric windlass.
Weight matters more than most people realize. A heavier anchor holds better not just because of weight, but because it sets deeper and resets more reliably. Err on the heavier side if you anchor often or in exposed areas.
When you're matching gear to your boat, also consider what the boat is worth to you — a modest investment in quality ground tackle protects the entire vessel.
Anchoring Etiquette and Legal Considerations
Anchoring isn't just about your boat — it's about coexisting with others on the water.
- Anchor clear of channels and marked navigational aids.
- Respect private docks and designated swimming areas.
- Check local regulations — some areas have anchoring restrictions or require permits.
- Use an anchor light at night or in limited visibility; white all-around light is standard.
- Avoid anchoring in sensitive habitats like coral or seagrass where anchors can cause lasting damage.
The U.S. Coast Guard publishes federal requirements for anchor lights and navigation rules that apply to recreational boats. When in doubt, follow those guidelines and check state or local rules before dropping the hook.
Conclusion
Anchoring is a system, not a single skill. The boat holds when the anchor matches the bottom, the scope is correct for the conditions, the set is done in stages, and someone verifies the position after the work is done. Skip any of those steps and you're relying on luck.
Before your next outing, run a short anchor drill at the dock or in calm water. One person calls distances, one manages the rode, and the helm confirms alignment and communication. Then practice one real set in low-stakes conditions — and repeat it in slightly stronger wind to build confidence.
The boats that drag are usually anchored by people who didn't verify. The boats that stay put are anchored by people who treated the process as a checklist. Be the second kind.
Frequently Asked Questions
How much anchor rode should I let out?
Let out 5:1 scope for calm daytime stops and 7:1 for overnight or windy conditions. Scope is calculated from the bow roller to the bottom, including bow height above water. In 10 feet of water with a 3-foot bow, 7:1 means about 91 feet of rode.
What type of anchor holds best in sand?
A fluke or Danforth-style anchor holds best in sand and soft mud. Its large flat flukes dig deep and offer excellent holding power relative to weight. In sand, a fluke anchor can hold several times more than its actual weight.
How do I know if my anchor is dragging?
Line up two fixed shore objects and watch if the alignment changes over a few minutes. If the objects drift apart, you're dragging. A GPS anchor alarm also helps, but visual bearings often reveal movement sooner, especially in tight anchorages.
Can I anchor without a chain leader?
You can, but a chain leader improves holding and reduces chafe. The chain adds weight, keeping the pull on the anchor horizontal, and protects the nylon from sharp rocks or coral. A 10–30 foot chain leader is standard for most recreational boats.
What's the best way to anchor overnight?
Use 7:1 scope or more, set the anchor in two stages with firm reverse, verify with bearings and an anchor alarm, and recheck after any wind shift. If conditions are uncertain, set a second anchor or have a watch schedule. Most overnight dragging happens after wind or current changes.
How do I free a stuck anchor?
Bring the boat slowly forward until the rode is vertical, then "bump" ahead with short engine bursts to pop the anchor free. If it's fouled, circle gently to change the pull angle. Avoid hard reverse with tight rode — that can damage cleats, windlass, or the anchor itself.

One Comment