How Long Does It Take for Compost to Be Ready at Home
How long does it take for compost to be ready? That’s the question that makes people peek into the bin every weekend, hoping for that dark, crumbly “garden gold” to magically appear.
The honest answer: it depends on how the pile is built and managed. A hot, well-aerated compost pile can finish in weeks, while a neglected heap may take many months. Look, both outcomes are normal—composting is biology, not a stopwatch.
Experienced gardeners and extension-backed compost guidelines tend to agree on the same drivers: heat, airflow, moisture, and particle size. When those basics are dialed in, the microbes do the heavy lifting fast and reliably.
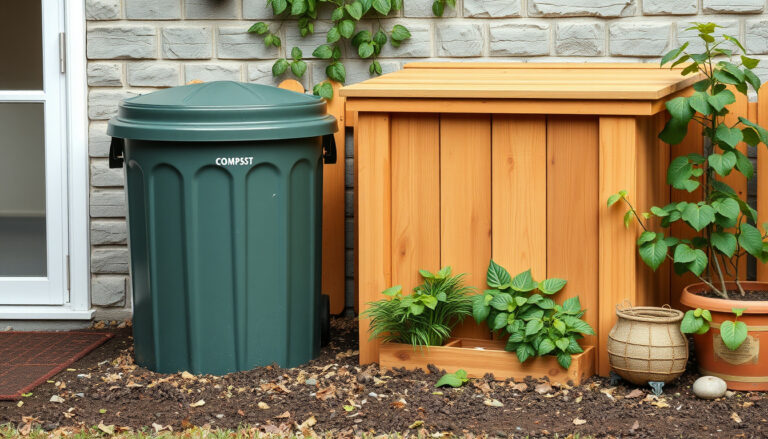
For a practical example, a 3×3-foot backyard bin layered with chopped leaves and kitchen scraps, kept as damp as a wrung-out sponge, and turned weekly often produces usable compost in about 6–12 weeks during warm weather.
They’ll get clear signs to watch for and simple levers to pull, including:
- What “ready” compost looks, smells, and feels like
- How turning and moisture change the timeline
- Common slowdowns (too wet, too dry, not enough “browns”)
Next, they can match their setup to a realistic timeframe and start using compost with confidence—without guessing or wasting a season.
Average Composting Timelines: What Most Piles Take
Now, once the basics are in place, most gardeners want a realistic clock to follow. In typical backyard conditions, compost is often “ready” somewhere between 2 to 6 months, but that range depends on how the pile is managed and what “ready” means for the job.
For a hot, actively managed pile, a finished, crumbly compost can appear in 4 to 8 weeks. That usually requires frequent turning, balanced inputs, and enough volume to hold heat. It’s fast, but it’s not hands-off.
For a more casual pile—kitchen scraps and yard waste added over time—expect 3 to 6 months to reach a stable, usable stage. Many home composters use it then as mulch or soil conditioner, even if a few woody bits remain.
Cold composting (minimal turning, lower heat) commonly takes 6 to 12 months. It’s slower, but it’s forgiving and fits people who prefer low effort over speed.
A practical example: a household that turns a 3x3x3-foot bin weekly and keeps a simple “two parts browns to one part greens” routine may harvest dark compost in about 8–10 weeks in warm weather. If they stop turning and let it sit, the same materials may take closer to 5–7 months.
- Fast (hot compost): ~1–2 months
- Typical (managed but relaxed): ~2–6 months
- Slow (cold compost): ~6–12 months
What Determines How Fast Compost Becomes Ready
Look, compost doesn’t run on a calendar—it runs on biology. The speed comes down to how quickly microbes can break materials into a stable, earthy product without going anaerobic or drying out.
Temperature is the big accelerator. When a pile holds 130–160°F (55–71°C), microbes work quickly and weeds and many pathogens are reduced. Smaller piles lose heat fast, so they tend to compost slower even with good ingredients.
Recipe balance matters just as much. Too many “greens” (food scraps, fresh grass) can get slimy and smelly; too many “browns” (dry leaves, cardboard) can stall. A workable rule is roughly 2–3 parts browns to 1 part greens by volume.

Particle size changes everything. Chopped leaves and shredded cardboard break down faster because they expose more surface area. Whole branches can linger for a year or more unless they’re chipped.
Oxygen and moisture are the quiet drivers. Turning adds air; moisture should feel like a wrung-out sponge. If it’s soggy, microbes slow and odors rise; if it’s dusty, activity drops.
- Turning frequency: weekly is faster than monthly
- Pile size: about 3x3x3 feet holds heat well
- Season: summer speeds; winter slows or pauses
- Inputs: woody, waxy, or oily items slow breakdown
Hot vs. Cold Composting: Expected Time Differences
Now the big lever is method: hot composting versus cold composting. They can both produce great compost, but they don’t move at the same pace.
Hot composting is managed for speed. When a pile is large enough, balanced (roughly 2–3 parts “browns” to 1 part “greens” by volume), and kept lightly moist, microbial activity can push temperatures into the 130–160°F range. Under those conditions, compost often finishes in 4–12 weeks, then benefits from a short curing period.
Cold composting is the “add and wait” approach. Materials break down at ambient temperatures, so the process commonly takes 6–18 months, depending on season, particle size, and how often the pile is turned. It’s lower effort, but it asks for patience.
Look for these time-shifting factors in either method:
- Turning frequency: weekly turning speeds hot piles; occasional turning slows them.
- Ingredient size: shredded leaves and chopped stems finish faster than whole materials.
- Moisture: too dry stalls; too wet turns anaerobic and sluggish.
Practical example: a gardener fills a 3x3x3-foot bin with shredded leaves, grass clippings, and kitchen scraps, then turns it every 5–7 days. The pile heats for two weeks, cools after a month, and produces usable compost in about 8–10 weeks, with two extra weeks of curing for stability.
How to Tell Compost Is Ready: Visual, Texture, and Smell Checks
Time estimates help, but readiness is judged by the compost itself. A pile can “hit the calendar” and still be too raw if large chunks or sour odors remain.
Visually, finished compost looks uniform and dark brown to nearly black. It shouldn’t resemble the original ingredients, aside from a few stubborn bits like avocado skins or small twigs. A stable pile also stops heating after turning, staying close to outdoor temperature.
Texture is the next check. Ready compost feels crumbly and soil-like, not slimy or stringy. When squeezed, it should hold together briefly, then break apart, like a wrung-out sponge.
If it mats into a wet clump, it likely needs more aeration and time.
Smell is the fastest diagnostic. Finished compost smells earthy, like forest soil. These odors signal it’s not ready:
- Ammonia: excess greens or too much nitrogen.
- Sour/rotten: anaerobic conditions from compaction or excess moisture.
- Sharp “garbage” smell: food scraps breaking down without enough browns.
Practical example: a gardener screens a handful through a 1/2-inch mesh. What passes through smells earthy and crumbles easily, so it goes on beds. The leftover twigs and half-finished pieces are returned to the bin as “inoculated” starter for the next batch.
How to Speed Up Compost Without Creating Odors or Pests
Now that the method is chosen, the fastest gains come from managing air, moisture, and particle size. Speeding up compost is really about feeding microbes efficiently while keeping conditions unfavorable for flies, rats, and anaerobic stink.

Start with the “wrung-out sponge” moisture level. Too wet turns the pile sour; too dry stalls it. If a handful drips, mix in dry browns like shredded leaves or cardboard and turn to reintroduce oxygen.
Then tighten the recipe. Aim for roughly 2–3 parts browns to 1 part greens by volume, and chop inputs smaller so microbes have more surface area. Keep food scraps buried in the center, not near the edges, and cap the top with 2–3 inches of browns to block odors.
- Turn on a schedule: every 3–7 days for hot piles; every 2–4 weeks for slower piles.
- Build enough mass: about 3x3x3 feet holds heat better than a thin layer.
- Add structure: mix in twiggy browns or wood chips to keep airflow channels.
- Skip pest magnets: avoid meat, dairy, oily foods, and large amounts of cooked grains.
Practical example: a backyard gardener with a lidded bin starts freezing kitchen scraps, then adds them weekly in a buried “green pocket,” topping with shredded cardboard. With a quick turn every Saturday, the pile heats reliably without attracting fruit flies.
Common Problems That Delay Readiness and How to Fix Them
When compost seems “stuck,” the cause is usually one of four bottlenecks: oxygen, moisture, balance, or temperature. Fixing the limiter often restarts decomposition within days.
A rotten-egg or swampy smell signals anaerobic conditions. The fix is mechanical: turn the pile thoroughly, break up matted layers (especially grass clumps), and add coarse browns to restore airflow. If it’s slimy, it’s too wet—add dry carbon and leave the lid slightly ajar during dry weather.
If the pile looks unchanged for weeks, it’s often too dry or too carbon-heavy. Moisten in thin layers while turning, and add a measured amount of greens (fresh grass, coffee grounds, or manure). If it’s full of intact leaves, shred them or run them over with a mower before mixing.
- No heat: pile is too small or ingredients are too dry; rebuild larger and water lightly.
- Lots of flies: scraps exposed; bury them and add a brown “cap” layer.
- Rodent activity: food accessible; use a closed bin, avoid cooked foods, and keep edges clean.
- Persistent chunks: woody items too large; screen them out and return to the pile.
Practical example: a community garden pile stays cold because volunteers add only dry leaves. A coordinator mixes in coffee grounds from a nearby café, waters while turning, and the pile begins warming within a week, shortening the wait for finished compost.
When and How to Use Finished Compost in Soil and Containers
Once the pile passes readiness checks, the next question is how long does it take for compost to be ready for real garden use—and what to do with it the day it is. Used well, finished compost improves structure, water-holding, and nutrient buffering without “burning” plants.
Look at compost as a soil amendment, not a standalone fertilizer. In beds, it’s best applied where roots will actually grow. In containers, it’s a small but powerful ingredient that upgrades potting mixes.
- Garden beds: Spread 1–2 inches over soil and lightly incorporate the top 2–4 inches, or leave it as a surface mulch around established plants.
- Planting holes: Blend compost with native soil (about 1 part compost to 3 parts soil) rather than filling the hole with pure compost.
- Lawns: Top-dress with a thin 1/4–1/2 inch layer and rake in; water afterward.
- Containers: Mix 10–30% compost by volume into a quality potting mix; screen it first for a smoother texture.
Practical example: for a 4×8-foot vegetable bed, they can apply roughly 3–6 cubic feet of compost (about 2–4 standard 1.5-cu-ft bags) before planting tomatoes and peppers, then add a light ring as midseason mulch.
Watch out: don’t use compost that still has recognizable food scraps or a sour smell in seed-starting or small pots; it can tie up nitrogen and stress seedlings. For sensitive starts, use screened compost at 5–10% or skip it until transplants are established.
Final Summary
Now the timeline question—how long does it take for compost to be ready—comes down to what the pile experienced over its life: heat, airflow, moisture balance, and how often it was managed. When those basics stayed steady, compost typically finished sooner and more predictably; when they drifted, it stretched out and needed course corrections.
A quick reality check helps set expectations. A suburban gardener who starts a bin in early spring and keeps it consistently tended may be spreading finished compost by mid-summer, while a hands-off pile might not be ready until the following season. The goal isn’t speed; it’s a stable, plant-safe material.
Before using any batch, they should confirm three non-negotiables:
- Consistency: the whole pile looks and feels uniform, not layered
- Stability: it no longer reheats after turning
- Confidence: no recognizable scraps that could regrow or attract pests
Next step: they should pick a target date, check the pile weekly, and adjust one variable at a time until the finish line becomes predictable.
Related read: How Deep to Make Raised Garden Beds for Healthy Roots