How Long Does It Take To BBQ a Pork Loin: Timing Guide
Nothing derails a backyard cookout faster than a pork loin that's still raw in the middle while the sides are already cold on the table. Pork loin is one of the leanest cuts you can put on a grill, which makes it both forgiving in flavor and merciless with timing. Pull it five minutes too late and you're serving dry, stringy slices that no amount of sauce can rescue.
The honest answer to "how long does it take to BBQ a pork loin" is: roughly 45–90 minutes for a typical 2–4 pound boneless loin over indirect heat at 350°F, with an additional 10–15 minutes of resting time. But that range swings dramatically based on your grill setup, the thickness of the cut, and whether you're working with bone-in or boneless meat.
What separates consistently juicy results from guesswork is a simple shift in mindset: cook to internal temperature, not the clock. In practice, the clock is your planning tool; the thermometer is your decision-maker. This guide walks through both so you can schedule dinner with confidence and pull the pork at exactly the right moment.
What Affects How Long It Takes to BBQ a Pork Loin
Pork loin responds quickly to changes in heat, thickness, and starting temperature. Before you light the grill, it helps to understand which variables actually move the finish time—and which ones just feel like they should.
Thickness Matters More Than Weight
A 3-inch-thick center-cut loin always takes longer than a flatter piece of the same weight. Heat needs time to travel from the surface to the center, so a compact, uniform cylinder cooks more predictably than an irregular roast with thin and thick sections in the same cut.
In practice, a tied boneless loin with even thickness will hit its target temperature within a tight window. An untrimmed loin with a tapered end will finish at the narrow end first, which is why many experienced cooks fold the thin tail under and tie it to create uniform thickness.
Six Variables That Shift Cook Time
- Grill temperature stability: A lid left closed with steady vents keeps timing predictable. Every time you lift the lid, you dump heat and add minutes.
- Bone-in vs. boneless: Bone slows heat transfer near its surface but helps buffer the meat against drying out. Plan for a slightly longer cook.
- Starting temperature: A loin pulled straight from the fridge can take 15–20 minutes longer than one rested at room temperature for 30 minutes.
- Two-zone setup: Searing over direct heat then finishing indirect gives you color without a scorched exterior, but it adds a step that affects overall flow.
- Target doneness: Pork loin needs 145°F plus a rest. Pulling at 140–143°F and letting carryover finish is the pro move.
- Weather conditions: Wind and cold ambient temperatures steal heat from the grill, stretching cook times more than most people expect.
A common mistake is trusting the lid thermometer exclusively. These cheap gauges are often off by 25–50°F from the actual grate temperature. If your grill says 350°F but the cooking surface is really 300°F, a 4-pound loin can run 20–25 minutes longer than planned. A probe thermometer at grate level removes the guesswork.
BBQ Pork Loin Time Chart by Weight and Temperature
Use this chart as a planning reference, not a contract. The times assume a boneless pork loin cooked over indirect heat with the lid closed, pulled at 140–143°F, and rested for 10 minutes to reach a safe 145°F finish.
| Weight (boneless loin) | 300°F indirect | 350°F indirect | 400°F indirect |
|---|---|---|---|
| 2 lb | 55–75 min | 40–55 min | 30–45 min |
| 3 lb | 75–95 min | 55–75 min | 45–60 min |
| 4 lb | 95–120 min | 70–95 min | 55–80 min |
| 5 lb | 120–150 min | 90–120 min | 70–100 min |
 A leave-in probe thermometer lets you monitor the center without lifting the lid.
For a 3-pound boneless loin at 350°F, plan on roughly 60–70 minutes, start checking around the 50-minute mark, and pull as soon as the thickest section reads 140–143°F. If your loin is tied into a uniform cylinder, the finish window tightens considerably because the whole roast heats at a consistent rate.
If you're new to grilling larger cuts, starting with a more forgiving protein is a smart way to build confidence with temperature control. Our guide to grilling a beginner-friendly steak breaks down the same two-zone principles on a quicker cook.
Direct vs. Indirect Heat: Choosing the Right Setup
Pork loin rewards control over brute force. Because it's lean, aggressive direct heat dries out the outer layer before the center catches up. The right zone setup prevents that race.
Why Indirect Heat Is the Default
Indirect heat cooks the loin like a convection oven while still allowing smoke and grill flavor to develop. On a gas grill, light one burner and place the pork on the unlit side. On charcoal, bank the coals to one side and cook over the empty half with the lid closed. This creates ambient heat that surrounds the roast instead of blasting it from below.
Where Direct Heat Fits In
Direct heat has a job, just not for the entire cook. A short sear over high heat develops browning and a deeper crust, which adds flavor through the Maillard reaction. After the sear, move the loin to the indirect zone to finish gently.
A reliable flow looks like this:
- Sear 1–2 minutes per side over direct heat for color and crust.
- Move to indirect heat, lid closed, until the center nears target temperature.
- Rest off-heat so carryover cooking finishes the interior and juices redistribute.
On a two-burner gas grill, preheat both burners, sear the loin over high heat, then turn one burner off and park the pork on that side. The indirect zone should hold steady at medium heat while the roast climbs toward 143°F without charring.
Step-by-Step Timing: From Preheat to Slicing
Most pork loin timing disasters come from skipped preheating, constant lid peeking, or cutting the rest short. Treating the cook as a sequence of steps removes the mystery minutes.
Assume a two-zone grill and a 2–4 pound loin. Total time typically lands between 60 and 120 minutes, depending on thickness and grill temperature.
- Preheat (10–15 min): Close the lid and let the grates come fully to temperature. Hot grates prevent sticking during the sear and stabilize the indirect zone.
- Season or dry brine (0–24 hr before): This isn't grill time, but a salt-forward dry brine dramatically improves moisture retention, giving you a wider margin for error.
- Sear (6–10 min): Give the loin 2–3 minutes per side over direct heat for browning, then move it to indirect.
- Roast indirect (30–75 min): Keep the lid closed and monitor with a leave-in probe. Start checking early; every grill has hot spots.
- Rest (10–15 min): Tent loosely with foil. This is non-negotiable for juicy slices.
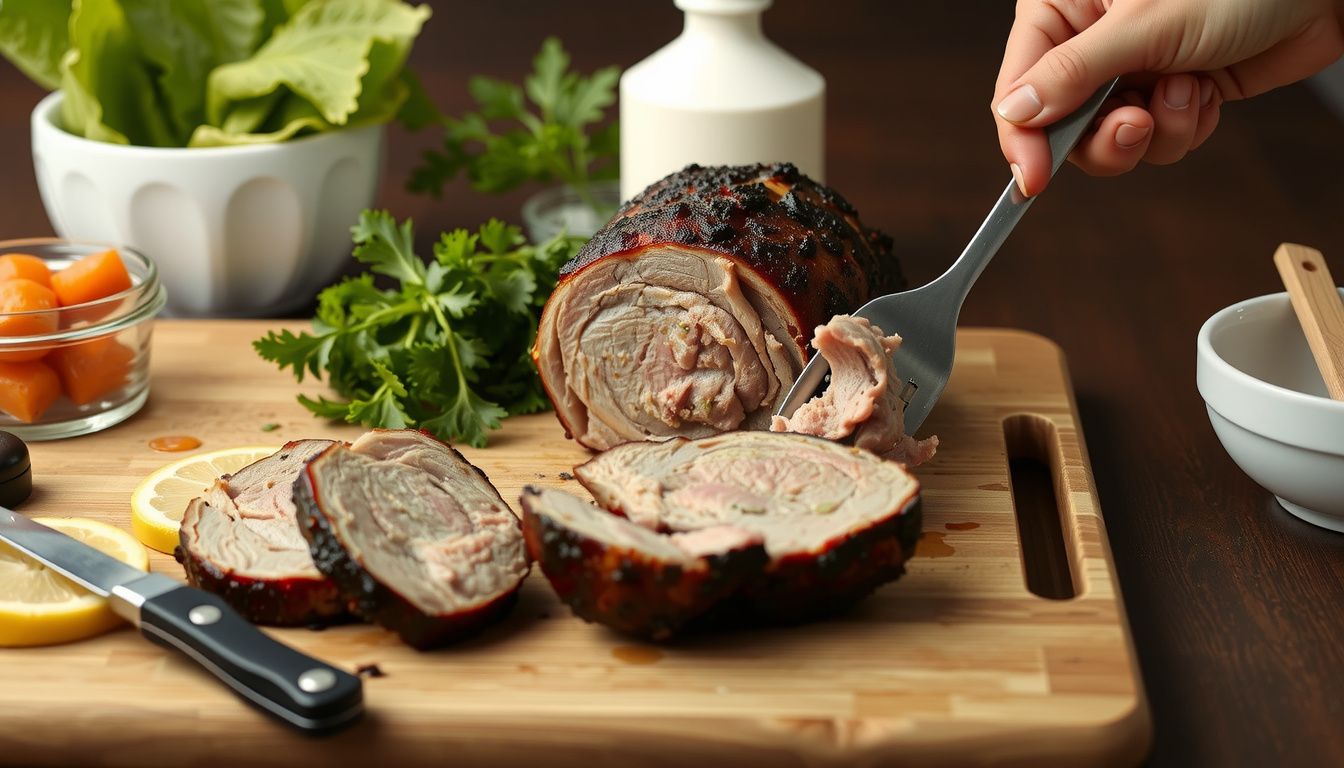
- Slice (2–5 min): Cut against the grain. Thicker slices hold their juices longer, especially if dinner runs late.
A realistic example: a 3-pound loin preheated for 12 minutes, seared for 8 minutes total, then roasted 45 minutes at 350°F indirect, rested 12 minutes, and sliced comes to about 1 hour and 17 minutes from start to serve.
For another pork tenderloin-adjacent option that handles indirect heat beautifully, see how we apply the same principles to thin-sliced chops finished in the oven.
Target Internal Temperature and Carryover Cooking
The single most important number in this entire guide is 145°F (63°C). That's the safe minimum internal temperature for whole pork cuts, according to the USDA Food Safety and Inspection Service. Below that, you risk foodborne illness. Far above it, you risk serving something that chews like a flip-flop.
Understanding Carryover Cooking
Carryover is the rise in internal temperature that continues after you pull meat off the heat. For a 3–4 pound pork loin, the center typically climbs another 3–8°F during the rest. That's why experienced cooks pull the loin at 140–143°F and let the rest finish the climb to 145°F or slightly higher.
How to Measure Accurately
- Insert a probe thermometer into the thickest part of the loin, avoiding fat seams and any bone.
- A leave-in probe lets you monitor constantly without lifting the lid.
- With an instant-read, check from the side so the tip lands in the thermal center.
- Always confirm with a second reading in a different spot near the end of the cook.
If the loin reads 142°F when you pull it and you tent it loosely with foil, it usually settles at 146–148°F after 10–12 minutes. Slice immediately and juices spill across the cutting board, making perfectly cooked pork look dry. A common mistake is assuming the meat is overcooked when the real issue was skipping the rest.
Boneless vs. Bone-In Pork Loin: Time Differences
Bone changes how heat moves through meat, which means a bone-in loin doesn't behave like its boneless cousin even at identical weights.
What to Expect
A bone-in loin generally takes 10–20% longer than a boneless one of similar thickness. Bone conducts heat more slowly than muscle, creating a wider doneness gradient near the bone. The outer meat may finish sooner while the area next to the bone lags behind.
- Boneless loin: More uniform thickness means a predictable cook. Start checking earlier and expect a tighter finish window. This is the easier cut for beginners.
- Bone-in loin: Plan for a wider finish range. Probe in two spots—near the bone and in the thickest center—and pull when both read at least 140°F.
- Placement tip: Position the bone side facing the hotter side of the indirect zone to help balance the lagging area.
At 350°F indirect, a 3.5-pound boneless loin may finish in roughly 55–70 minutes after searing, while a comparable bone-in loin runs 65–85 minutes. Pull each when the thermometer says it's ready, not when the timer does.
If you're weighing bone-in versus boneless for a different cut, our breakdown of pork chops done low and slow in a crock pot shows how the same principles translate to slower methods.
Marinades, Brines, and Rubs: How Prep Changes Cook Time
Prep choices don't rewrite the clock, but they can shift how fast the center heats and how forgiving the meat is if you overshoot by a few degrees.
Brines and Dry Brines
A wet brine adds water and salt into the muscle, which can slightly slow heat penetration—expect a few extra minutes on thicker loins. The payoff is a wider "juicy window" if the internal temperature creeps up. A dry brine (salting the surface hours in advance) improves browning and moisture retention without adding water weight, so it has minimal timing impact.
Marinades
Most marinades stay at the surface and don't meaningfully change cook time—unless they're sugary or oily. High sugar content browns fast and can scorch, forcing you to lower the grill temperature, which extends the cook. If you love a sweet glaze, apply it late or mix it into a finishing sauce instead of a long marinade.
Dry Rubs
Rubs don't affect internal timing, but they affect crust development. Heavy paprika, brown sugar, or thick spice layers darken early, which can make the exterior look done before the center is close. If the crust browns too fast, move the loin to a cooler part of the indirect zone and let it finish slowly.
- Wet brine: slightly longer cook, noticeably better moisture retention
- Sugary marinade: slower cook only if heat must be reduced to prevent burning
- Salt-forward rub: better browning and seasoning, minimal timing change
If you brine a 3–4 pound loin overnight, add a small timing cushion to your plan, then trust the thermometer to call the finish when the clock and the brine disagree.
When and How to Apply BBQ Sauce
Sauce timing is where many pork loins go from beautifully caramelized to burnt and bitter. Sugary barbecue sauce burns quickly over direct heat and even indirect heat above 350°F.
The Late-Sauce Rule
- Apply sauce during the final 10–15 minutes of cooking, after the internal temperature has reached roughly 130–135°F.
- Keep the grill at or below 350°F while the sauce sets to avoid scorching.
- Apply in thin layers rather than one thick coat, allowing each layer to tack up and caramelize.
- Never sauce before the sear unless you enjoy scrubbing carbonized sugar off your grates.
For a deeper smoke-and-sugar flavor, brush one light layer when the loin hits 120°F, then a second layer at 135°F. The sauce reduces slightly during the final stretch without turning bitter. If your sauce starts to blacken before the center is done, just move the loin to a cooler zone and let it coast.
For a completely different sweet-and-smoky route, consider finishing your next cook on a grill set up specifically for pizza temperatures—the same caramelization rules apply.
Common Timing Mistakes That Dry Out Pork Loin
Dry pork loin rarely comes from bad meat. It comes from timing errors, and they compound quickly because the loin has so little fat to buffer mistakes.
The Six Mistakes to Avoid
- Cooking by time alone: Wind, lid openings, and hot spots turn a "60-minute plan" into an overcooked roast. Time is a guide; temperature is the authority.
- Starting too cold: A fridge-cold loin cooks unevenly, tempting you to extend the cook and overcook the outer layers.
- Checking too often: Every lid lift dumps heat and stretches the cook. A leave-in probe lets you monitor without opening the lid.
- Chasing color with high heat: The exterior looks done while the center lags 20°F behind. Sear briefly, then move to indirect.
- Skipping the rest: Juices run out, slices look dry, and all your careful timing goes to waste. Rest for at least 10 minutes.
- Pulling at 160°F "to be safe": This was the old guidance and it produces dry pork. Modern guidance from the USDA confirms 145°F with a rest is both safe and dramatically juicier.
If you keep opening the lid every five minutes, the cook drags on and the outer layer overcooks while the center stalls. A probe thermometer left in place solves this completely. If you're cooking something quicker like ground beef patties alongside the loin, our burger timing reference helps you coordinate multiple items on the same grill.
Is It Better to Grill Pork Loin Fast or Slow?
The short answer: moderate, steady heat wins for pork loin. This cut doesn't benefit from low-and-slow barbecue the way a fatty pork shoulder does, because there's not enough connective tissue to break down. It also doesn't respond well to blazing heat, because the outside dries before the center cooks.
Fast vs. Slow, Honestly Compared
- High heat (400°F+): Faster cook, but a narrow window between undercooked center and dried-out exterior. Acceptable only with constant monitoring and a very even loin.
- Moderate heat (325–375°F): The sweet spot. Enough heat to develop browning and a light crust, but gentle enough to keep the center and edges within a few degrees of each other.
- Low heat (250–300°F): Takes longer and doesn't meaningfully improve tenderness in a lean cut. If you have time to burn, it's not terrible—but there's no real payoff for pork loin.
A 3-pound loin cooked at 350°F indirect usually lands juicier than the same cut rushed at 425°F. The moderate-heat roast gives the center time to climb while the surface stays moist enough to absorb smoke and seasoning. For cuts that genuinely benefit from slow cooking, a crock pot method like our BBQ chops recipe makes more sense.
BBQ Pork Loin on a Gas vs. Charcoal Grill
Your grill type affects timing more through heat control than through any magic in the fuel. Both can produce excellent results; they just demand different habits.
Gas Grill Timing
Gas grills offer predictable, adjustable heat. Set one burner to medium-high and leave the other side off, aiming for a 350°F indirect zone. Timing runs closest to the chart above because the temperature holds steady with minimal intervention. The trade-off is less smoke flavor, though a smoker box of wood chips helps.
Charcoal Grill Timing
Charcoal brings deeper wood-smoke character but requires more heat management. Bank lit coals on one side and add a few unlit briquettes to extend the burn. Expect timing to run 10–15% longer than gas because opening the lid to adjust vents or add coals releases heat. The flavor difference is real, especially with hardwoods like oak or hickory.
On either grill, a wireless or probe thermometer changes everything. It removes the need to peek, keeps the lid closed, and tells you when the loin is approaching the pull temp without breaking the heat seal.
How to Check for Doneness Without Overcooking
A thermometer is non-negotiable for consistent results, but how you use it matters as much as having one.
The Right Way to Probe
- Insert the probe into the thickest section, not near the tapered end.
- Keep the tip away from fat seams, which read hotter than the surrounding meat.
- For bone-in loins, avoid touching the bone with the tip.
- Take two readings: one in the thickest center, one a few inches away to confirm even cooking.
- If the readings differ by more than 5°F, let the loin cook a few minutes longer and recheck.
When to Start Checking
For a 3-pound boneless loin at 350°F, start checking around the 40-minute mark after searing. Check every 3–5 minutes from that point. The temperature climb slows as you approach target, which is normal—don't panic and crank the heat.
If you don't have a thermometer, the visual cues are less reliable: the loin should feel firm but with slight give, and the juices should run clear when pierced. But honestly, a $20 instant-read thermometer pays for itself the first time it saves a $15 pork loin from the trash.
FAQ: Pork Loin BBQ Timing Questions
How long does it take to BBQ a 3 lb pork loin?
A 3-pound boneless pork loin over indirect heat at 350°F takes roughly 55–75 minutes after searing, plus a 10–15 minute rest. Start checking the internal temperature at the 50-minute mark.
Should I flip a pork loin on the grill?
Yes, but not constantly. Flip every 12–15 minutes for even browning and steadier internal temperature rise. If flare-ups occur, move the loin away from the flame and flip sooner to prevent surface scorching. Remember that every lid opening adds time, so flip with purpose.
What temperature should pork loin be when done?
Pork loin is done at 145°F (63°C) measured in the thickest part, followed by a 10-minute rest. Pull it at 140–143°F because carryover cooking will finish the climb. This produces meat that's safe and pale pink in the center—no longer the dried-out white of decades past.
Do you grill pork loin fat side up or down?
If your loin has a fat cap, start with the fat side down over indirect heat so it renders slightly and bastes the meat. Many modern supermarket loins are sold trimmed, in which case orientation matters less than zone placement.
How long should a pork loin rest after grilling?
10–15 minutes, tented loosely with foil. This allows carryover cooking to finish the center and lets muscle fibers reabsorb juices. Cutting into a loin immediately after pulling it is the fastest way to undo a perfect cook.
Can I BBQ a pork loin from frozen?
Technically yes, but it's a bad idea. A frozen loin cooks unevenly—the exterior overcooks while the center thaws. Thaw completely in the refrigerator (24–48 hours for a 3–4 pound roast) before grilling for predictable timing and even doneness.
Final Summary
When someone asks how long it takes to BBQ a pork loin, the real answer is a system, not a number. Steady indirect heat, a clear doneness target of 145°F, and a committed rest are the three pillars of a juicy result.
Plan the cook around these principles:
- Consistency: Hold a stable 325–375°F indirect zone and keep the lid closed.
- Verification: Trust the thermometer over the timer—pull at 140–143°F and let carryover finish it.
- Patience: Rest 10–15 minutes before slicing, and cut against the grain.
For a typical 3–4 pound boneless loin, budget 60–90 minutes on the grill plus rest. If you're coordinating a full spread, build in a 10-minute buffer; a rested pork loin holds beautifully under loose foil while the sides finish.
Your next step: Pick a boneless 3-pound pork loin, dry brine it the night before, and run one timed cook with notes. Record your grill's actual temperature, the sear time, the pull temp, and the final rested temperature. That single practice run turns this guide from reference material into your own repeatable recipe.