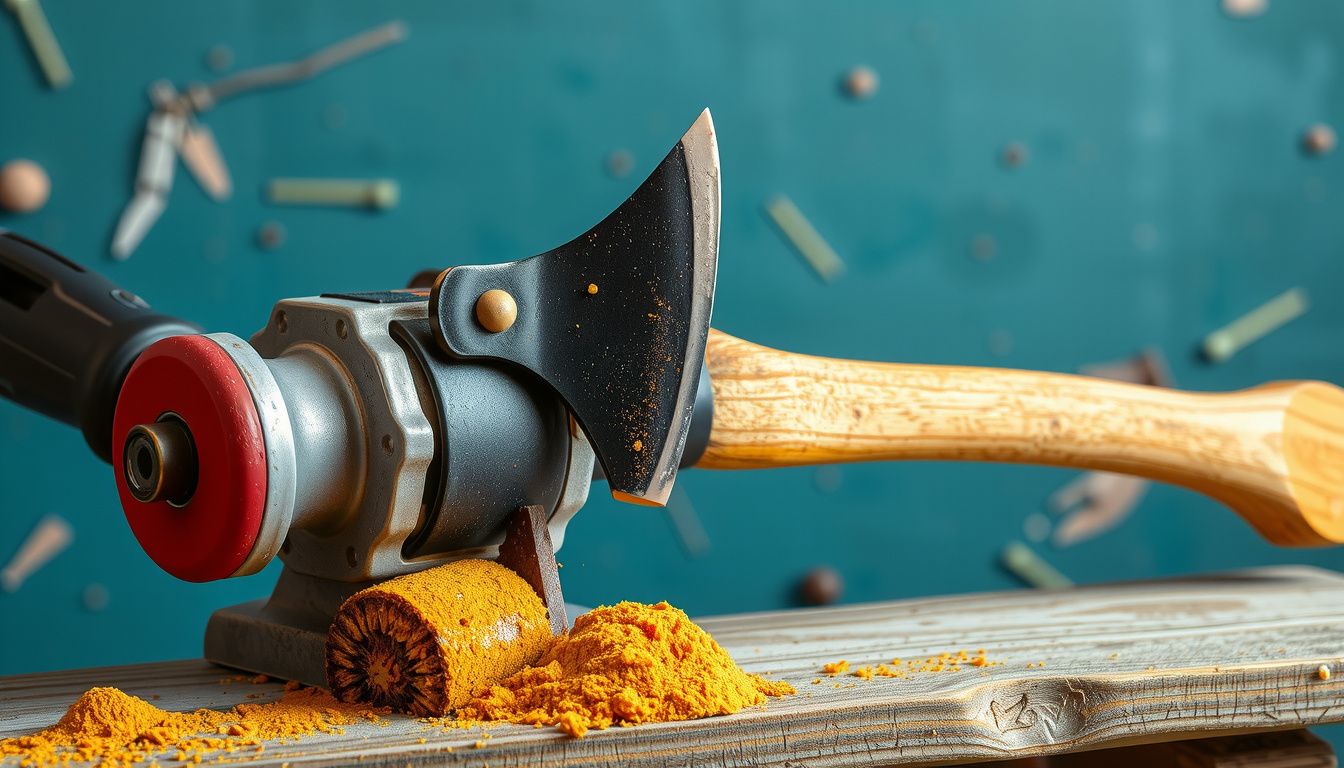
How to Sharpen an Axe With a Grinder Without Overheating
Wondering how to sharpen an axe with a grinder without ruining the edge—or worse, overheating the steel? It can be done safely and cleanly, as long as they control heat, match the bevel, and use the right wheel and technique.
This guide walks them through a practical, step-by-step method for restoring a sharp, durable axe edge using an angle grinder or bench grinder. It explains what to set up first, how to grind with steady passes, and how to finish the edge so it bites into wood instead of bouncing off it.
- Tool and safety setup (PPE, clamping, wheel choice)
- Correct grinding technique (angle control, light pressure, cooling)
- Edge finishing (deburring, honing, quick sharpness checks)
Example: if they’re rehabbing a camping axe that glanced off a rock and now has a flat spot, a grinder can remove the damaged steel in minutes. They’ll make short, controlled passes, dip the head in water to keep it cool, then hone the edge to a working sharpness that holds up on seasoned firewood.
Prepare the Axe, Grinder, and Work Area Before You Start
Now the setup work starts, and it’s where most sharpening jobs are won or lost. A grinder removes steel fast, so the axe, the tool, and the space all need to be controlled before the wheel ever touches the edge.
First, inspect the axe head and handle. They should look stable, tight, and free of cracks. If the head is loose on the haft, sharpening can wait—movement at the handle becomes movement at the edge, and that’s how bevels get uneven.
Clean the bit and cheeks so the grinder doesn’t skate over sap, oil, or rust. A rag with degreaser works, followed by a quick pass with a wire brush. Look for deep chips; if they’re severe, they may require a coarse wheel and more time, which increases heat risk.
Set up the grinder itself. A bench grinder should have a solid base, a properly adjusted tool rest, and guards in place. An angle grinder should have its guard installed, a side handle attached, and a flap disc or grinding wheel rated for the grinder’s RPM.
Use the right safety kit and keep it on. Eye protection alone isn’t enough when sparks and grit are flying. Hearing protection matters too, since grinders run loud and long.
- Eye and face protection: safety glasses plus a face shield
- Hand protection: snug gloves that won’t snag
- Respiratory protection: dust mask or respirator, especially on rusty heads
- Fire control: clear the area and keep a spray bottle or extinguisher nearby
Secure the axe so it can’t shift. A bench vise with wood or leather jaw pads prevents marring and keeps the bit stable. If a vise isn’t available, clamp the handle to a sturdy bench and support the head with a block so the edge sits at a predictable angle.
Set up a cooling plan before grinding. A bucket of water within arm’s reach is standard, and a damp rag nearby helps control heat between passes. If the steel discolors to blue or straw at the edge, it’s already too hot and the temper may be compromised.
Practical example: a homeowner sharpening a felling axe in a garage should move cardboard boxes and sawdust away from the spark path, clamp the axe head in a vise at waist height, and place a water bucket on the non-dominant side. That layout keeps the work steady, reduces fatigue, and makes quick cooling automatic.
Set the Correct Bevel and Mark the Edge for Accurate Grinding
With the workspace stable, the next job is defining the bevel. Grinding without a target angle often creates a thin, fragile edge or a thick, blunt wedge. The goal is a consistent profile that matches how the axe is used.
Start by identifying the axe’s purpose. A splitting axe typically wants a wider, more durable bevel, while a felling axe benefits from a slightly finer edge for clean bites. If the manufacturer’s grind is still visible, it’s usually the best reference point.
Pick a bevel target and commit to it. Many general-purpose axes land well in the mid-range, but the key is consistency across both sides. Matching bevels helps the axe track straight in the cut and reduces binding.
- Splitting-focused: broader bevel for strength and wedge action
- Felling/limbing-focused: moderately finer bevel for penetration
- All-purpose: balanced bevel that resists rolling and still bites well
Mark the edge before grinding. A permanent marker is the simplest guide: color the entire bevel on both sides, right up to the apex. As the grinder removes steel, the marker disappears, showing exactly where material is being taken and where the wheel isn’t contacting.
Use a quick angle reference to keep the bevel honest. A bevel gauge is ideal, but a simple visual guide works too: align the axe so the existing bevel sits flush to the wheel’s tangent, then lock that hand position in. On a bench grinder, the tool rest should support the head so the angle doesn’t change mid-pass.
Work in short, controlled passes. The grinder should sweep from heel to toe in a smooth motion, then stop. Long dwell time in one spot digs grooves and overheats the edge, especially near the toe where the steel thins.
Common mistake: chasing a “knife edge.” An axe shouldn’t be ground like a chef’s knife; too thin an apex chips quickly when it hits knots or frozen wood. Another mistake is grinding one side to completion before touching the other, which can shift the centerline and leave a lopsided bit.

Practical example: if the marker disappears only near the middle of the bevel but stays at the heel and toe, the operator is rocking the angle. They should reset the axe on the rest, lighten pressure, and make shorter passes that keep the bevel flat to the wheel. That small correction preserves symmetry and reduces the amount of steel removed overall.
Once the marker is being removed evenly, the axe is ready for careful grinding with predictable results. That’s the foundation for how to sharpen an axe with a grinder without creating hot spots or uneven geometry.
Grind the Edge Step by Step Without Burning the Steel
Now the real work starts: controlled grinding that reshapes the edge while keeping the temper intact. The goal isn’t a razor-thin wedge. It’s a clean, consistent bevel that will hold up in wood.
They should begin by positioning the axe so the grinder’s wheel meets the bevel at the angle set earlier. A stable stance matters. The grinder should come to full speed before it touches steel.
A simple rule keeps most people out of trouble: light pressure, short passes, frequent cooling. If they lean on the wheel to “speed things up,” heat spikes fast, and the edge softens permanently.
-
Start at the heel and sweep to the toe. They should move the grinder in a smooth arc that follows the edge, keeping the contact patch small.
-
Use 1–2 second passes. They should lift off, check the scratch pattern, then repeat. Long, continuous grinding is the fastest way to overheat.
-
Alternate sides every few passes. This keeps the bevel centered and reduces the chance of a lopsided edge that pulls in the cut.
-
Quench often. They should dip the bit in water after each pass or two. If the steel ever feels too hot to touch near the edge, it was already too hot.
Look for a consistent, fresh grind that removes the marker line evenly. If the marker remains at the very edge, they’re not reaching the apex yet. If it disappears far above the bevel, the angle is drifting too steep.
Pro tip: They should watch for color changes. Straw, purple, or blue tint near the edge signals overheating and lost hardness. If discoloration appears, they should stop, cool the head completely, and grind past the damaged steel—slowly.
Common mistakes that shorten edge life include:
-
Grinding only one side until “sharp,” which shifts the bevel off-center
-
Holding the grinder in one spot, creating a hollow and a weak, thin section
-
Chasing a knife edge; axes need a durable edge geometry
Practical example: If they’re sharpening a camp axe used for splitting knotty oak, they should stop grinding as soon as a small, even burr forms along the full edge. Pushing past that point to make it “shave” usually thins the bit too much, leading to chips on the first hard knot.
Once the burr is continuous and the bevel looks uniform, the grinder’s job is done. The edge is formed. Next, they refine it for strength and control.
Hone, Deburr, and Test the Edge for a Durable Finish
After grinding, the edge is shaped but still rough at a microscopic level. Honing removes deep scratches, aligns the apex, and improves bite without sacrificing toughness. It’s where the edge becomes predictable.

They should start with a coarse stone or puck that matches the axe’s intended use. For general chopping and splitting, a slightly toothy finish works well. For carving or limbing, they can polish more.
-
Hone the first side. They should set the stone on the bevel and make small circles or short strokes from heel to toe, keeping the same angle used during grinding.
-
Work until the burr flips. A burr should move to the opposite side. That’s the signal they’ve reached the apex with the stone, not just rubbed the shoulder.
-
Repeat on the second side. They should use the same stroke count and pressure to keep the bevel centered.
-
Lighten pressure for finishing strokes. A few gentle passes per side reduces the burr size and strengthens the edge.
Pro tip: If they use a file or stone dry, it can load up and skate. A few drops of honing oil or water (depending on the stone) improves feedback and keeps the abrasive cutting cleanly.
Deburring matters because a wire edge can feel sharp, then fold over in the first cut. They should remove it deliberately, not accidentally. A controlled method is alternating single strokes—one per side—while gradually reducing pressure.
-
Check for burr: They should lightly drag a fingernail from the cheek toward the edge (never along the edge). A snag indicates burr remains.
-
Break stubborn burr: They can strop lightly on wood end grain or thick cardboard, then return to the stone for two light passes.
-
Keep the apex supported: They should avoid steep “micro-beveling” unless they need extra durability for dirty wood.
Practical example: If they’re tuning a felling axe for softwood, they can finish with a medium stone and stop once the edge cleanly bites into a scrap of pine without skating. If they polish to a mirror, the axe may feel slick in resinous wood and lose that initial grab.
Testing should be simple and repeatable. They should aim for consistent bite, not showy sharpness.
-
Paper test (optional): It should slice with a steady pull, though an axe doesn’t need to “shave.”
-
Thumbnail bite: The edge should grab slightly without sliding (use care).
-
Wood test: A controlled chop into clean, dry wood should leave a crisp, V-shaped cut with minimal crushing.
When the edge bites cleanly and no burr is detectable, it’s ready for work. If it rolls quickly in the first few cuts, they should revisit the stone with a slightly higher angle for a tougher, longer-lasting finish.
Putting It Into Practice
Now it’s time to turn the process into a repeatable habit that keeps an axe working safely and efficiently. When someone follows how to sharpen an axe with a grinder with patience and consistency, the payoff is a cleaner bite, less effort per swing, and fewer edge repairs later.
They should treat each sharpening session as a quick quality check, not a one-and-done event. A practical example: after splitting a cord of seasoned oak, a user can do a short touch-up grind and hone so the next weekend’s work starts sharp instead of starting with struggle.
- Sharpen little and often to avoid heavy grinding sessions.
- Track results by noting how the edge performs in the first 5–10 swings.
- Store smart with a dry head and a simple edge cover to protect the bevel.
Next step: they should schedule a 10-minute touch-up, then test the edge on scrap wood and adjust their routine based on what the cut tells them.


One Comment