How to Rent Out Your Camper: A Step-by-Step Setup Guide
Many first-time owners assume renting out a camper is as simple as posting a few photos and handing over the keys. In practice, the rentals that run smoothly — and actually make money — are built on a repeatable system you create before the first booking request arrives.
Done well, camper rental works like a small hospitality business. You set standards, document condition, price with intent, screen renters consistently, and treat every handoff as a process instead of a one-off favor. When those pieces are in place, the listing sells itself and the return feels routine rather than risky. You can also read our guide on best camping vehicle ever.
This guide walks through the full setup in order: deciding whether to rent, confirming legal and insurance prerequisites, preparing the camper, choosing a rental method, building a listing, setting pricing and rules, screening guests, and closing out each rental with clean documentation.
Is Renting Out Your Camper Right for You?
Before you invest hours in photos, listings, and policies, decide whether renting makes financial and practical sense for your specific situation.
When renting usually makes sense
Renting is a strong option when:
- The camper sits unused for weeks or months at a time.
- You can handle occasional cleaning, maintenance, and renter communication.
- The rig is in dependable road-ready condition.
- You want offset ownership costs without selling the vehicle.
- You live near a destination area or can offer delivery to campgrounds and events.
A common misconception is that renting is passive income. It is not. Even a well-run rental requires cleaning time, message responses, maintenance, and occasional problem-solving after hours. The upside is that a quality rig in a decent market can cover loan payments, insurance, storage, and a meaningful share of annual maintenance.
When to hold off or sell
Renting may not be worth it if the camper has unresolved leaks, outdated tires, unreliable appliances, or a title issue. Renters notice problems quickly, and negative reviews are hard to recover from.
It is also the wrong move if you cannot be reasonably available. A renter who cannot reach you during a roadside issue will remember the experience in the review. If your schedule is already packed, a managed or consignment arrangement may make more sense.
Finally, if the camper mostly sits because you prefer road trips in a smaller vehicle anyway, selling it and choosing a dependable low-cost road trip car may beat the ongoing work of hosting guests.
A practical rule: if you cannot commit to inspecting the camper before and after every rental and responding to messages within a reasonable window, do not open the calendar yet.
Step 1: Confirm Legal, Insurance, and Road-Readiness Prerequisites
Most rental problems trace back to missing paperwork, unclear rules, or an underinsured rig. A short prerequisite check prevents cancellations, disputes, and expensive downtime.
Verify ownership, registration, and lienholder approval
Start with the basics:
- Registration is current and plates are valid.
- Required inspections are completed.
- The title is in your name or you have clear permission from the owner.
- If the camper is financed, the lender permits commercial or peer-to-peer rental use.
- Any storage facility agreement allows renters to access the rig.
If a bank or credit union still holds the title, contact them in writing. Some lenders restrict rental use, and violating that restriction can create a serious legal problem after an accident or damage claim.
Fix the insurance gap before it costs you
Personal RV and auto policies almost always exclude “for-hire” or commercial use. In practice, that means a claim filed during a paid rental can be denied, leaving you responsible for repairs and liability.
You have a few common options:
- Use a peer-to-peer rental platform that provides primary or secondary liability and physical damage coverage.
- Buy a commercial RV rental policy or a peer-to-peer rental endorsement that explicitly covers rental use.
- Work with an RV-specialist insurance broker to confirm exactly what is and is not covered.
Ask about deductibles, roadside assistance during a rental, and whether the renter’s own auto policy could affect coverage. Do not assume anything.
Lock down operating logistics
Decide where handoffs happen, who cleans between bookings, how keys are exchanged, and what a renter should do in an emergency. Look for gaps now, not when someone calls from a roadside pull-off at 10 p.m.
At minimum, you need written answers to:
- What is the check-in and check-out window?
- Will you offer delivery, pickup, or both?
- Who handles a lockout, flat tire, or mechanical failure?
- How much time do you need between rentals for cleaning and inspection?
Draft your house rules before writing the listing. It is easier to market honestly when policies are already decided, and renters are more likely to follow rules that appear consistent from the first message.
Step 2: Prepare the Camper Like a Small Hospitality Business
Renters treat clean, labeled, well-stocked rigs better. They also ask fewer repetitive questions, return the unit closer to the same condition, and leave stronger reviews.
Deep clean and create a condition baseline
Start with a thorough interior and exterior detail. Clean every surface, including cabinets, vents, window tracks, and storage bays. Soft surfaces matter more than they seem; odors and stains are among the first things renters photograph and mention in reviews. Use the same level of care you would apply when detailing every surface of a boat, and do not skip stubborn fabric areas — removing set-in stains from fabric before the first booking prevents future disputes over pre-existing damage.
After cleaning, create a condition baseline:
- Take time-stamped photos of the exterior, roof, interior, appliances, storage bays, tires, and hitch area.
- Record any existing scratches, dents, stains, or malfunctions in a short walkthrough checklist.
- Save everything in a dated folder you can reference after each return.
This baseline supports fair damage claims and helps renters feel confident at pickup because they see you know the condition of your own rig.

A clean, uncluttered interior signals to renters that the camper is well maintained and easy to use.
Test, label, and stock critical systems
Walk through the camper as if you were renting it for a weekend. Test every system the same day:
- Smoke and carbon monoxide detectors.
- Fire extinguisher charge and expiration date.
- Propane leak detector.
- Water pump, water heater, and faucets.
- Slide operation, awning function, and dump valves.
- Refrigerator on both electric and propane if applicable.
- Hitch, safety chains, brake controller, and trailer lights for towables.
Fix small problems now. A dead water heater or stuck awning discovered at pickup can turn into refunds, bad reviews, and a rushed repair bill.
Label controls and systems clearly. A laminated quick-start sheet near the entry saves time on every handoff. Common high-value labels include:
- “BLACK TANK ONLY” and “GRAY TANK ONLY” at the correct valves.
- Water heater bypass position.
- Awning wind safety warning.
- Generator start sequence.
Stock the essentials renters expect but often forget to bring: RV-safe toilet paper, sewer gloves, a water pressure regulator, spare fuses, and a basic tool kit. If you provide linens and kitchenware, keep the inventory simple and documented.
Inspect and fix structural weak points
Before listing, pay attention to the roof, seams, windows, and any sign of past water intrusion. A small leak becomes a much bigger problem when multiple renters use the camper in different weather conditions. If you notice staining, soft spots, or cracked sealant, address a failing roof seam now rather than after a guest returns the unit damp and disappointed.
Reduce wear with renter-proof boundaries
You do not need to hand over your favorite coffee mugs or sentimental gear. Keep personal items out of the rental inventory, lock off owner cabinets, and remove anything fragile or confusing.
A few low-cost wear reducers:
- Mattress protector.
- Entry rug and shoe tray.
- Seat covers in a motorhome.
- Cabinet latches that survive rough roads.
- Durable, matching kitchenware instead of mismatched fragile pieces.
If a feature is fragile or confusing, disable it and disclose that in the listing. Renters respect clear limits more than they respect a broken amenity.
Step 3: Choose a Rental Method and Build a High-Trust Listing
With the camper ready, choose the rental path that matches your time, risk tolerance, and desired income.
Compare peer-to-peer, direct, and managed options
The three common methods each change who handles marketing, payments, screening, support, and cleanup.
| Rental method | Who handles marketing and payments | Owner workload | Typical fit |
|---|---|---|---|
| Peer-to-peer marketplace | Platform | Medium | First-time owners who want built-in exposure and support tools |
| Direct booking | Owner | High | Owners with repeat renters, local demand, and clear contracts |
| Managed or consignment | Third-party manager | Low | Owners who travel often or want a mostly hands-off arrangement |
Marketplace commissions and service fees vary, so read the current fee schedule carefully. Direct booking keeps more revenue but requires your own contract, deposit collection, screening process, and cancellation policy. A manager reduces work but takes a larger cut and may not treat the rig exactly the way you would.
If you cannot be available for check-ins, delivery-only rentals or a local manager almost always reduce friction. If you want maximum margin and already have a list of interested renters, direct booking can work, but it demands process discipline.
Write a listing that removes hesitation
Start with a title that matches the renter’s intent: family weekend, off-grid adventure, festival-ready, delivery available, or pet-friendly. Then write a tight first paragraph that states sleeping capacity, key amenities, tow or drive requirements, and exactly what is included.
A strong listing answers the questions renters ask before they book:
- How many people can sleep comfortably?
- What is the bathroom and kitchen setup?
- Is the unit driveable or towable?
- What license, tow vehicle, or hitch is required?
- What is included: linens, kitchen kit, chairs, generator hours, solar, leveling blocks?
- What is not included or does not work?
Avoid vague claims like “fully stocked” without an inventory. Instead write, “Linens for six, cookware, four camp chairs, RV-safe toilet paper, and a propane fill on pickup.” That specificity attracts renters who follow instructions and reduces repeated questions.
Capture a complete, specific photo set
Photos are the first trust signal. Include every angle and every space, even the less glamorous ones.
At minimum, shoot:
- All exterior sides and the roof.
- Driver’s area, dashboard, and odometer if applicable.
- Every sleeping area with bedding shown.
- Bathroom, shower, and toilet controls.
- Kitchen, refrigerator, and cooktop.
- Storage bays, hitch, tires, and hookups.
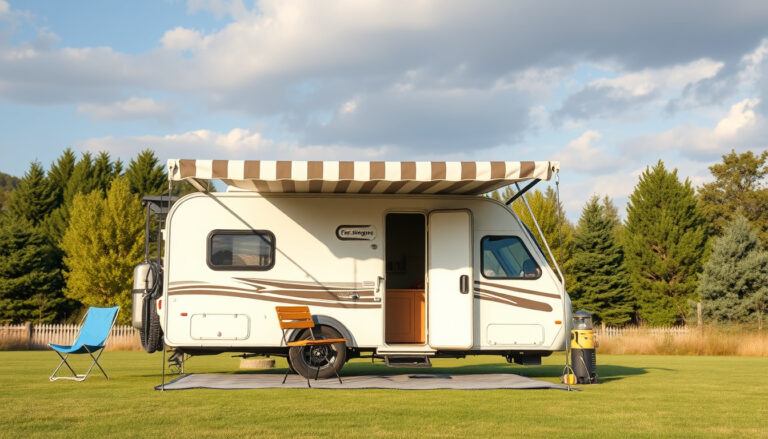
- Awning deployed if you have one.
Add captions that clarify condition and recent maintenance. For example, “New tires installed within the last 12 months” or “Roof resealed this season.” A listing that shows honest wear and documentation feels more trustworthy than one that hides it.
Step 4: Set Pricing, Rules, and Deposits Before You Open the Calendar
Clear numbers and enforceable rules prevent awkward negotiations, reduce damage risk, and protect your income.
Build a rate from costs and local demand
Do not guess your rate. Start by finding comparable listings of the same class, year range, and amenities in your area, then adjust for seasonality, delivery, and included gear.
A good baseline structure includes:
- Base nightly rate: anchored to comparable units, then refined after your first five to ten inquiries.
- Cleaning or prep fee: covers your turnover time and supplies.
- Delivery or pickup fee: priced by distance and setup time if you offer it.
- Generator or pet fee: only if you allow those options.
- Minimum night requirement: commonly two to three nights on weekends and longer over peak holidays.
Keep pricing simple at launch. Too many add-ons can look like hidden fees and push serious renters away. Underpricing peak weekends is a common mistake: it attracts high-risk renters and increases wear without enough revenue to cover the extra work.

Clear nightly rates and fee breakdowns reduce pre-booking questions and attract tenants who respect the rules.
Remember that short-term rental income is generally taxable. You can often deduct direct expenses such as supplies, maintenance, cleaning, and a portion of insurance, but the rules depend on personal-use days and how often you rent. Keep a simple log of rental days and expenses from day one. The IRS provides current guidance on rental-income tax rules that is worth reviewing before your first payout.
Write enforceable house rules
Good rules define who can drive or tow, where the camper can go, what is prohibited, and how returns are handled. Keep them strict enough to protect the asset and simple enough that renters actually read and follow them.
Cover these areas explicitly:
- Smoking and vaping: state “no smoking or vaping inside” and name the remediation charge for odor removal.
- Festival and off-road use: allow or prohibit clearly. Many owners exclude festivals, boondocking on rough terrain, and winter use.
- Towing requirements: specify minimum tow rating, brake controller, hitch class, and driver experience.
- Return expectations: dump tanks, fuel or propane level, trash removal, and late-return fees.
- Pet policy: if allowed, set a pet fee and cleaning expectations with clear damage language.
Rules that sound emotional or vague are hard to enforce. “Renters are expected to return the camper in clean condition” means little. “Gray and black tanks must be emptied before return; a $60 dumping fee applies if not emptied” is enforceable.
Protect yourself with deposits and documentation
Confirm whether your rental method provides liability and physical damage coverage, what the deductible is, and whether your personal RV insurance excludes commercial use. If deposits are pre-authorizations rather than real charges, document condition at checkout with time-stamped photos and a checklist so any claim is defensible.
A few best practices:
- Collect the deposit or pre-authorization before the renter leaves.
- Review your walkthrough checklist at both pickup and return.
- Take timestamped photos of the same angles every time.
- File damage claims promptly using the platform’s process.
- Keep text or in-app messages as a written record of all promises and disclosures.
Step 5: Screen Renters and Run a Tight Handoff
Oncebooking inquiries arrive, a consistent screening and handoff process protects the rig, reduces disputes, and improves reviews.
Screen for fit before approving a booking
Screening is not about being suspicious of everyone. It is about confirming the renter’s trip matches your rig and your rules. Message before approving and cover:
- Full legal name and age of the primary renter.
- Licensed drivers and their experience level.
- Destination, approximate mileage, and whether pets or festivals are involved.
- For towables: tow vehicle make, rating, brake controller, and towing experience.
Evasive answers, rushed pickup demands, insistence on cash outside the platform, or pressure to skip the walkthrough are reliable red flags. A good renter will answer straightforward questions without friction.
For towable campers, do not skip the tow setup conversation. Confirm the tow vehicle rating and hitch configuration in writing. The U.S. Department of Transportation publishes practical towing safety guidance covering weight ratings, brake controllers, and proper hitching procedures — worth reviewing so your requirements are technically correct.
Run a standardized walkthrough
A short structured walkthrough beats a long lecture. Renters remember three to five key actions under pressure, not twenty.
Cover the exterior, tires, awning, hitch, propane, electrical, water, and safety gear. Then demonstrate:
- How to connect and disconnect water, power, and sewer.
- How to operate the refrigerator, water heater, and awning.
- How to dump tanks and which valve is which.
- How to start the generator if applicable.
- What to do in the first 10 minutes of a roadside problem.
Use the same checklist every time. Time-stamp photos and video of all sides, roof, interior, appliances, and odometer or hitch. Inventory linens, hoses, adapters, leveling blocks, and keys together so the renter sees exactly what they are responsible for.
Close out with evidence and a wrap-up
The return should be just as structured as the pickup. Re-check the same items, compare photos, record mileage or generator hours, and note tank levels.
A simple closeout sequence:
- Confirm tanks are dumped or note the condition clearly. Provide a printed or digital dump-station checklist that includes rinsing the black tank at the dump station to prevent residue, odor, and sensor problems between rentals.
- Check fuel, propane, trash, linens, and missing gear.
- Inspect for new scratches, odors, stains, or appliance faults.
- If damage occurred, stay factual, collect evidence, and submit the claim promptly.
- Send a thank-you message, request a review, and log any maintenance needs.
If the same issue appears twice, change the process. For example, if two renters return late in the same month, add a paid late-return option, extend the buffer, or require an earlier check-out time before the next booking.
Prepare the Waste System Before the First Rental
One area that consistently causes bad reviews is the black tank. A renter who opens the wrong valve or cannot get the sensors to read correctly will remember the frustration. Before listing, thoroughly flush and sanitize the holding tank and verify the sensors work. During prep, add printed instructions with photos of the correct valves and a two-minute dump-station checklist. If you are uncertain whether the tank is actually clean, spend the time flushing the waste tank correctly before you hand over the keys.
A clean, well-maintained waste system also reduces the chance that a renter causes a clog or sensor failure, which would take the camper out of service for your next booking.
Common Problems and How to Fix Them
| Problem | Likely cause | Fix |
|---|---|---|
| Lots of views, few bookings | Weak first paragraph, missing bed or bath photos, unclear included items | Tighten the first 150 words, add photos of every bed and bath, list exact linens and kitchen kit |
| Price shoppers asking for discounts | Rate too low or listing lacks trust signals | Hold the rate, offer a weekly discount for longer stays, emphasize maintenance dates and quick support |
| Renters ask the same basic questions | Unclear listing or no quick-start guide | Add a pinned FAQ message, label controls, and include a one-page quick-start sheet |
| Damage disputes after return | No baseline photos or unclear rules | Create timestamped before/after photos and a shared checklist |
| Late returns disrupt cleaning | No late-return policy or too little buffer | Add a paid late-return option, extend the buffer, or require a specific return time |
FAQ: Renting Out Your Camper
Should I allow pets?
You can, but it should be a deliberate choice with a pet fee, cleaning expectations, and clear damage language. If your camper has fabric surfaces that trap hair and odors, you may decide the extra revenue is not worth the turnover work.
Is delivery worth offering?
If you can standardize it with a fixed radius, clear fee, and setup time, delivery increases bookings and reduces risky driving by renters who are not experienced with large vehicles. It also gives you more control over parking and placement.
How strict should my rules be?
Strict enough to protect the asset and simple enough that renters actually read and follow them. A short list of clear, enforceable rules works better than a long list of vague expectations.
Do I need a rental contract?
Yes, even on a marketplace. The platform may provide terms, but your own house rules, condition checklist, and written trip expectations create a clearer record in case of a dispute.
What if my camper needs repairs before renting?
Do not list a camper with known safety or comfort issues. Fix roof leaks, plumbing problems, brake or tire concerns, and appliance failures first. Renters expect the same function they would get from a commercial rental.
How much can I earn renting out my camper?
It varies widely by region, rig type, season, and how much work you put into the listing. Treat the first few bookings as a test, then adjust your rate, minimum nights, and fees based on actual demand and turnover time.
Your 30-Day Launch Plan
A simple weekly plan keeps the setup from feeling overwhelming.
Week 1: Prerequisites and condition
- Confirm registration, lienholder permission, and insurance coverage.
- Test every system and fix urgent repairs.
- Deep clean and photograph the full condition baseline.
Week 2: Prep and boundaries
- Label controls and stock critical supplies.
- Create the house rules, quick-start sheet, and dump-station checklist.
- Decide on your rental method and check fee structures.
Week 3: Listing and pricing
- Write the title, description, and included-items list.
- Build the photo set and add captions with recent maintenance.
- Set base rate, fees, minimum nights, and deposit approach.
Week 4: Process and launch
- Write your screening questions and handoff checklist.
- Open the calendar with one or two buffer days between bookings.
- Run a mock pickup and return with a friend to catch gaps.
Measure what matters after the first few rentals: inquiries, booking rate, average nightly revenue, turnover time, and repeated renter questions. Use that feedback to improve one thing at a time.
Conclusion: Start With a Repeatable System
Learning how to rent out your camper is less about finding the perfect listing and more about building a workflow you can run the same way every time. That means documenting condition before and after every rental, setting clear rules, pricing with intent, and screening renters with the same questions.
The owners who get the best results treat each booking as data. Which trips create the most cleaning time? Which add-ons get requested? Where do misunderstandings still happen? Adjust the system, not just the rate.
Your next step is simple: complete the Week 1 checklist this week. Confirm your insurance, test the camper, and document its condition. Doing that one block of work before you open the calendar will put you ahead of most first-time hosts — and set up the first rental to be smooth, protected, and worth repeating.