How to Fill a Raised Garden Bed Cheap for Rich Soil
how to fill a raised garden bed cheap can cut setup costs fast: a single 4×8 bed can swallow 20–30 cubic feet of soil, and store-bought bagged mixes often run $80–$200 per bed. That sticker shock is why many new gardeners stall before planting a single seed.
Cost matters, but so does performance. The fill choice controls drainage, fertility, and how often they’ll water, weed, and re-topdress. Look, the goal isn’t “free dirt”; it’s a layered fill that stays productive.
Three budget-friendly options tend to outperform random “cheap soil” buys, and they compare well by cost and longevity:
- Option 1: Hügelkultur-style base (logs/branches + leaves)
Best For: Gardeners with yard waste and deep beds (12–24″).
Pros & Cons:- Pros: Lowest cost; improves moisture retention over time.
- Cons: Settles in year one; can tie up nitrogen early.
- Option 2: “Bulk blend” top layer (compost + screened topsoil)
Best For: People who can get a local delivery.
Pros & Cons:- Pros: Best value per cubic yard; consistent texture.
- Cons: Delivery fees; quality varies by supplier.
- Option 3: Bagged mix only (fast, predictable)
Best For: Small beds or renters needing portability.
Pros & Cons:- Pros: Clean and convenient; easy to control ingredients.
- Cons: Highest cost; lots of plastic waste.
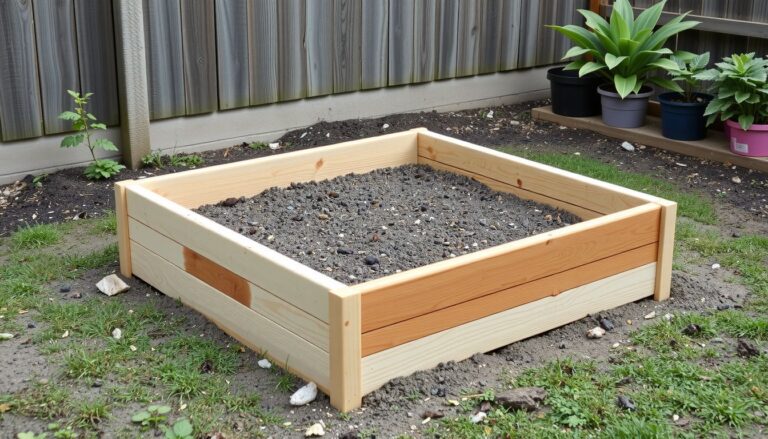
Practical example: a homeowner filling a 12″ 4×8 bed used free branches for the bottom half, then topped with a delivered compost/topsoil blend, cutting costs by over half versus bags while keeping a plant-ready surface.
Best for… Gardeners Who Want Low-Cost Beds Without Sacrificing Growth
Now, the goal shifts from “cheapest possible” to how to fill a raised garden bed cheap while still growing vigorously. The best approach is a layered fill that protects roots, manages drainage, and keeps the top layer fertile.
Option 1: “Hugelkultur-lite” base (logs/branches + leaves)
Best For: Gardeners with access to yard debris and a 12–24 inch bed.
- Pros: Cuts soil volume fast; improves moisture holding over time; uses free materials.
- Cons: Settles the first season; can tie up nitrogen if wood is too fresh; attracts termites near structures in some regions.
Option 2: Compost + topsoil blend cap (6–10 inches)
Best For: Growers who want reliable yields for vegetables and herbs.
- Pros: Strong early growth; easier watering; predictable fertility.
- Cons: Compost costs vary; too much compost can hold excess water in clay-heavy yards.
Option 3: Bagged mix only (premium “raised bed soil”)
Best For: Small beds or gardeners short on time.
- Pros: Fastest; consistent texture; fewer weeds.
- Cons: Highest cost per cubic foot; quality varies by brand; can shrink noticeably.
Plan the Fill: Bed Size, Depth, Budget, and What They’ll Grow
Look, planning prevents overspending. They should match fill strategy to bed depth and crop rooting needs, then reserve the best material for the top zone where roots actually feed.
Option 1: Shallow plan (8–12 inches total)
Best For: Lettuce, spinach, radishes, and compact herbs.
- Pros: Lowest fill volume; faster to amend; warms quickly in spring.
- Cons: Dries out faster; limited for tomatoes/peppers; less buffer for nutrient swings.
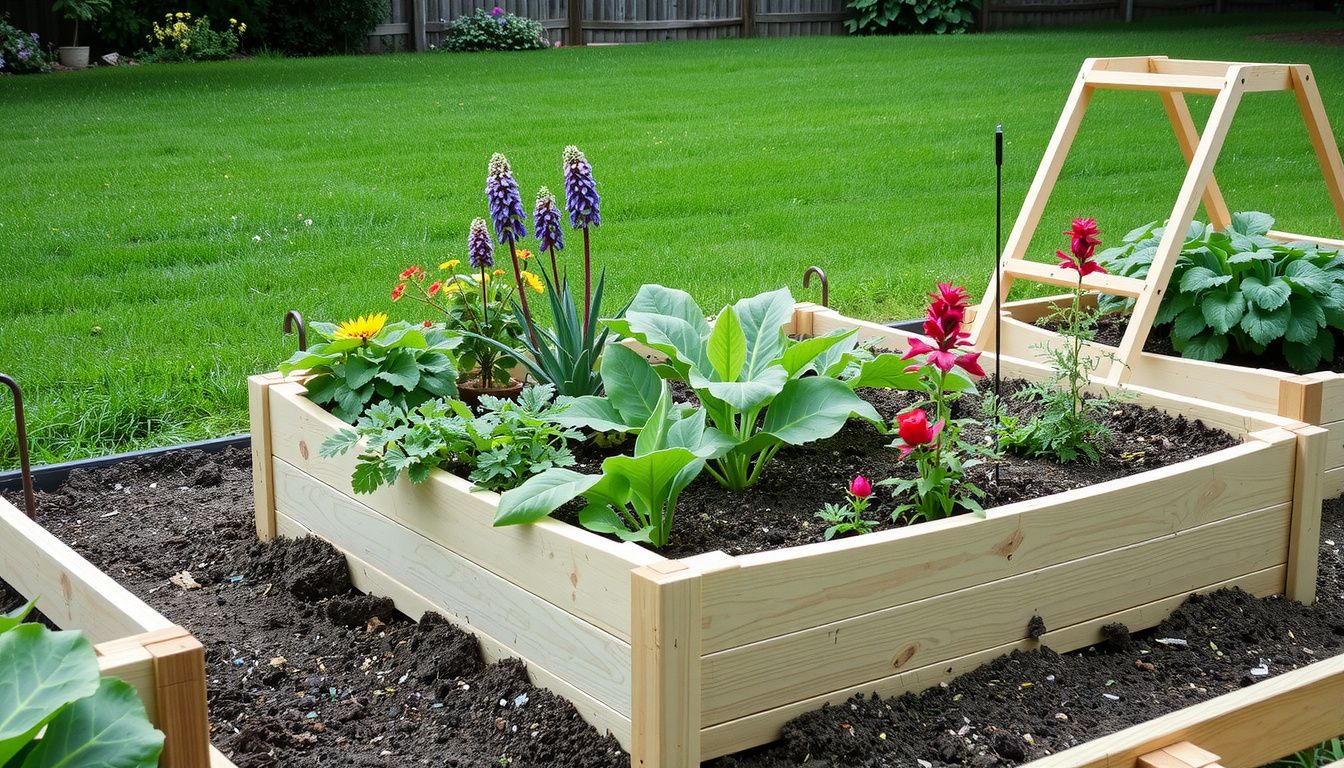
Option 2: Standard plan (12–18 inches, layered)
Best For: Most mixed vegetable gardens on a budget.
- Pros: Supports deeper roots; allows cheap base layers; steadier moisture.
- Cons: Requires more materials; settling needs a top-up.
Option 3: Deep plan (18–24+ inches)
Best For: Carrots, potatoes, and long-season fruiting crops.
- Pros: Highest yield potential; excellent drainage control; fewer compaction issues.
- Cons: Most expensive if not layered; more labor to fill.
Practical example: a 4x8x18-inch bed can be filled with free branches/leaves up to 8 inches, then 6 inches of topsoil, then 4 inches of compost-rich mix—keeping costs down while giving tomatoes a nutrient-dense root zone.
Cheap Fill Strategies Compared: Full Soil vs Layering vs Hybrid
Now the decision becomes tactical: they’re choosing the cheapest fill method that still supports roots, drainage, and long-term bed stability. Three approaches dominate, and the best choice depends on depth, crop type, and how soon they want peak performance.
Full Soil Fill keeps the entire bed uniform with a soil/compost blend. Best For: gardeners growing deep-rooted crops (tomatoes, carrots) who want predictable results.
- Pros: consistent moisture and nutrients; easiest to amend; fewer settling surprises
- Cons: highest upfront cost; heavy to move; can compact if mix is poor
Layering (Hugelkultur-style) uses logs/branches and rough organics below, soil on top. Best For: budget-focused gardeners with 12–24 in. beds and time for settling.
- Pros: big cost reduction; better water-holding over time; reuses yard waste
- Cons: initial nitrogen tie-up; uneven settling; attracts pests if food scraps are used
Hybrid Fill places a cheap bulk layer (wood chips/leaf mold) under a quality top zone. Best For: most home gardeners balancing cost and performance.

- Pros: cheaper than full soil; stable root zone; fewer early nutrient issues
- Cons: still needs purchased mix; requires planning layer thickness
Practical example: they fill a 4x8x18 in. bed with 8–10 in. of branches and leaves, then cap with 8 in.
of compost-rich mix for strong first-season growth.
Source Materials for Less: Free and Low-Cost Fill Options (and Where They Get Them)
Look, the cheapest beds are built from smart sourcing, not bargain soil alone. When they’re figuring out how to fill a raised garden bed cheap, the win comes from stacking free bulk with a clean, fertile top layer.
Autumn Leaves & Grass Clippings come from their yard or neighbors’ bagged curb piles. Best For: gardeners needing high-volume filler fast.
- Pros: free; breaks down into humus; improves water retention
- Cons: herbicide risk from treated lawns; clippings can mat; settles quickly
Tree Trimmer Wood Chips are often delivered free via local crews or chip-drop services. Best For: deep beds using hybrid or layering.
- Pros: huge volume; excellent bottom filler; reduces purchased soil
- Cons: ties up nitrogen if mixed into root zone; can be uneven; may include twigs
Compost Sources include municipal compost, coffee shops (grounds), and stable manure that’s aged. Best For: topping beds and boosting fertility cheaply.
- Pros: nutrient-dense; improves structure; often discounted in bulk
- Cons: variable quality; manure must be composted; contaminants possible
For comparison, they’ll typically reserve the cleanest compost for the top 6–8 inches and use chips/leaves below to cut costs without sacrificing growth.
What to Avoid: Treated Wood, Contaminated Soil, Weeds, and Pest-Prone Fill
Now the cost-saving choices need a safety filter. A cheap bed fill can backfire if it introduces toxins, chronic weeds, or pests that raise long-term labor and replacement costs.
Best For: Gardeners using reclaimed or free materials
- Pros: Prevents crop contamination; reduces rework; protects soil biology.
- Cons: Requires screening; may limit “free” sources; takes extra sourcing time.
Treated wood scraps (especially old railroad ties or unknown lumber) can leach preservatives. Contaminated soil from curbside piles may contain herbicide residues, lead dust, or petroleum grit, while weed-seeded fill turns a bed into a multi-year weeding project.
Look for pest-prone materials, too: uncomposted kitchen scraps attract rodents, and thick, matted grass layers can become slug habitat. A quick comparison helps: clean cardboard is low-risk weed suppression, while hay often carries seeds; finished compost is stable, while “hot” manure can burn roots.
Practical example: a gardener who filled with free “topsoil” from a demolition site later saw stunted beans and oily odor; replacing the top 8 inches cost more than buying screened soil upfront.
The Cheapest Reliable Method: Layering (Hugelkultur-Style) Step-by-Step
When they want predictable results at low cost, layering is the workhorse method for how to fill a raised garden bed cheap. It replaces expensive soil volume with stable, low-cost bulk while keeping a high-quality planting zone on top.
Best For: Gardeners filling deep beds (12–24 inches) on a tight budget
- Pros: Cuts soil purchases; improves moisture retention; uses free yard waste.
- Cons: Settles over time; needs nitrogen management; not ideal for shallow beds.
- Base (optional): Hardware cloth for gophers; then 1–2 layers of cardboard to smother weeds.
- Bulk layer: Logs, sticks, and chipped branches (avoid black walnut). Pack tightly to reduce settling.
- Carbon layer: Leaves, shredded paper, or straw to fill gaps and slow decomposition.
- Nitrogen buffer: A thin layer of finished compost or grass clippings to prevent temporary nitrogen tie-up.
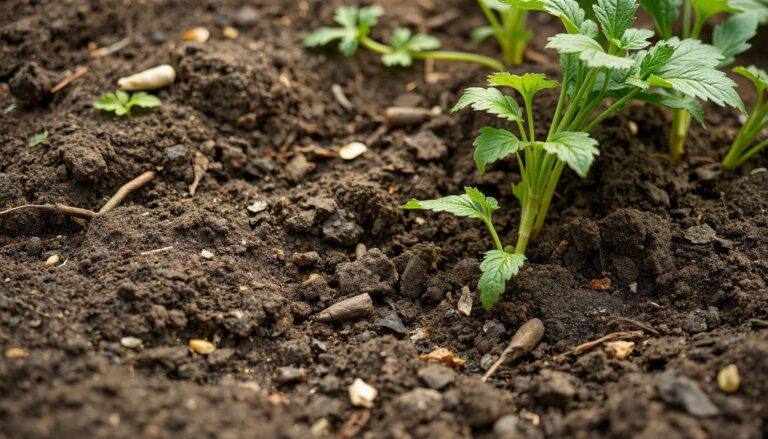
- Top 6–8 inches: Quality garden soil/compost blend for direct planting.
Real-world example: in a 4×8 bed, they can fill the bottom half with free branches and leaves, then buy only enough soil mix for the top layer, keeping seedlings vigorous while the lower layers break down.
Budget Soil Mix Recipes: Ratios for Vegetables, Herbs, and Flowers
Once the base fill is set, the top layer decides performance. For how to fill a raised garden bed cheap without stunting plants, they can standardize one “budget base” and tweak it by crop. The goal: stable moisture, enough nutrients, and good airflow.
Option 1: Vegetable Mix (heavy feeders) — 40% compost, 40% screened topsoil, 20% aeration (perlite/pumice/rice hulls). Best For: tomatoes, peppers, squash.

- Pros: High fertility; holds moisture; easy to source in bulk.
- Cons: Compost quality varies; can compact if topsoil is clay-heavy.
Option 2: Herb Mix (leaner, faster draining) — 30% compost, 40% topsoil, 30% aeration. Best For: rosemary, thyme, oregano.
- Pros: Reduces root rot risk; fewer nutrient spikes; lighter texture.
- Cons: Needs more frequent watering; may require light feeding midseason.
Option 3: Flower Mix (balanced bloom support) — 35% compost, 45% topsoil, 20% aeration. Best For: zinnias, marigolds, cut flowers.
- Pros: Steady growth; good stem strength; broad compatibility.
- Cons: Too rich for some natives; may need extra aeration in wet climates.
Buying Guide: What They Should Purchase vs Scavenge (Best Value Picks)
Now the spending gets strategic: buy what controls outcomes, scavenge what doesn’t. They’ll stretch dollars by prioritizing clean inputs and consistent texture, then backfilling with low-cost volume.
Buy: Compost (or composted manure) from a reputable yard. Best For: gardeners who want predictable fertility.
- Pros: Reliable nutrients; fewer weed seeds; improves structure fast.
- Cons: Delivery fees; “hot” manure can burn if not composted.
Buy: Screened topsoil (not “fill dirt”). Best For: beds needing mineral body and water-holding.
- Pros: Adds weight and buffering; cheaper than bagged mixes; scalable.
- Cons: Quality varies; may arrive too sandy or too clayey.
Scavenge: Leaves, aged wood chips, and clean cardboard. Best For: budget-focused builders adding volume under the root zone.
- Pros: Often free; reduces purchased soil; improves long-term tilth.
- Cons: Settles over time; chips can tie up nitrogen if mixed into the top layer.
Real-world example: A gardener filling a 4x8x18-inch bed buys 1 yard compost + 1 yard screened topsoil, then scavenges bagged leaves for the lower third; the bed performs like a premium mix while cutting paid material roughly in half.
Top-Up, Watering, and Settling: How They Keep the Bed Full All Season
Now the decision becomes maintenance: how to fill a raised garden bed cheap only works long-term if they plan for settling. Expect the surface to drop after the first few irrigations and again after heavy rain. A realistic target is keeping 2–3 inches of “headroom” early, then topping up once plants are established.
Option 1: Scheduled top-ups (monthly check)
Best For: Busy gardeners who want predictable upkeep.
- Pros: Prevents exposed roots; keeps mulch depth consistent; stabilizes moisture.
- Cons: Requires a stored top-up pile; can bury crowns if applied carelessly.
Option 2: Water-to-settle, then regrade (first 2 weeks)
Best For: New beds that were layered and need a final level.
- Pros: Reveals low spots fast; improves seedbed contact; reduces later sinkholes.
- Cons: Can compact if overwatered; may expose unevenness that needs more material.
Real-world example: They plant tomatoes, water deeply for 10 days, and the bed drops 1.5 inches; they regrade with a thin top-up and mulch, avoiding stem burial.
Cost Breakdown and Decision Checklist: Choose the Best Cheap Fill Plan
Look, the cheapest plan is the one they won’t redo mid-season. The decision should balance upfront cost, how often they’ll top up, and how quickly the bed needs to be plant-ready.
| Option | Typical Cost | Best For |
|---|---|---|
| Full soil fill | $ | Small beds, immediate planting |
| Layered fill + soil cap | $$ | Deep beds, lowest cash outlay |
| Hybrid (partial bulk + soil cap) | $$$ | Fast setup with fewer top-ups |
Option A: Full soil fill
Best For: Shallow beds or gardeners planting the same day.
- Pros: Most uniform; minimal settling; easiest to amend.
- Cons: Highest purchase volume; hauling is the bottleneck.
Option B: Layered fill
Best For: Tall beds where cash matters most.
- Pros: Lowest spend; reduces paid soil needs; uses bulky materials efficiently.
- Cons: More settling; needs a planned top-up reserve.
Option C: Hybrid
Best For: People who want savings without frequent regrading.
- Pros: Faster to stabilize; fewer sinkholes; good early growth.
- Cons: Costs more than layering; still needs minor top-ups.
Decision checklist: bed depth, planting deadline, top-up storage, and how often they can check moisture and level.
Where to Go From Here
Now the plan is simple: how to fill a raised garden bed cheap comes down to matching materials, time, and risk tolerance. Choose a low-effort approach if they want predictable results fast; choose a scavenged approach if they can invest sweat equity and monitor settling. The best choice is the one they’ll actually maintain through the season.
Choose the option that fits them:
- Choose bagged raised-bed/compost blends if they need speed, consistent texture, and minimal troubleshooting.
- Choose municipal compost + a small amount of purchased topsoil if they want the lowest cost per cubic foot and can verify source quality.
- Choose free local organics (leaves, chips) with a smaller “good soil” cap if they have access to clean inputs and don’t mind gradual settling.
Example: a renter filling two 4×8 beds often caps with a dependable mix, then uses free leaf mold to stretch volume without hauling heavy soil. Next step: they should measure bed volume, pick one approach above, and source materials this week so the bed can be planted on schedule.