How to Deep Fry Fish in a Pan With Oil, Crisp Every Time
how to deep fry fish in a pan with oil is the kind of skill that saves dinner when the fryer’s missing and the takeout line is long. Picture a weeknight when the fish is thawed, the sides are ready, and the only question is whether the coating will turn crisp or go soggy. They want that clean crunch without filling the kitchen with smoke or leaving the fillets greasy.
This guide shows a reliable pan-fry method that behaves like deep-frying: steady heat, the right oil depth, and a simple workflow that protects the crust. It covers what to prep, how to manage temperature, and when to flip so the fish cooks through while staying juicy. Look, the difference is usually technique—not luck.
Practical example: they can cook two 1-inch cod fillets by heating 3/4 inch of neutral oil in a heavy skillet, then frying 3–4 minutes per side until golden and 145°F inside. The steps focus on repeatable results, including:
- Oil choice and depth for even browning
- Simple breading options that won’t slide off
- Temperature cues to prevent burning or sogginess
- Safe draining and seasoning timing for maximum crunch
By the end, they’ll know exactly how to get restaurant-style fried fish using one pan, oil, and a few smart checks.
Gather Tools, Oil, and Fish Before You Start
Now it’s time to set the station so the fish can go from raw to crisp without scrambling for gear mid-fry. They’ll get better browning, safer handling, and fewer oil splatters when everything is within reach. A simple mise en place setup also keeps the coating dry and the oil temperature steadier.
They should start with a heavy pan that holds heat well, plus a way to monitor temperature. A cast-iron skillet or deep sauté pan works; shallow pans cool too fast and encourage sticking. If they don’t have a thermometer, they can still fry, but they’ll need to watch visual cues more closely.
- Deep, heavy pan (cast iron or stainless) with 2–3 inch sides
- Instant-read or clip-on thermometer; long tongs or a spider skimmer
- Wire rack over a sheet pan (or paper towels) for draining
- Paper towels, a lid/splatter screen, and a heatproof tray for cooked fish
For oil, they’ll want a neutral, high-smoke-point option like peanut, canola, sunflower, or refined avocado oil. Plan enough depth so the fish can float slightly—typically 1 to 1 1/2 inches in a pan. They should pat fish dry and keep any flour or batter staged in shallow dishes.
Practical example: If they’re frying for four, they can set a rack on a sheet pan in a 200°F oven to hold early batches while the last pieces cook. That keeps the crust crisp without overcooking.
Choose the Right Fish and Cut It for Even Frying
Look, the fish choice matters as much as the oil. They’ll get the most consistent results with firm, mild fillets that won’t shred when turned. Very delicate fish can work, but it demands gentler handling and tighter temperature control.
Good pan-deep-fry picks include cod, haddock, pollock, catfish, tilapia, and halibut. Oily fish like salmon can be fried, yet it browns faster and can taste heavier. Whatever they choose, they should buy fish that smells clean, looks glossy, and springs back when pressed.
- Firm white fish for stability: cod, haddock, catfish
- Moderate thickness for even cooking: 3/4 to 1 inch is ideal
- Skin on or off: skin-on crisps well but can curl if not scored
They should cut portions to a uniform size so every piece finishes together. Aim for 3–4 inch wide sections, and trim thin “tails” that overcook. If the fillet is thick on one end, they can butterfly it or slice it into two flatter pieces.
Pro tip: They should lightly score skin-on pieces (two shallow cuts) to reduce curling. Common mistake: frying mixed thicknesses in one batch; thin pieces turn dry while thick ones stay underdone.
Practical example: With a 1 1/2-inch halibut fillet, they can cut it into two 3/4-inch slabs before coating. The result is a faster fry, a crisper crust, and a center that stays juicy.
Season and Coat the Fish for a Crisp Crust
Now the fish needs flavor and a coating that can survive hot oil without sliding off. They’ll get the best crust when the surface is dry, the seasoning is balanced, and the coating is applied in a clean order.
First, they should pat the fish dry with paper towels until it feels tack-free. Moisture is the enemy of crunch because it steams the coating and can make the oil spit. If the fish was rinsed, it must be dried again.

Next, they should season the fish directly, not just the flour. A reliable baseline is salt, black pepper, and a pinch of paprika or cayenne for color. If the fish is mild, a little garlic powder works; if it’s already briny, they should reduce salt.
For coating, they can choose a simple flour dredge or a craggy cornmeal blend. A practical standard is:
- Dry mix: 3/4 cup all-purpose flour + 1/4 cup cornmeal + 1 tsp salt + 1/2 tsp pepper
- Wet dip (optional): 1 egg beaten with 2 tbsp water or buttermilk
- Finish: Return to dry mix and press lightly for adhesion
They should coat in small batches and shake off excess; thick clumps fall off and burn. Then the coated fish should rest on a rack for 5–10 minutes so the starch hydrates and bonds.
Pro tip: If they want extra crispness, they can add 1 tbsp cornstarch to the dry mix. Common mistake: coating fish while it’s still wet, which creates bald spots and soggy edges.
Real-world example: for two 5-ounce cod fillets, they can season both sides, dip in egg wash, press into the flour-cornmeal mix, and let them sit while the oil heats—no rushing, better crust.
Heat the Oil to the Correct Temperature in a Deep Pan
With the fish coated, the next job is getting the oil hot enough to crisp fast without scorching. They’re aiming for steady heat, not a roaring boil, because temperature control decides whether the fish turns golden or greasy.
They should pour oil into a deep, heavy pan to a depth that can submerge at least half the fish. Too little oil drops temperature quickly; too much increases splatter risk. The pan should sit centered over the burner for even heating.
They should heat the oil gradually over medium to medium-high until it reaches 350–375°F. A thermometer is the cleanest method; clipped to the pan, it shows real-time recovery after each batch. If they don’t have one, they can test with a pinch of coating: it should sizzle immediately and float, not sink and darken fast.
To keep the temperature stable, they should follow these action points:
- Preheat for 8–12 minutes, then fine-tune the burner in small adjustments
- Fry in batches; overcrowding can drop oil below 325°F
- Wait for the oil to recover to 350°F before adding the next pieces
Pro tip: If the oil smokes, it’s too hot; they should remove the pan from heat for 1–2 minutes and lower the burner. Common mistake: cranking heat to “high” after adding fish, which can burn the coating before the center cooks.
Real-world example: if they add two breaded tilapia fillets and the thermometer falls to 330°F, they should pause and let it climb back to 350°F before adding more, keeping the crust crisp and the fish tender.
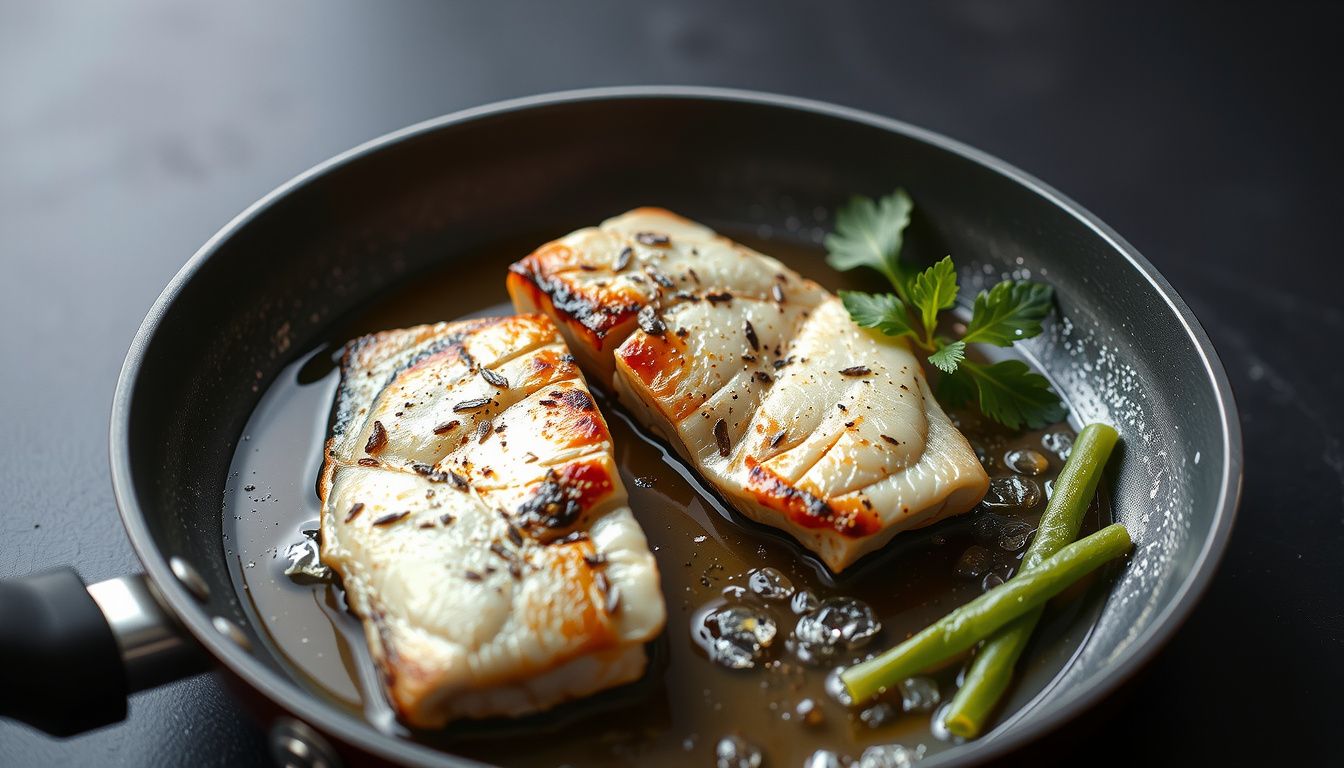
Fry the Fish in Batches Without Sticking or Splattering
Now the oil’s hot and the coating’s set, so the focus shifts to control. Frying in batches keeps the oil temperature stable and prevents the crust from steaming instead of crisping.
Start by lowering fish into the oil away from the cook using tongs or a spider. Release each piece gently, then wait 10–15 seconds before adding the next one so the oil can recover and the coating can “lock” before it’s jostled.
Keep the pan from overcrowding. A good rule is to leave visible oil between pieces so bubbles can circulate. If the fish touches, it often sticks, tears, and sheds breading into the oil.
- Sticking fix: Don’t move the fish early; let the first side firm up before turning.
- Splatter control: Pat off surface moisture and lower fish close to the oil before releasing.
- Even browning: Turn once, then finish without constant flipping.
Look for cues, not guesswork. The fish is ready to turn when the bubbling slows slightly around the edges and the crust looks set, not wet. If the coating looks pale and fragile, it needs more time.

Practical example: when frying four thin tilapia fillets in a 12-inch deep skillet, they’ll typically cook best in two batches of two. The oil stays hot, the crust stays intact, and the second batch won’t taste like “reheated oil.”
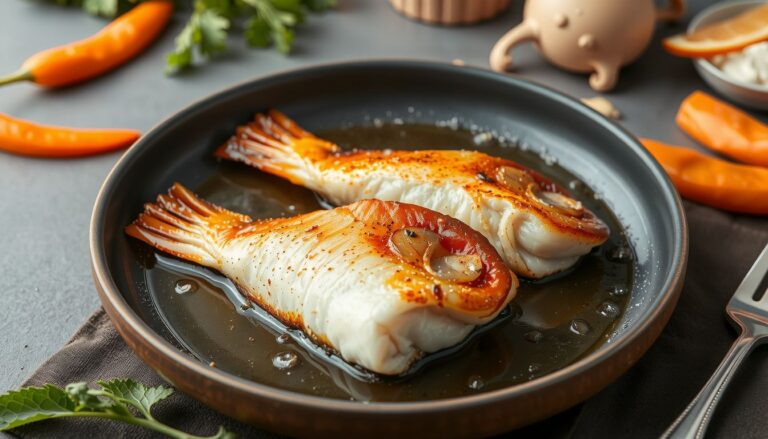
Drain, Rest, and Serve for Maximum Crunch
Once the fish is golden and cooked through, the last texture gains happen off the heat. Draining correctly prevents soggy bottoms and keeps the crust shattering crisp.
Lift each piece out and let excess oil drip back into the pan for a few seconds. Transfer to a wire rack set over a sheet pan; paper towels trap steam and soften the crust, especially with thicker fillets.
- Best draining setup: wire rack + rimmed pan
- Season timing: salt immediately while the surface oil is still hot
- Hold strategy: keep warm in a low oven only if needed, rack still required
Give the fish a short rest. Two to three minutes lets surface oil finish draining and helps the crust firm, while the interior juices settle so the first bite doesn’t gush and soften the coating.
Practical example: if they’re serving pan-fried cod for tacos, they can rest the pieces on a rack while warming tortillas. Then they should break the fish into chunks right before assembling, so the coating stays crisp under slaw and sauce.
Serve fast for peak crunch. If it must wait, keep pieces separated and uncovered; covering traps moisture and turns a crisp crust limp in minutes.
Troubleshoot Common Problems and Store Leftovers Safely
If how to deep fry fish in a pan with oil feels finicky, they’re not alone. Even small shifts in moisture, heat, or timing can turn “crispy” into “soggy” fast. The fixes below are ranked from quickest to most effective, with the outcome they should expect.
Low effort, fast wins usually solve most batches. These are the first moves when something looks off.
- Coating falling off: Let the coated fish sit 5–10 minutes before frying. Outcome: the crust bonds and stays intact when flipped.
- Fish sticking to the pan: Wait 30–60 seconds longer before moving it; the crust releases when set. Outcome: clean turns without tearing.
- Excess splatter: Pat the fish drier and lower it into oil away from the body. Outcome: calmer bubbling and fewer burns.
Medium effort, biggest quality jump targets temperature and crowding—the usual culprits behind pale crusts and greasy bites.
- Greasy, heavy texture: Raise oil heat slightly and fry smaller batches. Outcome: faster crust set and less oil absorption.
- Burning before cooked through: Reduce heat a notch and use thinner pieces. Outcome: even browning with flaky centers.
Look: if they fried cod and it went limp after plating, a real fix is holding pieces on a wire rack over a sheet pan in a 200°F oven for 10 minutes. Outcome: steam vents, crunch returns, and the next batch doesn’t sog the first.
For leftovers, cool fish within 1 hour, then refrigerate in a vented container lined with paper towel. Reheat on a rack at 400°F until hot and crisp; avoid microwaving. Outcome: safer storage and a crust that stays snappy.
You’re Ready
Now it’s just repetition and confidence: how to deep fry fish in a pan with oil becomes reliable once they treat it like a simple routine, not a one-off experiment. The best cooks stay calm, keep their workspace organized, and make small adjustments based on what they see and hear in the pan.
They’ll get the most consistent results by locking in a few habits:
- Plan the timing so sides and sauces are ready when the fish comes out.
- Keep tools close (tongs, thermometer, rack, paper towels) to avoid scrambling mid-fry.
- Work clean by wiping splatters and resetting between batches.
Real-world example: when they’re feeding four people on a Friday, they can fry two batches, hold the first on a rack while plating, then serve everything hot within minutes.
Next step: they should pick one fish they can buy consistently, fry it twice this week, and note what they’d tweak next time.
Related read: Blackstone Grill How to Use: Step-by-Step Setup to Cook