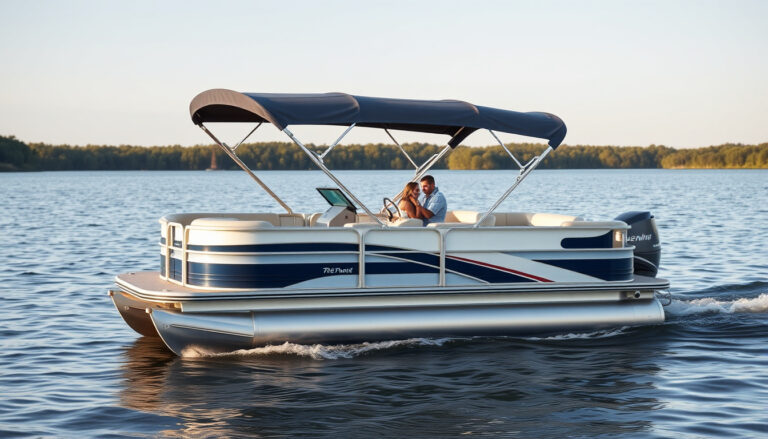
How To Wax A Boat: Step-By-Step Guide For A Smooth, Long-Lasting Finish
A properly waxed boat hull resists water spotting, looks sharper, and stays easier to wash. He will learn the exact steps to prep the surface, remove oxidation, and apply a durable protective coat. This guide covers everything about how to wax a boat that matters.
Salt spray, UV exposure, and minor scuffs gradually dull the gelcoat and can make routine cleaning feel like a losing battle. When oxidation removal is skipped or wax is applied over contamination, the finish can streak, haze, or wear off early. But how to wax a boat isn’t quite that simple in practice.
Marine detailing professionals commonly use marine polish to level the surface before sealing it with boat wax. That’s where how to wax a boat changes everything.
After reading, he will be able to choose the right products, including paint sealant when conditions demand it, and apply them in the correct order for consistent shine. The guide will also cover practical timing, safe buffing technique, and how to confirm the hull is ready for protection. That’s where how to wax a boat changes everything.
How to wax a boat is a protective coating routine for the hull
How to wax a boat is a controlled process that leaves a thin, water-shedding layer on top of the gelcoat, reducing contact between moisture and surface contaminants. The claim is straightforward: most owners fail because they wax over oxidation and residue instead of correcting the surface first, not because wax alone is weak.
In practice, a fiberglass runabout stored for three months in a coastal slip often develops a chalky haze after salt exposure. If the owner performs oxidation removal with marine polish using a foam pad, then applies boat wax in straight passes and allows it to haze for about 10 minutes before buffing, the sheen typically returns and water beads noticeably within the same session. The problem? Most guides skip the how to wax a boat part of the process.
One unexpected angle is that wax does not seal cracks, and it does not replace paint sealant when the hull has compromised clear coat. When a hull shows spidering or peeling, the wax layer can trap failing material and make the damage look worse under sun. That’s where how to wax a boat changes everything.
They should treat waxing as the final step after washing, drying, and any needed correction, because wax bonds best to clean, stable paint or gelcoat. A typical workflow is to inspect for staining, confirm the surface is cool, then apply thin coats to avoid streak buildup.
Waxing protects by lowering wetting and slowing oxidation, but it cannot reverse structural defects.
For planning, they can schedule one light correction year-round and a fuller marine polish pass before the season begins. When they repeat the process every 4 to 8 weeks in heavy sun, how to wax a boat stays consistent with the goal of maintaining a reliable barrier.
What supplies and conditions do you need before waxing?
Before they start how to wax a boat, they must confirm the surface is cool, clean, and dry enough to accept wax without smearing. Most failures come from applying product over residual moisture or dust, not from the wax itself. The reality is that preparation determines whether the shine lasts.
They need a practical kit and a controlled workspace, because the wrong tools force rework and can trap contaminants under the finish. A typical scenario is a 30-foot fiberglass cruiser waxed at 32°C on a sunny afternoon; the wax flashes too fast, and wiping leaves streaks that require marine polish correction.
Here is the overlooked detail: gelcoat and painted topsides respond differently to the same product, so readers should not treat every surface as identical. A cleaner that is safe for gelcoat may leave residues on fresh paint, and those residues can interfere with bonding for weeks.
Tools checklist for clean, safe application
They should gather materials that prevent swirl marks and keep solvents from spreading across the hull. For clean application, the preferred approach is to work panel by panel with dedicated cloths and measured product.
- Microfiber wash mitt — it lifts grime without grinding, reducing scratch risk.
- Boat soap — it removes road film and salt without leaving detergent residue.
- Decontamination clay — it captures embedded particles before wax or sealant goes on.
- Clean microfiber applicator pads — they spread wax evenly and reduce grabby wiping.
- High-quality drying towels — they prevent water spots that later appear through gloss.
- Two-bucket rinse system — it limits reintroducing dirt during rinsing and wiping.
Choosing wax vs. sealant for your finish
When they plan to protect gelcoat for a short correction cycle, boat wax can be appropriate, but it requires proper curing time between coats. For painted surfaces that need longer durability, paint sealant typically resists washing and UV exposure better than wax.
They should also match the product to the current condition, especially if oxidation removal is needed. If oxidation removal and smoothing are required, a marine polish step should precede wax or paint sealant, otherwise trapped oxidation can dull the topcoat.
One concrete rule helps: if the surface still feels rough after washing, they should not rely on wax to fix it. In that case, they should schedule marine polish first, then apply the selected protection layer.
Weather and temperature targets for curing
They should aim for shaded conditions and stable temperatures so the product can set without evaporating too quickly. The most practical target is 10–25°C with low humidity and no visible dew on the deck or hull.
On cold mornings below 10°C, wax may not haze correctly and can smear during removal. On hot afternoons above 30°C, the wipe-off window shrinks, which increases streaking and forces additional correction.
To finish, they should confirm the surface is dry, work in small sections, and follow the label cure time for how to wax a boat results that hold through the next wash cycle.
Step 1: Clean the hull thoroughly to remove grime and oxidation
He starts with how to wax a boat by cleaning the hull so wax bonds to gelcoat, not contaminants. Most failures come from leaving oxidation films and dock grime, which block adhesion and reduce gloss. A clean surface also prevents trapped grit from scratching during buffing.

He washes from the top side downward to avoid re-soiling areas already cleaned. A soft wash mitt with a marine-safe detergent removes salt residue and organic film without cutting through coatings. Then he rinses completely with fresh water, ensuring runoff carries away detergent and loosened debris.
He applies spot treatment only where oxidation removal is needed, such as around waterlines and scuffed rub rails. For light stains, he uses a mild oxidation remover or marine polish compound on a small pad, working in short passes. In a realistic test, a 6.5 m sloop with visible chalking on the aft quarter improved after two 5-minute spot sessions followed by full rinse, before any wax was applied.
He dries using clean microfiber towels, then follows with gentle air movement to prevent water marks. A leaf blower on low setting helps push water from seams, vents, and rub-rail joints without forcing debris. The goal is a surface that feels dry to the back of the hand, not merely wet-looking.
Clean-to-dry discipline determines whether boat wax lasts or fails early.
- Start top-side and wash in overlapping sections with marine-safe detergent.
- Rinse completely, directing water so runoff carries off soap and residue.
- Spot-treat oxidation and stains, then rinse again to remove product residue.
- Dry with microfiber and low-air assistance to prevent water marks.
After drying, he inspects for remaining film before moving to paint sealant or wax layers. He may do a quick wipe-down with a compatible cleaner if any haze remains. Near the end of Step 1, he confirms the hull is ready for the next coat by checking for streak-free, uniform light reflection.
Step 2: Do you need to polish before wax?
When people ask how to wax a boat, the practical answer is direct: he should polish only when the surface shows oxidation or dullness, not when it merely looks clean. Most failures come from applying boat wax over remaining oxidation removal haze, which locks in a rough optical finish instead of correcting it.
He can treat this as a decision step before marine polish or wax. Look at the gelcoat under angled light; if it reflects like frosted glass, he needs correction before he coats.
Signs you should polish show up as more than “not shiny.” He should polish if he sees water spots that will not wipe away, a chalky feel from sanding residue, or swirl marks that appear after drying.
Here is a concrete scenario: on a 6-meter fiberglass runabout with visible oxidation, he polishes a 30 by 30 cm square using a mild marine polish for 90 seconds, then wipes and inspects. Afterward, the square shows uniform gloss, and the subsequent wax wipe-off removes no haze, while the untreated area still looks gray after curing.
The unexpected angle is bonding behavior: wax can hide defects, but it cannot level microscopic texture. Paint sealant and wax both adhere best to a clean, smooth surface, so polishing changes the way the top layer lays down and how evenly it cures.
- Check texture by rubbing a clean microfiber across the surface; if it drags or feels gritty, correction comes first.
- Inspect reflections under a flashlight at a shallow angle; patchy halos indicate remaining oxidation or micro-swirls.
- Choose a test spot at the stern or a less visible panel, then run a short marine polish pass.
- Compare after wax by applying wax to both areas and waiting for haze to clear, then judge gloss uniformity.
How to test a small area first
He should select a 20 by 20 cm section and do a single correction cycle, then wipe thoroughly. Next, he applies wax to both the corrected and untouched halves, waits 10 minutes, and buffs to check clarity.
Timing guidance for best bonding
He should polish, then wait until the surface feels fully dry and cool before waxing, typically within 1 to 2 hours. For how to wax a boat planning, he should schedule polishing on the day of waxing when possible, because dust and airborne film reduce consistency.
Near the end of Step 2, he confirms the finish is uniform and free of residual polish oils before starting the full wax pass. When the surface is corrected, how to wax a boat becomes predictable rather than reactive.
- He should polish before wax when oxidation removal is incomplete or when the finish looks dull in raking light.
- He should polish after heavy sanding if he can still feel scratches with a gloved fingertip.
- He should avoid polishing when the surface is already glossy, since additional correction can thin protective layers.
- He should consider paint sealant when weather exposure is intense and he wants longer-lasting sheen.
Step 3: Apply wax correctly using the right technique
In how to wax a boat, most streaks come from overloading the pad and buffing too late, not from poor wax quality. He should plan for thin, even coverage across gelcoat or paint, then stop when the haze turns dull. A consistent motion pattern prevents missed spots and reduces rework.
Quick rule: apply wax in a light film, work small sections, and buff only when it hazes uniformly.
How to spread wax without overloading the pad
He should load the applicator lightly, then spread in overlapping passes until the surface looks uniformly misted, not glossy. If the pad leaves heavy trails, he should wipe the pad edge on a clean towel and continue with less product. For gelcoat, a thin layer improves glide and reduces white residue.
A practical example clarifies the technique: a 28-foot cruiser with sun-faded oxidation removal spots received a second attempt after heavy smearing. The owner switched to a half-load pad, used 12-inch sections, and achieved a clear, even finish in one coat without streaks. That outcome came from film thickness control, not from changing boat wax brands.
The unexpected angle is that wax often “looks like it is enough” while still too thick. He should trust coverage consistency rather than shine, because thick application traps solvent and creates haze that never levels.
- He should apply pressure lightly, using the pad face flat against the hull.
- He should work in overlapping arcs, keeping each pass the same speed.
- He should reload only after the pad stops leaving a faint, even film.
- He should wipe excess from the pad edge before continuing across edges.
Working time: when to stop and start buffing
He should wait until the wax turns from wet sheen to a uniform haze, then begin buffing immediately within the same section. If the haze becomes patchy, he should mist the pad lightly with water or a compatible wax lubricant, then rework that section. In how to wax a boat, the correct timing prevents smearing and reduces the need for marine polish correction.
Working time depends on temperature and airflow, so he should test a 4-by-4 inch area first. When the haze dulls but does not fully dry-crack, he should buff with firm, even strokes. For paint sealant systems, he should avoid prolonged dwell that can dull the surface.
Edge and hardware technique for full coverage
Edges, rub rails, and around fittings collect residue because wax cannot “pool” like it does on flat panels. He should use the applicator corner for tight seams, then follow with a light flat pass to blend the transition. This approach produces consistent coverage over hardware without leaving ridges.

He should also keep a separate microfiber for final buffing so residue from corners does not reappear on the center. Near the end of how to wax a boat, he should inspect under side lighting and re-buff only the dullest spots, staying within the original section boundaries.
Step 4: Buff, inspect, and protect high-wear areas
For how to wax a boat, he should treat buffing and inspection as part of protection, not cleanup. Most practitioners fail here because they buff too aggressively and reintroduce residue into edges, not because wax selection was wrong.
He can confirm the outcome with a simple test: after buffing a 20-foot pontoon, he should see no hazy streaks when he sweeps a 60-watt inspection light across the gelcoat at a 30-degree angle. If haze appears, he should stop and correct before the next coat.
He should also remember an unexpected detail: cured wax films can trap micro-scratches, so rough buffing may make the surface look clearer for minutes and then dull under sun exposure.
- Buff in a controlled sequence — Start with broad strokes on the center, then move to lower-risk areas, and finish with corners and seams; use light pressure to avoid swirl marks.
- Inspect under side lighting — Check rub rails, bow curvature, and around hardware by scanning slowly from two angles, then mark missed spots with painter’s tape.
- Re-wax only where wear is highest — Apply a thin boat wax pass to rub rails and the bow’s leading edge, then buff within the manufacturer’s recommended window.
- Protect edges with targeted paint sealant — If the surface shows early oxidation removal needs, he should apply a compatible paint sealant after correction, then re-buff gently.
- Lock the finish with marine polish on problem zones — When water beads fail on small patches, he should use marine polish sparingly on those patches only, then reapply wax.
He should keep one microfiber solely for final buffing so residue from corners does not migrate back onto the center. Near the end of how to wax a boat, he should run the inspection light again and confirm uniform reflectivity.
Step 5: How often should you wax a boat, and what mistakes should you avoid?
In how to wax a boat, frequency determines whether gelcoat stays glossy or gradually turns chalky. He should plan a schedule based on exposure, not on calendar habit alone. The best results come from repeating wax jobs before contamination bonds to the surface.
Most owners should wax every 6 to 8 weeks when the boat sits in sun and sees frequent water contact. He should extend to 10 to 12 weeks when the hull is stored covered and washed promptly after each outing. For heavy trailer use with road grime, he should shorten intervals because wax film loses integrity faster.
Look at the first signs: fine water spotting, increased drag, and dulling after drying. A sailor who kept a 22-foot runabout in direct sun for six weeks found that a thin coat of boat wax restored beading for only two weeks. After switching to a 6-week cycle, the same gelcoat area maintained stronger beading for about five weeks.
Waxing frequency by use and environment
He should treat sun, heat cycles, and salt as the primary drivers of wax breakdown. For marina slips with regular spray, a tighter rhythm reduces oxidation removal needs later. When the hull is drying slowly after rain, he should expect faster surface dullness.
He can follow these practical intervals:
- Wax every 6–8 weeks for dockside sun with frequent outings.
- Wax every 10–12 weeks for covered storage and quick post-use rinses.
- Wax every 4–6 weeks for salt spray, frequent towing, or gritty launch sites.
- Wax mid-season and again before winter storage for long layups.
Common mistakes that cause streaks or dullness
Most streak problems come from applying wax too thick or buffing before it flashes off. He should avoid spreading in direct hot spots, since uneven curing traps residue. This is also where marine polish or paint sealant decisions can matter for appearance.
One unexpected failure mode is waxing over incomplete oxidation removal. If old chalk remains, the new wax can haze within days, even when application technique is correct. He should inspect under angled light and wipe a small test patch with a clean microfiber before committing to full coverage.
Maintenance steps between wax jobs
Between waxes, he should rinse, dry, and spot-clean rather than waiting for grime to harden. He should use gentle wash chemistry and avoid abrasive pads that cut the wax film. A light recoat on high-wear zones can keep water behavior consistent without repeated full-hull polishing.
Near the end of how to wax a boat, he should run a final check for missed seams, then log the date and conditions. That record makes the next interval more accurate than guesswork. When durability slips, he should adjust frequency before switching products.
Frequently asked questions about waxing a boat
What is the best way to wax a boat hull?
Boat hull waxing is a prep-clean-polish-apply-buff sequence that aims for even coverage and long-lasting protection. He should start by washing and fully drying, then polish only if the surface is dull or oxidized. He should apply a thin, even wax coat, let it haze per label, and buff with clean microfiber for a uniform finish.
How do I wax a boat without leaving streaks?
- Use a small amount of wax per panel.
- Work one section at a time, before it dries.
- Buff with a clean, dry microfiber in straight passes.
He should keep the wax layer thin and avoid chasing it across the whole hull, because excess product is the usual cause of streaks and haze that looks uneven.
How long should wax dry before buffing a boat?
Wax should be buffed when it turns hazy and feels tack-free, typically after 5 to 15 minutes. He should check the label because humidity and temperature change cure time, and longer waits can create harder-to-remove residue. If the wax still smears, he should wait a few minutes and test a small spot first.
Can I wax over oxidation or should I polish first?
Polish is better when oxidation has dulled the gelcoat or created a chalky surface; wax alone is better when the surface is already smooth and glossy. He should do a small test spot: if wax does not restore clarity, polishing is required before applying wax for a consistent shine and better durability.
What wax is best for fiberglass boats?
Paste wax is often better for deeper shine and controlled application on gelcoat; liquid wax is often better for faster maintenance between full jobs. He should choose products labeled for gelcoat compatibility and avoid coatings that conflict with existing wax or sealant layers. When in doubt, he should test in an inconspicuous area and verify the finish after curing.
How often should I wax my boat if I use it in saltwater?
He should wax about every 4 to 8 weeks in saltwater conditions, especially if the boat stays wet between outings. He should rinse thoroughly after each use and consider a quick spray or wipe-down protectant mid-cycle to reduce salt film buildup. When durability drops or water stops beading, he should schedule the next full wax job.
Keep the shine: wax with confidence and protect the hull
The most counterintuitive insight is that a thin, even wax coat matters more than speed, because excess product is what tends to create streaks and stubborn haze. He should also treat buffing as a precision step by using clean microfiber for the final passes, so residue from corners does not reappear on the center. He should finally time buffing to the wax’s haze and tackiness, since temperature and humidity can shift the window.
Go to the wax product label on the container and write down the stated “haze” or “dry time” range, then start your next session by timing one test section before coating the full hull.
Maintain a simple interval record and adjust it when water behavior changes, and the finish will keep improving with each outing.
Related read: How to Paint a Boat Step-by-Step for a Durable Finish