How to Tie a Boat to a Dock Overnight Without Damage
Wondering how to tie a boat to a dock overnight without waking up to slack lines, gelcoat scuffs, or a boat that’s drifted out of position? The right knots, line angles, and fender placement keep the boat secure while still letting it move with wind, wakes, and changing tide.
They’ll start by choosing proper dock lines, then rigging bow, stern, and spring lines to control forward-and-aft motion. Next comes setting fenders at the correct height and checking chafe points so the setup holds for hours, not minutes.
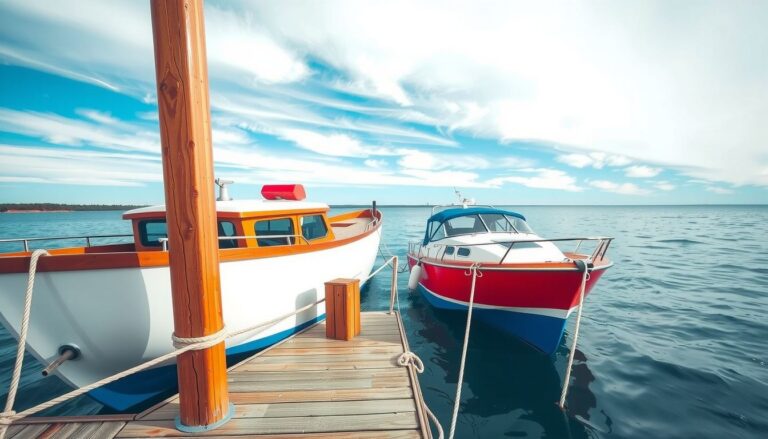
Look at a practical example: a 22-foot bowrider left overnight at a floating dock with a 1–2 foot tide swing. They can run two spring lines (one forward, one aft), snug the bow and stern lines just enough to center the boat, then place two fenders at the widest point to prevent rub when a late-night wake rolls through.
They’ll learn:
- Which knots to use for fast, reliable dock tie-offs
- How to set spring lines for stability in current and wake action
- Where fenders and chafe gear prevent costly damage
- A quick overnight checklist before they walk away
Assess Dock, Weather, and Water Movement
Now they should slow down and read the dock like a chart. A solid overnight tie starts with understanding what will move the boat while they sleep. Wind, current, tide, and wake exposure decide where the load lands and how much line travel is needed.
They should first inspect the dock structure and attachment points. Cleats should be through-bolted, not loose or cracked, and pilings should be free of sharp edges or protruding fasteners. If the dock has rings, they should confirm the ring can’t jam at an angle and chafe a line.
Next, they should check the forecast and local patterns, not just the app’s headline wind speed. A 15-knot shift can swap which lines are “working” and pull the boat off fenders. Water movement matters too: tidal range, river current, and passing traffic can surge the boat forward and aft.
- Wind: direction shifts, gust spread, and nearby funneling between buildings
- Water: tide height change, current set, wake exposure from channels
- Dock layout: finger pier length, piling spacing, cleat placement
Example: they’re docking overnight on a river marina with a 2–3 ft tide swing and morning ferry wakes. They should plan for vertical movement and fore-aft surging by allowing controlled slack and choosing line leads that resist “sawing” against the dock edge.
Gather the Right Dock Lines, Fenders, and Hardware
With conditions understood, they should match gear to the loads. Overnight, undersized line and poor chafe protection fail quietly. The goal is predictable stretch, clean leads, and hardware that won’t slip when the boat surges.
They should use quality dock lines sized for the boat, favoring nylon for its shock absorption. Lines should be long enough to reach cleats without sharp angles, and they should be free of cuts, flattened spots, or sun-brittle stiffness. If they’re unsure, they should carry at least two spare lines.
- Dock lines: nylon, appropriate diameter, finished eyes or reliable splices
- Fenders: correct size, adjustable lines, spare for corners
- Hardware: chafe guards, dock hooks, spring line snubbers (if needed)
Fenders should be staged before final tie-up, set at contact points, and hung so they can roll, not pinch. They should add chafe gear anywhere a line touches a chock, piling, or rough dock edge.
Example: for a 28-foot cruiser staying on an exposed face dock, they might rig four fenders (two midship, one forward, one aft) and bring two 25–30 ft spring lines plus chafe sleeves, preventing gelcoat rub when wakes push the boat along the dock.
Choose Secure Cleats and Plan Line Angles
Now they should shift attention from conditions to attachment points. A calm night can still punish weak hardware if a wake rolls through.
They should pick dock cleats that are through-bolted, solid, and sized for the boat’s line diameter. Never trust loose screws, cracked bases, or cleats mounted to soft, punky timber.
- Test by rocking the cleat hard; any movement is a no-go.
- Choose cleats that let the line sit low and fair, not perched on sharp edges.
- Avoid tying to railings, pilings without chafe protection, or unknown fittings.
Next comes geometry. They should aim for clean, opposing angles so the boat can’t surge forward, slide aft, or rub the dock. Lines should leave the boat in straight runs, avoiding stanchions and corners that create chafe.
Pro tip: if the dock cleat is too close to the boat’s cleat, they should run the line to a more distant cleat to create a longer, spring-like lead. Common mistake: short, steep lines that “snatch” when the boat rises and falls.
Real-world example: in a busy marina, they choose a mid-dock cleat and run a longer lead rather than tying to the nearest cleat. The boat rides out late-night wake with less jerking and less hardware strain.

Rig Bow and Stern Lines to Control Fore-and-Aft Movement
With solid cleats selected, they can rig the core controls: bow and stern lines. These lines set the boat’s position and keep it centered between fenders.
They should run the bow line from the boat’s bow cleat to a dock cleat slightly forward of the bow. The stern line should run from the stern cleat to a dock cleat slightly aft of the stern. That forward-and-aft separation limits creeping.
- Lead each line with a fair angle, then take two full turns around the boat cleat.
- Finish with a proper cleat hitch on the dock cleat; dress the turns neatly.
- Set tension so the boat can rise with tide but won’t kiss the dock under wake.
Pro tip: they should keep tails long enough for a quick re-tension at night, and they should add chafe gear anywhere a line touches a rub rail, chock, or dock edge. Common mistake: over-tightening both ends, which pins the boat and makes fenders useless.
Practical example: they leave 6–12 inches of “give” in the stern line to account for a small overnight tide change, while keeping the bow line slightly firmer to prevent the boat from walking forward into a neighboring slip.
If the boat still surges, they should revisit line leads and add springs next, not crank tighter.
Add Spring Lines to Prevent Surging Along the Dock
Now they’ll lock in control by adding spring lines, the pieces that stop a boat from “walking” forward and aft as wakes and wind load the hull.
A spring line runs diagonally along the dock, not straight out. One line should resist forward motion (from a bow cleat on the boat to a dock cleat aft). The other should resist aft motion (from a stern cleat to a dock cleat forward).
-
Rig the forward spring: boat bow cleat to a dock cleat behind the boat, leaving a clean diagonal.
-
Rig the aft spring: boat stern cleat to a dock cleat ahead of the boat, also diagonal.
-
Snug both springs until the boat sits centered between bow and stern lines, then re-check chafe points.
-
Add chafe protection where the line crosses a rub rail, piling, or dock edge.
Pro tip: Springs work best when they’re long. If the dock layout allows, they should use the next cleat down the dock to flatten the angle and reduce shock loading.
Common mistakes: tying springs to weak dock hardware, using short steep angles that “snatch,” and forgetting to re-tension after the boat settles.
Example: A 28-foot cruiser in a marina with frequent ferry wake can surge a foot or more. With both springs rigged to adjacent cleats, the boat stays planted, lines stay quieter, and cleats see smoother loads overnight.
Place and Secure Fenders to Protect the Hull
With movement controlled, they should protect the gelcoat by placing fenders where the hull will actually touch when the boat leans or shifts.
Fenders should hang vertically, just above the waterline, and be tied to strong points like stanchion bases or cleats. They should avoid tying to lifelines alone, since lifelines can bend or pop free under load.
-
Start with three fenders: bow quarter, midship (widest point), and stern quarter on the dock side.

-
Adjust height so the fender’s “fat” section meets the dock edge or piling face, not below it.
-
Use fender lines with a secure hitch and leave enough tail to re-adjust after tide or wake changes.
-
For pilings or rough docks, add a fourth fender or a ball fender at the contact point.
Pro tip: If the dock has gaps or exposed bolts, they should shift fenders slightly fore or aft to keep the hull off hard points, even if spacing looks uneven.
Common mistakes: fenders set too high, fenders drifting because knots slip, and relying on one oversized fender midship.
Example: At a floating dock with a low edge, a 22-foot runabout can ride up during wake. Setting the midship fender two inches lower and adding a stern-quarter fender keeps the hull from kissing the dock cap all night.
Adjust Tension for Tide, Wake, and Wind Shifts
Now the lines are on and the boat is protected, they should fine-tune tension so the setup survives the night’s changes. The goal is controlled movement, not a rigid tie that shocks cleats or chafes lines. A few minutes here prevents most 2 a.m.
surprises.
They should start by checking the tidal range and setting slack accordingly. In big tide areas, lines need room for rise and fall without lifting fenders out of position or pulling knots tight. In lakes or locked canals, they can keep lines a bit firmer, but never bar-tight.
- Set baseline tension: snug enough to stop drifting, loose enough to absorb a wake.
- Match bow/stern tension: keep the boat centered between cleats, avoiding “walking” forward or aft.
- Account for wind: if wind pushes off the dock, reduce slack; if it pins the boat on, allow slight give to protect rub rails.
Pro tip: They can use a simple “two-finger test” at mid-line—if they can’t deflect the line slightly, it’s too tight. Common mistake: tightening one line to fix a gap; it usually shifts the boat and overloads hardware.
Example: A 3-foot overnight tide with ferry wakes calls for a touch more slack and spring-line tension balanced so the boat can rise while staying aligned. They should re-check fender height after the first adjustment.
Perform an Overnight Safety Check and Morning Recheck
Look, the tie-up isn’t finished until they’ve inspected it like a preflight. An overnight safety check catches small issues—twists, chafe points, drifting fenders—before they become damage. Then the morning recheck confirms nothing crept during the night.
They should walk the dock slowly and inspect each contact point under load. Hands-on checks beat visual guesses, especially in low light. A headlamp helps, but they should avoid stepping over taut lines.
- Cleats and hitches: confirm turns are neat, locked, and not riding up on the horn.
- Chafe points: feel for sawing where lines cross rails, pilings, or rough dock edges.
- Fender security: verify knots haven’t slipped and fenders still cover the widest hull point.
- Boat position: ensure the boat isn’t angled, with rudder/outdrive at risk of contacting the dock.
Pro tip: They should leave a knife accessible (not buried) and keep a spare line ready for emergencies. Common mistake: trusting “it held earlier” and skipping the last check after wind shifts.
Example: After a late-night squall, they may find one line humming tight and a fender riding high. A quick retension and fender drop prevents gelcoat scuffs and cleat strain by morning.
Your Action Plan
Now it’s time to lock in a repeatable routine for how to tie a boat to a dock overnight. They should treat every overnight tie-up like a short checklist, not a one-off task. Consistency is what prevents 2 a.m.
surprises.
Before walking away, they should do three fast passes:
- Scan the dock: confirm no loose boards, sharp edges, or protruding hardware can chafe lines.
- Confirm access: set a safe step-on/step-off point and stow excess line so nobody trips.
- Document and monitor: snap a quick photo of the finished setup and check local wind and wake forecasts.
Real-world example: at a busy marina, they can take a photo at dusk, then compare it at sunrise to spot any creeping, chafe, or shifting contact points in seconds. Next step: they should print this checklist, keep it in a dock box, and use it on the very next overnight stay.