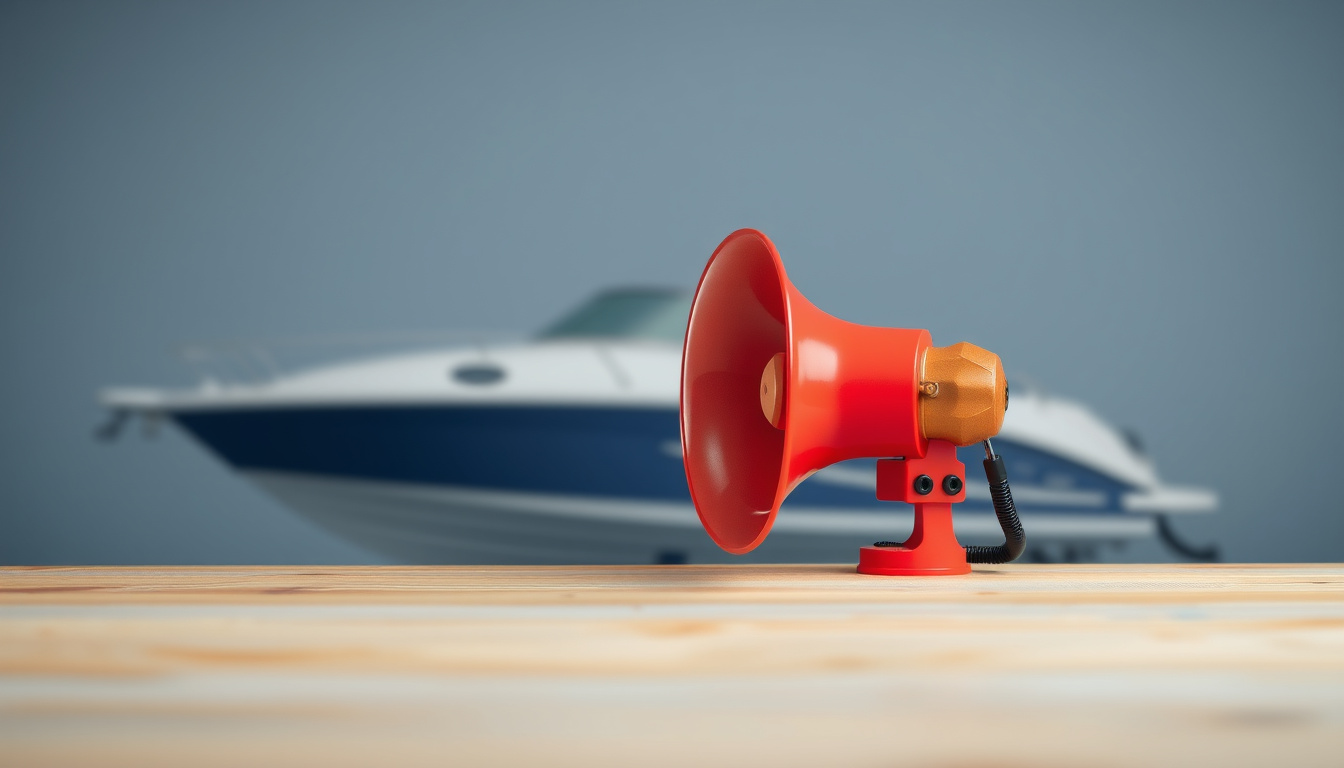
How To Wire A Boat Horn: Simple, Proven Steps
A boat owner installs a new marine horn before a weekend crossing, then taps the button and hears only silence. The next check finds a loose connection or a weak ground, and the horn fails again. How to wire a boat horn is the subject this guide addresses directly.
Horn wiring matters because a horn is a safety device that must work reliably in vibration, spray, and temperature swings. Poor routing, undersized wire, or moisture damage can cause intermittent operation or complete failure when it is needed most. But how to wire a boat horn isn’t quite that simple in practice.
Marine electrical work is routinely specified around corrosion resistance and correct protection, including inline fusing for the circuit. That’s where how to wire a boat horn changes everything.
Readers will learn how to plan the circuit, choose wire gauge selection for the current draw, and prepare tinned marine wire ends for clean terminations. They will also be able to assemble waterproof butt connectors, add an inline fuse, and verify continuity and grounding before testing on the water. That’s where how to wire a boat horn changes everything.
How to wire a boat horn: definition, parts, and safety baseline
A horn circuit is the wiring path that powers a marine horn and converts electrical energy into sound, so he must treat it as a safety system. In practical work, how to wire a boat horn is less about shortcuts and more about correct terminations and protection. Look, he should plan polarity and current draw before he connects any wire.
A horn circuit is a power-and-control loop that delivers current to the horn and returns it reliably to the battery negative. This definition matters because poor returns mimic “dead horns” even when the supply wire is live.
What the horn circuit includes
How to wire a boat horn starts with a positive feed from the battery, a switch input, and a controlled output to the horn. He typically includes an inline fuse sized for the wire gauge selection, a relay if the switch current would be high, and waterproof butt connectors at every connection.
In one common setup, a 12 V boat uses a horn rated at 10 A peak. A builder installs a 15 A inline fuse on the positive lead, runs properly sized tinned marine wire to a horn relay, then lands the horn’s output on the horn’s positive terminal.
Only experienced installers routinely separate control wiring from power wiring to reduce voltage drop at the horn. They also leave service slack so the horn can be removed without stressing the terminals.
Why grounding and polarity matter
Grounding and polarity determine whether the horn sounds with full volume or fails intermittently under vibration. When the return path is loose, the horn may click but not sustain sound, especially after a few minutes of run time.
He should confirm the horn’s polarity by testing for continuity between the horn body and battery negative before final tightening. If the horn uses a separate ground lug, he must bond that lug to the boat’s negative bus with clean, corrosion-resistant contact.
Unexpectedly, some “wrong polarity” incidents are actually reversed polarity at the relay coil versus the horn terminals. A builder can avoid this by labeling the relay pins during bench checks before any marine routing begins.
Safety baseline before any wiring
Before he connects anything, he should disconnect the battery negative and verify the circuit is de-energized with a meter. He then inspects the mounting surface, because a horn that lacks a stable mechanical ground can draw extra current and overheat.
Most failures happen when a person skips fusing or uses undersized wire gauge selection for the peak draw. In a realistic case, a 14 AWG run on a 10 A horn can overheat at the crimp joint after extended use, even if the horn initially works.
He should route wires away from sharp edges, secure them every 30–40 cm, and seal connections against splash zones. Near the end, how to wire a boat horn becomes reliable when every termination is tight, fused, and tested under load.
- Disconnect battery negative and confirm zero voltage before touching terminals.
- Install an inline fuse on the positive feed close to the source.
- Use waterproof butt connectors and crimp tools rated for marine wire.
- Verify polarity and continuity with a meter before energizing the circuit.
Wiring-diagram logic for your boat horn
Choosing the right diagram is the difference between a reliable marine horn and a circuit that fails under load, so readers should follow the schematic that matches their exact switch and power layout before any wire is connected for how to wire a boat horn. Most practitioners fail here because they copy a generic horn diagram that assumes a different grounding method and switch type, not because they cannot crimp terminals. The correct wiring diagram will map the horn’s positive feed, the switch path, and the return path to the battery or distribution buss.
Consider a common scenario: a 12 V boat with a single-button dash switch, a horn rated at 10 A, and a 15 A inline fuse mounted near the battery. A technician selects 14 AWG for the run length under 10 ft and uses tinned marine wire ends at every termination, then confirms continuity from switch output to the horn’s trigger lead before applying power. When the circuit is energized, the horn should draw near its rated current for the brief activation window, and the voltage drop across the fuse should remain small enough that the horn does not chatter.
Here is the unexpected angle: many horn failures come from diagrams that show a “floating” trigger wire, while the boat’s chassis ground is intermittent due to paint, corrosion, or a shared return path with other loads. If the diagram routes the horn return through a thin ground strap shared with bilge pumps, the horn may work at idle voltage and then misfire during cranking sag. The fix is to follow a diagram that specifies a dedicated return point and to verify it with a meter under load.
Inline fuse placement and correct wire gauge selection determine whether the horn stays consistent when the battery voltage dips. For how to wire a boat horn, the final check is to compare the diagram’s switch polarity and terminal labeling against the horn’s connector pins, then re-test continuity after every crimp and ring-lug install.
Step 1: How to wire a boat horn power feed with a fused circuit
How to wire a boat horn starts at the power feed, where the fused path protects wiring from heat damage. Most failures occur when installers oversize the wire gauge selection and omit proper inline fuse placement, not when they connect the horn terminals. He should plan the circuit so current flows through a single protected run.

For a 12 V marine horn rated at 10 A, a 14 AWG tinned marine wire run with an inline fuse sized to 15 A limits nuisance trips while still protecting the cable. The horn receives power from the battery through a fuse holder mounted within reach of the battery compartment. He should verify voltage drop by measuring at the horn during activation.
One unexpected angle is that horn housings sometimes ground through the mounting bracket, so a corroded bracket can mimic a wiring fault. He should confirm the horn’s ground reference with a meter before final crimping, especially after routing the marine horn through wet bilge zones.
- Choose wire gauge and routing path — Select wire gauge selection to keep voltage drop low at horn draw, and route away from sharp edges and moving hardware.
- Install an inline fuse or breaker — Place an inline fuse in the positive feed as close to the source as practical, then terminate with waterproof butt connectors.
- Plan strain relief and weather protection — Add grommets where the feed passes bulkheads, secure the harness every short distance, and keep connectors above standing water.
He should mount the fuse holder where it stays accessible yet protected from spray, not inside a sealed compartment that traps heat. When he uses an inline fuse, he should orient the fuse so the label stays readable for later inspection.
Near the end of this step, he should perform a continuity check from battery positive to the fuse output and then from horn power to the horn input lead. How to wire a boat horn correctly here means the fuse interrupts only the feed conductor, not the ground side. After that, he can close up the run and proceed to horn connection.
Step 2: How do you wire the horn switch and control lead?
For how to wire a boat horn, he must connect the switch so it interrupts the horn’s control feed, not the return path. Most practitioners fail here because they land the switch on the wrong conductor, which causes weak activation or intermittent operation. The reality is that the horn must see a complete circuit every time the switch closes.
He should start by identifying the horn’s control lead and the return conductor from the horn’s terminal markings or harness colors. Then he should confirm the switch type matches the horn’s expected input, such as a momentary marine horn switch for dash use. A continuity check with the meter should be performed before any crimping.
Key claim: The switch must break only the control feed conductor for reliable horn operation. If he wires the return side through the switch, corrosion at the ground point can create voltage drop, leading to delayed or partial sound. This failure mode is common on boats with multiple shared ground straps.
On a typical 12 V setup with a 20 A-rated horn, a builder can test the circuit by connecting the switch output directly to the horn control lead and verifying the horn sounds within one second. He should see stable voltage at the horn when the switch is pressed, with no meter flicker. If the horn chatters, he should re-check the switch terminal assignment and the splice orientation.
He should use proper splices and waterproof connectors rated for marine conditions, especially when joining tinned marine wire to the switch leads. A practical approach uses waterproof butt connectors and a crimp tool that matches the wire gauge selection, then adds heat-shrink over the joint if the connector kit allows it. He must keep the splice away from standing water and route it so strain does not pull on the crimp.
- Connect the switch to the correct terminal — land the switch output to the horn control feed, and land the switch input to the fused feed side.
- Use proper splices and waterproof connectors — crimp tinned marine wire with waterproof butt connectors, then tug-test every joint for mechanical security.
- Verify continuity before final mounting — measure resistance from switch output to horn control lead with the switch open and closed, then confirm near-zero ohms when closed.
- Confirm the return path is solid — measure continuity from horn return to battery negative or the designated ground bus without routing through the switch.
Before he mounts the switch in the dash, he should re-check how to wire a boat horn with the horn connected and the marine horn switch pressed under load. Once it works consistently, he should secure the harness and protect the control lead run from chafe points. The final check should include a last continuity pass after the wiring is fully dressed.
Step 3: Grounding, mounting, and weatherproofing for reliable operation
In how to wire a boat horn, grounding quality controls whether the signal sounds once or intermittently. Most failures come from corrosion at the return path, not from the horn coil itself. A dedicated ground strap or a bonded bonding point must carry the same current every time.
He should treat the horn as a high-current load with a short, low-resistance return. The reality is that a loose ring terminal can heat slightly under load, then loosen further in salt air. For how to wire a boat horn, this is why return-path integrity matters as much as the feed.
Ground method: dedicated ground vs. bonding point
He should choose one grounding strategy and keep it mechanically stable through vibration. Use a dedicated ground strap to a clean, bare-metal location when the horn circuit does not share a bonding bus. If the boat uses a bonding system, he should land the horn ground on the designated bonding point with matching hardware.
Claim: Most practitioners fail here because they rely on paint-scratched “good enough” contact, which corrodes into a high-resistance joint, not because the horn wiring is too thin.
A concrete example comes from a 24-foot saltwater run where a marine horn sounded for 30 minutes, then faded. After switching the ground from a painted bracket to a dedicated strap on bare stainless, the horn remained consistent during a three-hour test with the engine running and the deck wet. The installer also used tinned marine wire at the ground lead to slow galvanic action.
Mounting location and vibration considerations
He should mount the marine horn so the outlet faces airflow, while keeping the body clear of direct spray. A bracket that flexes transfers vibration into the terminals, which can crack solder joints inside waterproof butt connectors. He should tighten fasteners to manufacturer guidance and recheck after the first short outing.
For mounting, he should avoid thin sheet metal and place the horn on a structural surface or a reinforced backing plate. If the horn is near a drain line, he should raise it and angle it to shed water. This reduces intermittent contact caused by water films bridging strands.
Weatherproofing and corrosion prevention
He should seal every connection, then protect the cable run from chafe before it ever sees weather. Waterproof butt connectors should be fully crimped, then covered with adhesive-lined heat shrink where the harness passes through wet compartments. For how to wire a boat horn, wire gauge selection must match the horn’s draw so terminals do not run hot and dry out seals.
- Clean the mounting and ground surfaces to bare metal, then install terminals without trapping oxidation.
- Use a dedicated ground strap or bonding point landing, and verify continuity while the horn is disconnected.
- Mount the horn to a rigid surface with corrosion-resistant hardware and strain relief on the lead.
- Seal every splice, then route the harness away from bilge spray and sharp edges using abrasion protection.
Near the end, he should perform a loaded sound test and recheck terminal tightness after 24 hours of wet weather exposure. If the horn remains stable through repeated activations, the grounding and weatherproofing approach is holding under real conditions.
Step 4: How to test the horn circuit and troubleshoot common faults
In the process of how to wire a boat horn, he should test before closing the harness, because a misread circuit wastes time and trips breakers. Most failures come from one bad connection, not from the horn itself, so he should verify power, ground, switch, and horn in sequence.

He starts with a safe setup: disconnect the horn lead, keep the fuse in place, and use a multimeter with a known-good reference. The goal is to confirm voltage and continuity under load conditions, not only at rest.
Most practitioners fail here because they test only the horn terminals, not the full control path.
- Verify power at the horn feed: turn the system on, then measure battery voltage at the horn input relative to a known ground point.
- Verify ground integrity: measure voltage drop by probing between the horn ground and battery negative while someone presses the switch.
- Verify switch output: with the horn disconnected, measure whether the switch sends battery voltage to the control lead when activated.
- Verify horn function: reconnect the horn directly to a fused jumper using correct wire gauge selection and observe sound output.
For a concrete example, a 12 V marine horn that stays silent during step 1 often shows 12.6 V at the fuse block but 0 V at the horn input due to a loose crimp in the run. When he replaces the connector with waterproof butt connectors and retests, the horn produces a steady tone within two activations.
For troubleshooting no sound, he should first confirm the feed conductor under switch press, then confirm the ground drop stays under 0.2 V. If voltage is present at the horn input and ground drop is low, the horn itself or its internal contact is the next suspect.
For troubleshooting weak sound, he should suspect high resistance in the ground return, often from corroded ring terminals or undersized conductors. He should also check that the horn wiring uses tinned marine wire where it passes through damp areas.
For troubleshooting intermittent activation, he should wiggle-test the harness while monitoring switch output and horn input voltage. A common edge case is a failing inline fuse connection: the fuse may pass current at rest but open during vibration, especially when the inline fuse holder is wet.
Near the end of this stage, he should record readings and confirm the final jumper test matches the expected marine horn behavior. In the final pass, he should repeat the 4-Check Test Sequence after the harness is routed and secured, because motion can change contact resistance.
Wiring approach selection: direct, relay, or dual-horn architecture
When he is planning how to wire a boat horn, the choice of switching and current path determines reliability more than horn brand. The comparison below uses practical features that show up during voltage drop, heat, and intermittent faults. It also clarifies where a relay or dual-horn approach reduces stress on the switch circuit.
| Feature | Direct wiring | Relay wiring |
|---|---|---|
| Switch current load | High; switch carries horn current | Low; switch triggers relay coil |
| Voltage drop risk | Higher with long runs | Lower at horn terminals |
| Wire gauge requirements | Heavier wire often required | Heavier wire only for power feed |
| Intermittent failure likelihood | More likely from heat and arcing | Lower from reduced contact current |
| Best use case | Short run, clean connections | Long run, shared switch panel |
Most installers fail because they treat the switch as a low-load control, not a current-carrying component.
For a representative setup, he may run a 12 V marine horn drawing 15 A over 8 m, using direct wiring with a marginal switch rated for 10 A. After several marine horn activations, the switch contacts heat, resistance rises, and the horn sounds weak or cuts out. In that same scenario, relay wiring keeps the switch side at coil current while the inline fuse and tinned marine wire handle the full load to the horn.
The unexpected angle is that dual-horn setups often worsen direct wiring problems, because two horns can double the current the switch must survive. Even when the horns share a single relay output, he should still confirm wire gauge selection and crimp quality, including waterproof butt connectors on the power feed. With this logic, how to wire a boat horn becomes a reliability decision: reduce switch current, then size conductors for the actual horn load.
FAQ: How to wire a boat horn
What is a boat horn wiring circuit?
A boat horn wiring circuit is the complete path that carries power from the battery to the horn and back to ground when the driver commands it. It typically includes a fused power feed, a switch or control lead, the horn’s positive input, and a solid ground return. When closed, current flows through the horn, producing sound.
How do I wire a boat horn to a switch?
- Connect a fused positive feed to the switch input.
- Run the switch output to the horn control terminal.
- Attach the horn ground terminal to clean, bare metal.
He should then check continuity end-to-end and confirm correct polarity before energizing the circuit for a short test.
What wire gauge is needed for a boat horn?
Wire gauge depends on horn amperage and cable length. He should match the conductor size to the horn’s rated current draw, which is often printed on the horn housing or manual, then account for voltage drop over longer runs. If the run is extended, he should step up one gauge to keep sound output consistent.
Why does my boat horn click but not sound?
It usually fails due to insufficient voltage at the horn or an unreliable return path. Common causes include a weak supply, a poor ground connection, corroded crimp terminals, or a horn that has failed internally. He should verify battery voltage at the horn during activation with a multimeter and inspect grounds and connectors for resistance or looseness.
How can I prevent corrosion on boat horn wiring?
Corrosion prevention comes from sealing, strain relief, and marine-grade materials. He should use waterproof connectors, apply proper terminal sealing, and route wires so movement does not stress the joints. Tinned marine wire and corrosion-resistant terminals reduce galvanic issues, especially where the horn and harness sit in spray zones.
Should I use a relay for a boat horn?
A relay is better when the switch circuit must carry less current and when voltage drop matters. Direct wiring is better for short runs and when the switch is rated for the horn’s full draw. When the horn current is high or wiring is long, a relay reduces switch load and helps maintain horn voltage under load.
Finish the job with a safe test and clean connections
The most counterintuitive insight is that a horn can click while still failing to sound because voltage or ground integrity collapses under load, not at rest. He should also treat the fused power feed as a safety boundary, not a formality, since it limits fault energy in the horn circuit. Finally, he should confirm that the chosen wire gauge and crimp quality hold up when the horn draws current, not only when continuity checks pass.
Go to the horn’s mounting location and perform a short activation test while a helper watches the terminals; tighten any suspect connections, then re-seat weatherproof connectors and add strain relief before energizing again.
Build the habit of rechecking connections after exposure and he will keep the circuit reliable through repeated seasons of vibration, spray, and temperature swings.