What Do You Do With Compost: 9 Practical Ways to Use It
What do you do with compost once it’s dark, crumbly, and smells like fresh soil? It’s a fair question, because finished compost can feel like “good stuff” without a clear next step.
Compost isn’t just for gardeners with big yards. It’s a versatile soil booster that can improve plant health, reduce waste, and save money on fertilizers. Look, even a small balcony or a few houseplants can put it to work.
Experienced growers and extension-backed best practices agree on the basics: use compost like a slow-release soil conditioner, not like potting mix or a quick-fix fertilizer. Used correctly, it supports soil structure, moisture retention, and beneficial microbes.
Here are a few smart, beginner-friendly ways to use it:
- Top-dress lawns and garden beds
- Mix into soil for vegetables, flowers, and shrubs
- Blend small amounts into container mixes
- Use as mulch around plants (kept off stems)
For example, someone planting tomatoes can mix 1–2 inches of compost into the top 6–8 inches of soil, then add a thin compost ring as a midseason top-up. Keep going to learn the best uses, the right amounts, and the common mistakes to avoid.
How to Tell When Compost Is Ready to Use
Now the practical question is timing: using compost too early can steal nitrogen from plants and introduce unfinished bits that keep breaking down. Finished compost should look uniform, feel crumbly, and smell like clean, earthy soil—not sour, ammonia-like, or “rotting.”
They can check readiness with a quick sensory review. A mature pile is mostly dark brown, with few recognizable food scraps, and it won’t heat up again after turning. If it’s still warm in the center days after mixing, it’s still actively decomposing.
- Smell: earthy and mild (no sharp or swampy odor)
- Texture: crumbly, not slimy; no wet clumps that smear
- Temperature: near outdoor air temperature after turning
- Appearance: mostly uniform, with only small woody pieces left
A simple “bag test” can confirm it. They can seal a handful in a plastic bag for 24 hours; if it smells off when opened, it needs more time and airflow. For extra confidence, a quick seed test works: sprinkle a few radish seeds in a small pot of compost and compare germination to plain potting mix.
Practical example: if a gardener turns a bin on Saturday and it’s still noticeably hot on Tuesday, they should wait, keep it lightly moist, and turn again before spreading it near seedlings.
Top Uses for Finished Compost Around the Home and Garden
Once compost is mature, it becomes a versatile soil upgrade with real payoffs: better structure, steadier moisture, and slow nutrient release. The best use depends on whether they’re feeding plants, improving soil, or protecting it.
In garden beds, compost works best as a top-dress rather than being buried deep. They can spread 1–2 inches over the surface and let worms and watering pull it down naturally. For new beds, mixing a few inches into the top 6–8 inches of soil helps jump-start poor or compacted ground.
- Mulch/top-dress: 1–2 inches around vegetables, shrubs, and perennials
- Soil building: blend into new beds or tired lawns (thin layer, then rake)
- Potting blends: mix up to 20–30% compost with potting mix for containers
- Tree care: compost “donut” under the drip line, kept off the trunk
They can also brew compost tea for a short-term boost, but only with well-finished compost and clean equipment. For houseplants, screened compost is safer and less likely to create dense, waterlogged pots.
Practical example: after planting tomatoes, a gardener can ring each plant with a 1-inch compost layer (kept 2 inches from the stem) and water it in to reduce drying and support steady growth.
How to Apply Compost to Garden Beds for Maximum Benefit
Now that the compost is ready, the next step is getting it into garden beds in a way plants can actually use. Compost works best as a soil “feeder,” not a one-time fertilizer dump. The goal is steady improvement in structure, moisture-holding, and nutrient cycling.
For established beds, spread a 1–2 inch layer on the surface and let watering and soil life pull it down. In vegetable beds being replanted, mix compost into the top 4–6 inches, but avoid over-tilling; too much disturbance breaks soil aggregates. For new beds, blend compost with existing soil rather than building a pure-compost layer that can dry out and slump.

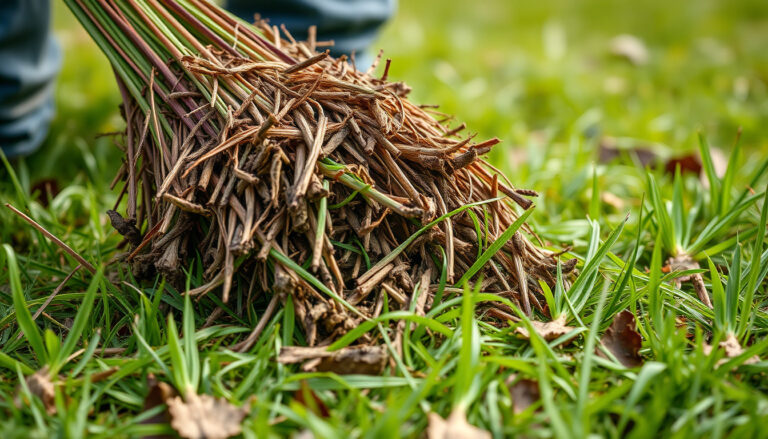
Keep compost a few inches away from stems and crowns to reduce rot and pest pressure. When using mulch, compost can go under mulch as a “nutrition layer,” then top with leaves, straw, or wood chips to slow drying.
- Spring refresh: top-dress before planting and lightly rake in.
- Midseason boost: side-dress around heavy feeders like tomatoes or squash.
- Fall conditioning: spread after harvest to protect soil and feed microbes.
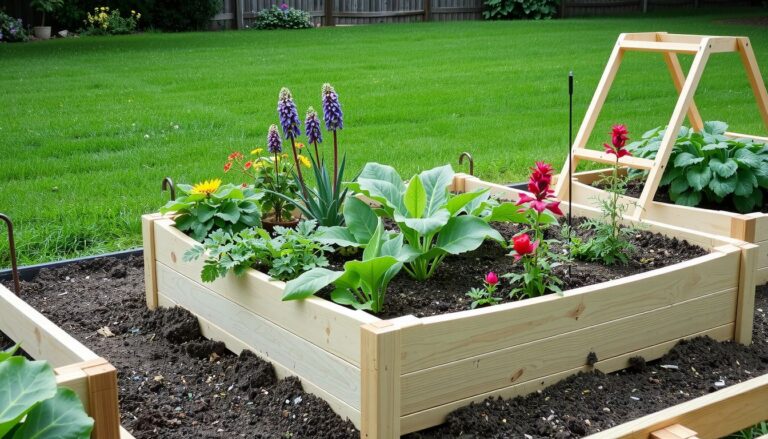
Practical example: a gardener prepping a 4×8 raised bed can apply about two wheelbarrows of compost (roughly 8–10 cubic feet) as a 1-inch top-dress, rake it level, then water deeply before transplanting seedlings.
Using Compost for Lawns
Compost can upgrade a lawn without chasing quick, high-nitrogen spikes. Applied as a thin topdressing, it supports deeper rooting, better drought tolerance, and improved soil biology. The trick is keeping the layer light enough that grass blades still breathe.
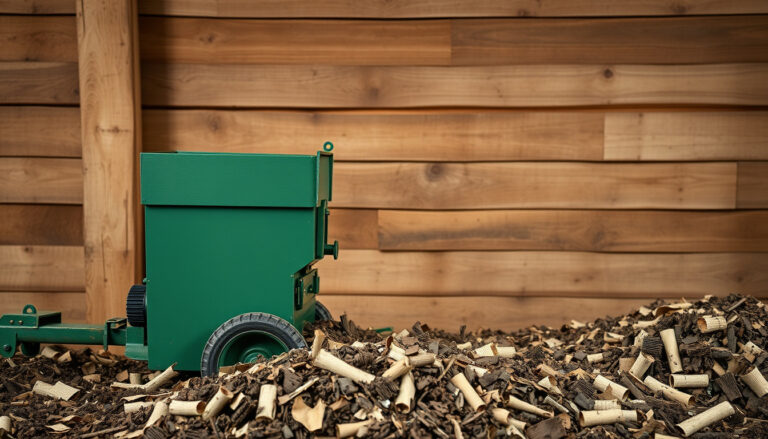
For most lawns, apply ¼–½ inch of screened compost across the surface, ideally in spring or early fall when grass is actively growing. A compost spreader, shovel-and-rake method, or wide landscape rake can work; the objective is even coverage. Water afterward to settle particles into the canopy.
Compost also helps with common lawn issues like compaction and thin spots. Aerating first creates channels so compost can move into the root zone, where it matters most. For bare areas, blend compost with seed as a starter layer, then keep consistently moist until germination.
- Topdress: ¼–½ inch for general improvement.
- After aeration: compost falls into holes for faster soil rehab.
- Spot repair: compost + seed for thin or damaged patches.
Practical example: after core aerating a 1,000 sq ft lawn, they can spread about 8–12 cubic feet of screened compost (roughly 6–9 wheelbarrow loads), rake it in, then water lightly for a week to help roots respond.
Trees, Shrubs, and Houseplants
Compost shines around perennials because it improves soil over time with minimal disruption. For trees and shrubs, it’s best used as a surface topdress under the drip line, where feeder roots live. For houseplants, it’s a small ingredient—not the whole pot.
For trees and shrubs, spread ½–1 inch of compost in a wide ring, starting several inches away from the trunk and extending toward the drip line. Then cover with 2–4 inches of mulch, keeping mulch off the bark. This approach supports moisture retention and nutrient cycling without encouraging trunk rot.
For houseplants, mix compost into potting media at about 10–20% by volume, or use a thin topdress (¼ inch) and water through. Straight compost can compact, stay wet, and invite fungus gnats, especially indoors with limited airflow.
- Trees: compost ring + mulch, never “volcano mulching.”
- Shrubs: light topdress in spring, repeat in fall if needed.
- Houseplants: compost as an amendment, not a full substrate.
Practical example: for a newly planted hydrangea, they can topdress a 3-foot circle with 1 inch of compost, add shredded bark mulch, and water weekly; the plant often shows steadier growth and fewer drought-stress wilts by midsummer.
How Much Compost to Use and How Often to Reapply
Now that it’s going in the right places, the next question is rate and timing. Compost isn’t fertilizer in the strict sense; it’s a soil builder, so “more” isn’t always “better.” A consistent, light application usually outperforms a rare, heavy one.
For most gardens, a good baseline is 1–2 inches of finished compost spread over the soil surface and left as a topdress or gently mixed into the top few inches. In containers, compost typically performs best as 10–30% of the potting mix, since straight compost can hold too much water and compact over time.
Reapplication depends on how fast the soil is used up. Annual beds often benefit from compost once per season, while intensively cropped vegetable beds may do well with twice per year (spring and mid-season). Established perennials and shrubs generally need less—often once annually as a thin ring under the drip line.
Practical example: A home gardener with a 4×8 raised bed can spread about 1 inch of compost each spring, then add a thin 1/2-inch top-up after the first heavy harvest. That keeps soil structure improving without burying seedlings or creating a soggy surface.
- New beds: 2 inches before planting
- Established beds: 1 inch each season
- Containers: 10–30% blended into mix
When Compost Should Not Be Used (and What to Do Instead)
Look, compost is versatile, but there are times it can backfire. The most common issue is using compost where a plant needs a specific pH, a low-nutrient environment, or very sharp drainage. In those cases, compost can push growth in the wrong direction or worsen disease pressure.

Compost is often a poor fit for acid-loving plants if the compost is neutral to alkaline, especially around blueberries, azaleas, and rhododendrons. It can also be risky when dealing with seed-starting and tiny seedlings, where compost particles and salts can reduce germination and invite damping-off.
It’s also smart to pause compost use when there’s a known problem source. If the compost was made from weedy, seedy material that didn’t heat properly, it can spread weeds. If it includes diseased plant debris that wasn’t fully processed, it may reintroduce pathogens.
Practical example: If a gardener’s blueberries show yellowing leaves and the soil test reads high pH, they should skip compost and use pine bark fines or peat-based mulch, then correct pH with elemental sulfur as directed by the test.
- Instead of compost for seedlings: sterile seed-starting mix
- Instead of compost for acid lovers: pine bark, pine needles, peat-based mulch
- Instead of compost for drainage issues: coarse mineral amendments (pumice/perlite) and soil grading
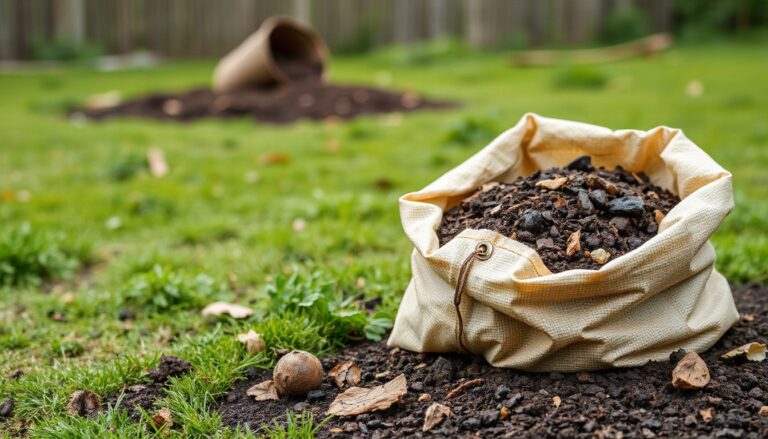
Storing, Bagging, and Sharing Extra Compost
Once the garden’s been fed, there’s often a little compost left over. Stored well, finished compost stays biologically active and easy to use, rather than turning into a soggy, smelly pile or drying into dust.
For short-term storage, they can keep compost in a covered bin, lidded tote, or a shaded pile under a breathable tarp. The goal is “damp sponge” moisture: wet enough to support microbes, not so wet that it goes anaerobic.
- Keep it covered to prevent nutrient-leaching rain and windblown drying.
- Keep it off bare soil (use a pallet or tarp) to reduce weed seeds and contamination.
- Check moisture monthly; mist if dusty, fluff if matted.
Bagging works when space is tight. They should use woven polypropylene or paper yard bags for airflow; sealed plastic can trap moisture and create sour odors. If bagging is necessary, leaving the top slightly open and storing in shade helps.
Sharing extra compost is often the best “storage.” Neighbors, community gardens, school gardens, and local plant swaps usually welcome it if it’s finished and free of trash. A simple label builds trust: feedstock type (leaves/food scraps), age, and any amendments used.
Practical example: after a fall cleanup, they might bag 6–8 gallons, keep two bags for spring potting mixes, and offer the rest through a neighborhood group with pickup-ready buckets.
Common Compost Application Mistakes and How to Avoid Them
Even good compost can underperform when it’s handled poorly. Most issues come down to placement, timing around stems, and treating compost like a one-size-fits-all fertilizer.
- Piling compost against stems or trunks: They should keep compost a few inches back to reduce rot, rodents, and disease pressure.
- Leaving compost exposed: A thin layer can crust or dry; they can lightly rake it in or cover with mulch to protect biology and moisture.
- Using compost as the only nutrient plan: Compost improves soil structure, but some crops still need targeted nutrients based on a soil test.
Another frequent mistake is uneven distribution. Thick clumps create water-shedding spots while bare patches stay compacted. Screening bulky compost for topdressing and breaking up lumps with a rake keeps coverage consistent.
They should also avoid contaminating clean beds by using compost that contains persistent herbicide residues or visible plastics. Sourcing matters; if it’s imported, asking about feedstocks and performing a simple “bean test” can prevent surprises.
Practical example: if tomatoes show stem darkening after topdressing, they can pull compost back from the base, add a clean mulch ring, and switch to a screened, known-source compost for future applications.
60-Second Recap
Now that the compost has a job, the real win is making it part of a simple routine. When someone asks what do you do with compost, the best answer is: use it with intention, track results, and keep it clean and convenient. Compost is a tool for steady soil improvement, not a one-time fix.
They’ll get the most value by focusing on three habits:
- Observe plant response over 2–4 weeks and adjust future use based on vigor, color, and moisture.
- Keep it consistent by setting a seasonal reminder for compost-related tasks.
- Stay organized with a labeled bin or sealed container so compost is always ready when needed.
Real-world example: a homeowner keeps a small lidded bucket in the shed and uses it during weekend garden walks to spot-treat tired areas, then notes what improved.
Next step: pick one area to improve this week, apply compost thoughtfully, and record one quick before-and-after note.
Related read: How Deep Does a Raised Garden Bed Need to Be for Crops