How to Winterize a Camper Without Antifreeze: Step-by-Step
Wondering how to winterize a camper without antifreeze and still protect the plumbing from a hard freeze?
Yes, it’s doable. They’ll rely on fully draining the water system, purging lines with air, and protecting key components so nothing expands and cracks when temperatures drop. Done correctly, it’s clean, fast, and avoids the taste and cleanup some owners dislike.
This guide walks them through the exact sequence—what to gather, how to drain tanks and low points, how to blow out the lines safely, and what to check before storage. It also covers common mistakes (like over-pressurizing) and quick troubleshooting if water still spits from a faucet.
Practical example: a weekend camper stored in an unheated driveway can be winter-ready in under an hour using a small air compressor set to 30–40 PSI, cycling each faucet until only air comes out.
- Drain the fresh tank, water heater, and low-point drains
- Purge hot and cold lines with regulated compressed air
- Protect fixtures, traps, and the water pump from leftover water
- Verify by rechecking drains and cycling faucets one last time
Confirm It’s Safe to Skip Antifreeze (Before You Start)
Now, before they commit to a dry winterization approach, they need to confirm it’s actually safe for their rig and climate. Skipping antifreeze can work well, but only when the plumbing can be reliably cleared of water and kept that way through storage.
The first checkpoint is weather. If the camper will see repeated hard freezes (or unpredictable freeze-thaw cycles), they should be confident they can remove water from every line, valve, and low spot. If they can’t, antifreeze becomes the safer option.
Next, they should identify the plumbing layout and components that trap water. Common risk areas include:
- Water heater tank and check valve
- City-water inlet and backflow preventer
- Shower mixer and exterior shower box
- Toilet valve, sprayer hoses, and low-point drains
- Water pump head, strainer bowl, and short suction line
They should also confirm they have a way to blow out lines with controlled pressure. A proper air compressor and regulator matter because too much pressure can damage fittings, while too little leaves water behind. Many manufacturers and service departments recommend staying around 30–40 PSI for blowouts; they should verify their owner’s manual for any model-specific limits.
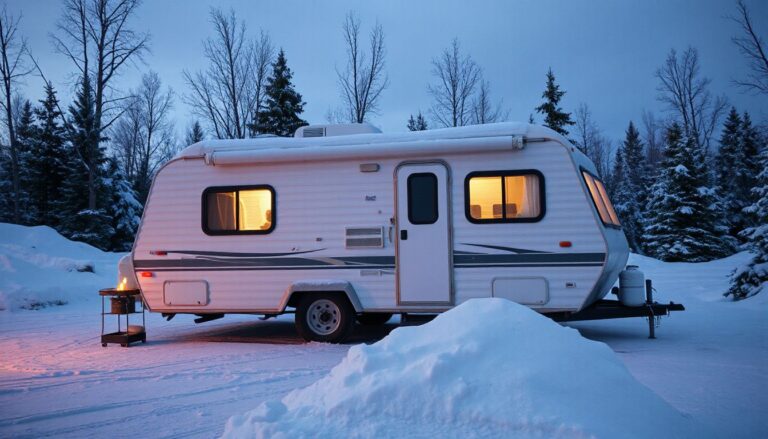
Look at how the camper will be stored. Indoor heated storage is low risk. Outdoor storage in wind-exposed lots is higher risk, even in “mild” climates.
If the camper will sit level, lines drain more predictably; nose-high or nose-low storage can create pockets.
Practical example: A family storing a travel trailer in northern Utah plans to use the “how to winterize a camper without antifreeze” blowout method. They confirm the trailer has low-point drains, a water-heater bypass, and easy access to the city-water inlet. Because temps routinely hit single digits, they decide to blow out lines twice (once after draining, once after cycling each faucet) and leave all faucets open to prevent pressure buildup.
Common mistake: assuming “drained” equals “dry.” A tablespoon of water in a PEX elbow can still split a fitting when it freezes.
Gather Tools and Prep the Camper for Winterizing
Once they’ve confirmed the approach fits their situation, they should set up tools and prep the rig so the process stays controlled. Good prep prevents missed steps, rushed decisions, and surprise leaks in spring.
They’ll need a short, focused kit. The goal is to drain, blow out, and verify each fixture without over-pressurizing the system.
- Air compressor capable of steady 30–40 PSI with a regulator
- Blowout plug (city-water connection fitting) matched to RV threads
- Basic hand tools: screwdriver, adjustable wrench, pliers
- Bucket, towels, and a small catch pan for low-point drains
- Flashlight or headlamp for underbelly and service bays
- Water-heater bypass access tools (panel driver if needed)
Now they should prep the camper itself. Start by turning off all heat sources to the water heater (electric and propane) and letting the tank cool. Then disconnect from city water and switch off the water pump.
They should open a faucet to relieve pressure and confirm the system is depressurized. After that, they can position the camper on a stable, mostly level surface and chock the wheels so they can move safely between compartments.
Before any blowout, they should locate and label key points: low-point drains (hot and cold), fresh tank drain, water-heater drain/anode rod, and the city-water inlet. If the rig has an exterior shower, washer prep, or water filter housing, they should identify those too because they often hold water.
Pro tip: They should remove or bypass inline water filters before blowing out lines. Filters can crack when frozen and can restrict airflow during the purge.
Common mistake: forgetting the battery condition. If the pump needs to run briefly during prep or valves are powered, a weak battery can interrupt the sequence and leave water trapped.

With tools staged and compartments opened, they’re ready to drain and purge the plumbing methodically in the next steps.
Drain the Fresh, Gray, and Black Systems Completely
Now they’re ready to remove every easy-to-drain gallon before air ever touches the lines. A dry winterization depends on gravity and access points, so this step is about opening the right valves in the right order. If water is left sitting in tanks or low spots, it can freeze, expand, and crack fittings.
They should start with the fresh system, because it feeds everything else. Turn off the water pump and disconnect city water. Then open the fresh tank drain and let it run until it’s fully empty.
-
Open the fresh tank drain and any low-point drains (hot and cold) beneath the camper.
-
Open a few faucets inside to break vacuum and speed drainage.
-
Drain the water heater only after verifying it’s off and cooled; remove the drain plug/anode and open the pressure relief valve.
Next, they’ll empty gray and black tanks at an approved dump station. Dump black first, then gray to help rinse the hose. Let each tank drain until the flow stops, not just until it slows.
-
Pull the black valve fully open; wait for a complete drain.
-
Close black, open gray; drain fully.
-
If equipped, run a built-in tank flush for a few minutes, then re-dump black and gray.
Look for hidden water traps. Exterior shower lines, washing-machine prep, and spray ports often sit lower than interior plumbing and can hold water. They should open those fixtures briefly while the low-point drains are open.
Pro tip: Park slightly nose-high so low-point drains truly become the lowest point. A small leveling change can release surprising amounts of water.
Common mistake: Forgetting the water heater. A six- or ten-gallon heater full of water is a freeze risk and adds unnecessary weight.
Practical example: A family with a 30-foot travel trailer drained tanks but skipped the exterior shower. The next spring, the shower’s plastic mixer body was split. Draining the low points with that shower open would’ve prevented it.
Purge Water Lines and Fixtures Using Air (Step-by-Step)
With tanks drained, they’ll push remaining water out of the plumbing using controlled compressed air. This is the core of how to winterize a camper without antifreeze safely. The goal isn’t high pressure; it’s steady airflow that clears low spots, valves, and faucet cartridges.
They’ll need an air compressor, a blowout plug (city-water connection fitting), and a regulator. Set pressure conservatively; most RV plumbing is fine at low pressure, and higher PSI can damage check valves or PEX connections.
-
Confirm the water heater is bypassed and drained; leave the drain open.
-
Screw the blowout plug into the city-water inlet.
-
Set the regulator to 30–40 PSI; connect the air hose.

-
Turn on the compressor and let pressure stabilize before opening fixtures.
They should purge in a logical sequence, one fixture at a time. Open the farthest cold faucet first, then close it when only air sputters out. Repeat for hot, then move closer to the inlet.
-
Kitchen faucet (cold then hot)
-
Bathroom sink (cold then hot)
-
Shower (cold then hot), including exterior shower
-
Toilet valve (hold pedal until air only)
Now they’ll protect the “small-volume” components. Cycle the water pump for 5–10 seconds to clear its chamber, but don’t run it dry for long. If the camper has a water filter, remove the cartridge and drain the housing.
Pro tip: Pulse each fixture twice. Open for 10–15 seconds, close, wait, then open again. The pause helps water in elbows and tees migrate to the outlet.
Common mistake: Blowing air with a faucet already wide open. That reduces line pressure and can leave water sitting in branches that never see a strong push.
Practical example: A weekend camper used 60 PSI and didn’t bypass the heater. The next trip, the city-water check valve leaked. Keeping pressure at 30–40 PSI and bypassing the heater would’ve avoided that failure.
Protect Appliances, Traps, and Final Checks Before Storage
Now that the lines are blown out, the job shifts to the places water hides. Appliances, low-point pockets, and drain traps can still freeze and crack even when faucets spit only air. A careful last pass prevents the “mystery leak” found on the first spring trip.
They should start with the water heater and any inline filters. The heater must stay in bypass and remain empty, with the drain plug/anode removed so any residual moisture can evaporate. Filters should be removed and discarded or dried per the manufacturer, since trapped water splits housings.
- Water heater: verify bypass valves are set correctly; leave drain open.
- Water pump: open the pump strainer bowl, drain it, and reinstall hand-tight.
- Exterior shower & sprayers: crack both hot/cold valves and the hose to release trapped water.
- Washer/dishwasher prep (if equipped): follow the appliance drain routine; many have a small sump.
Next, they’ll protect every P-trap and holding-tank termination. Without RV antifreeze, the safest approach is to drain traps dry and leave them dry for storage, since any water left can freeze. They should pull sink stoppers, open the shower drain, and run a small wet/dry vac at each drain for 10–20 seconds to suck the trap clear.
Practical example: a tech winterizing a 25-foot travel trailer often finds the bathroom sink trap still holds a cup of water after line purging. They’ll remove the trap cleanout (or disconnect the slip nut), dump it, then vacuum the drain line for a few seconds; that single step prevents a split trap and a springtime cabinet flood.
Now they can do a final system check before storage. Each fixture should be cycled once more—hot, cold, and mixed—then left open halfway so pressure can’t build. They should also confirm the city-water inlet check valve isn’t holding water by briefly depressing it with a small tool while catching drips with a towel.
- Leave all drain valves closed after verifying empty, so pests don’t enter.
- Cap the sewer outlet and close termination handles fully.
- Shut off propane, unplug shore power, and set the battery plan (disconnect or maintain).
Pro tip: label the bypass and drain points with painter’s tape so spring re-commissioning is fast. Common mistake: forgetting the exterior shower or pump strainer—both freeze first.
You’re Ready
Now they’ve seen that how to winterize a camper without antifreeze comes down to one thing: eliminating freeze-risk water and verifying nothing can refill the system. It’s a clean approach that avoids chemical taste issues in spring, but it only works when they’re disciplined about final verification. Look, the last few minutes matter most.
A practical example: a weekend traveler storing a camper in a driveway can finish the job, then check it again after the first hard freeze. If a faucet spits even a small burst of water on recheck, they know a low spot still held moisture and they can correct it before damage happens.
- Set a reminder to recheck after the first freeze and again mid-winter.
- Document what was done (date, steps, any quirks) for spring startup.
- Monitor storage conditions and access so follow-up checks are easy.
Next step: they should schedule a quick 10-minute post-freeze inspection on their calendar today, then store the camper with confidence.
Related read: How to Winterize a Camper to Live In: Step-by-Step Setup