How to Clean Boat Seats for a Fresh, Stain-Free Finish
Dirty boat seats do more than look bad. Sunscreen, salt, fish slime, mildew, and everyday grime work into the vinyl or fabric, break down stitching, and create odors that linger long after you dock. The good news is that a repeatable cleaning routine prevents most long-term damage.
The goal is a fresh, stain-free finish without fading the vinyl, setting stains deeper, or leaving a slick, sticky residue. In practice, that means identifying your seat material first, using the mildest effective cleaner, scrubbing with the right tools, and then rinsing and protecting the surface. This approach works for every boat from small fishing skiffs to pontoon lounges and fits within a holistic boat-washing routine rather than working against it. For more on this, see our guide on how to reupholster boat seats.
Whether you are dealing with routine sunscreen smears or black mildew specks along a seam, the process below keeps the work controlled and safe for the upholstery.
Why Seat Material and Stain Type Should Change Your Cleaning Approach
Before you touch a cleaner, identify what you are actually working on. Marine upholstery is not all the same, and using the wrong product can haze vinyl, strip protective topcoats, or permanently lighten the surface. For more on this, see our guide on best pontoon boat for the money.
- Marine-grade vinyl is the most common seat material because it resists water, UV damage, and abrasion. It still has pores, so sunscreen and body oils can settle into the texture.
- Coated fabric or canvas appears on some backrests, bolsters, and bimini-adjacent panels. It usually needs gentler cleaning than vinyl.
- Faux or marine leather can crack if dried out by strong degreasers.
- Stitched seams and piping catch dirt first and let water reach the foam if not kept clean.
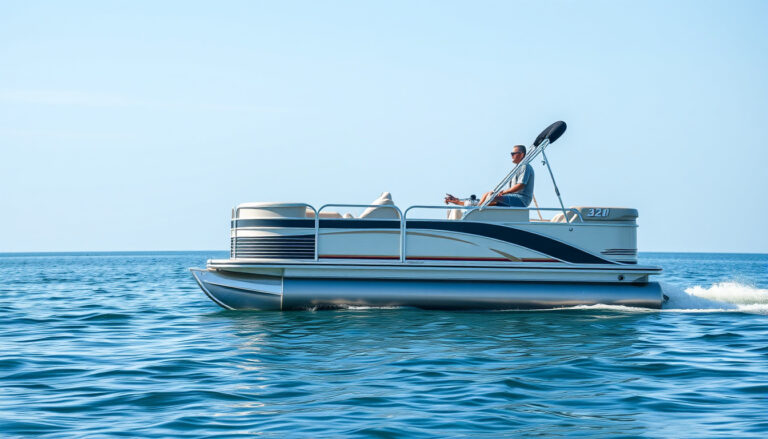
Check for a manufacturer tag under a cushion or inside a storage compartment. If you own a pontoon with U-shaped lounges, the layout and seat configuration can make some areas harder to reach than others; understanding your boat's specific arrangement is part of safe handling and routine care. A well-designed cockpit layout also matters if you are evaluating whether your current boat is still worth deep-cleaning versus replacing.
Next, classify the stain. Matching the cleaner to the stain type saves time and reduces the chance of damage.
| Stain Type | Common Examples | General Approach |
|---|---|---|
| Organic | Food, drink, bird droppings, tannins | Mild vinyl cleaner or oxygen-based cleaner |
| Oily | Sunscreen, grease, bug spray | Vinyl-safe degreaser with short dwell time |
| Biological | Mildew, mold, black specks | Marine mildew remover labeled for vinyl |
| Mineral | Hard-water spots, rust rings | Acidic or chelating cleaner formulated for marine vinyl |
Inspect the seat's condition before starting. Look for cracks, loose piping, open seams, or areas where the foam feels waterlogged. If a cushion feels heavy or squishy, it may need more drying time than cleaning time. A spot-test on a hidden section is non-negotiable. Apply the intended cleaner, wait five to ten minutes, and check for discoloration or tackiness before treating the full seat.
Gather Supplies and Prep the Area for Safe Cleaning
Good preparation keeps runoff out of the bilge, prevents overspray on surrounding gelcoat, and stops dirty water from soaking into foam. Assemble tools based on the seat material and stain type.
- Cleaner: A marine vinyl seat cleaner is the workhorse. Keep a separate mildew remover only for biological stains.
- Agitation: A soft nylon brush for broad areas, a detailing brush for seams, and plenty of microfiber towels.
- Rinse: A spray bottle or bucket of fresh water and a dedicated damp rinse towel.
- Protection: A non-greasy vinyl protectant with UV inhibitors for after cleaning.
- Safety: Nitrile gloves, eye protection, and ventilation if you are working in an enclosed cabin.
Avoid substituting household kitchen or bathroom cleaners unless the label specifically approves them for marine vinyl. Many general-purpose sprays contain solvents that strip plasticizers and shorten the life of the upholstery.
Prep the space before spraying. Remove loose gear, lift removable cushions where possible, and vacuum grit out of seams. Grit acts like sandpaper when you scrub. Work in the shade or early in the day because hot vinyl makes cleaners flash-dry and streak. If the adjacent boat carpeted sections need attention, clean or cover them separately so seat runoff does not push dirt into the carpet fibers.
Protect the surrounding area with an old towel along the seat base to catch drips. Close nearby storage compartments, and use painter's tape to shield stitching or trim you do not want exposed to cleaner.
A common mistake is flood-rinsing with a hose. That pushes dirty solution into seams and foam, which leads to slow-drying cushions and a musty smell later. Controlled rinsing with a spray bottle or wrung-out towel avoids most of that problem.
Step-by-Step: Clean Everyday Grime and Sunscreen Film
For regular cleaning after a day on the water, speed and consistency matter more than aggressive chemicals. The objective is to lift the film of sunscreen, sweat, and lake water before it bonds.

Use a soft nylon brush and light pressure to protect the vinyl's top coat.
- Rinse first. Mist the seat with fresh water to float off loose grit that can scratch during wiping.
- Apply cleaner to the towel, not the seat. A damp microfiber towel with a small amount of vinyl-safe soap reduces overspray into seams.
- Wipe in straight passes. Move along the grain and around piping, flipping the towel as it loads up with dirt.
- Agitate seams gently. Use a detailing brush on stitch lines and textured panels with short, light strokes.
- Rinse and inspect. Remove all surfactant residue so the seats do not feel sticky after drying.
- Dry completely. Towel-dry, then let the seats air out with compartments open.
In practice, two towel passes remove most everyday grime. Keep one towel for pulling up dirt and one clean towel for the final wipe. If water beads unevenly on the vinyl, that is usually body oil, not staining.
Before you start this routine, make sure the exterior wash step is already handled so you are not dragging grit from the deck onto freshly cleaned seats. A full exterior wash also keeps you from re-soiling upholstery with splashback from dirty hull sides.
Remove Tough Stains and Mildew Without Damaging Vinyl
When a regular wipe-down does not remove the mark, treat the stain as a controlled spot repair. Start mild, escalate slowly, and stop as soon as the stain releases.

Target mildew along seams with a short dwell time and gentle agitation.
- Pre-wet the area. A damp towel reduces the chance of a concentrated cleaner forming a ring around the stain.
- Apply the correct remover. Organic grime and light mildew usually respond to an oxygen-based marine cleaner. For heavier mildew, use a marine mildew remover labeled safe for vinyl.
- Allow a short dwell time. Let the product work for the shortest time the label recommends, not longer.
- Agitate gently. Use a soft brush in small circles, focusing on the textured valleys.
- Rinse thoroughly. Rinse until the water runs clear, then wipe with a clean damp towel to pull residue from the pores.
- Repeat once if needed. Two light cycles are safer than one aggressive scrub.
- Dry and ventilate. Open compartments and dry seams completely.
For mold and mildew, the real enemy is moisture. Clean the visible staining, but also address the damp environment that caused it. The Environmental Protection Agency's guidance on mold cleanup reinforces that removing moisture is essential to preventing regrowth. On a boat, that means improving airflow under cushions and not covering seats until they are fully dry.
Avoid household bleach, magic erasers, and harsh solvents. Bleach can break down vinyl stitching and leave a chalky, weakened surface. A magic eraser is an abrasive pad and can remove the protective top coat along with the stain.
Rinse, Dry, and Protect Seats to Prevent Future Buildup
The final stage locks in the cleaning results and makes the next cleanup easier. Rinse away residual cleaner, dry the upholstery completely, and add a thin layer of protection.
- Rinse lightly. Use clean water and change rinse cloths often to avoid re-depositing dirt. Work from the top of the seat down so residue does not run onto already cleaned areas.
- Dry fast. Blot with microfiber rather than scrubbing. In a humid marina, a small fan moving air across the seats dries them faster than blowing directly at one spot.
- Ventilate. Open storage lids to let moisture escape from under cushions. Do not cover the seats until they are completely dry.
- Protect. Apply a marine UV protectant that dries to a non-greasy finish. A thin coat is enough. Let it haze, then buff lightly.
Protection matters because vinyl without UV inhibitors becomes chalky and prone to cracking. However, too much product attracts dust and makes the seats feel slick. Sun-facing bolsters usually need protection more often than shaded cockpit sections.
Once the seats are protected, check the surrounding surfaces. If water got past the seat bases during cleaning, address the boat carpet drying and deodorizing steps before mildew sets in. The goal is to leave the entire seating area dry, not just the top surface.
Seasonal Maintenance and When to Call in Extra Help
A consistent schedule prevents most deep stains from forming in the first place.
- After every outing: Wipe down seats with fresh water and a microfiber towel. Even a quick rinse removes sunscreen before it bakes in.
- Monthly during boating season: Do the full everyday cleaning routine, including seams and stitching.
- At winterization: Deep-clean, dry, and apply protectant before covering the boat for storage.
- Any time you smell mustiness: Inspect for hidden moisture under cushions and clean immediately.
If seats are cracked, torn, or the foam stays wet after several days of drying, deeper repairs may be needed before cleaning helps. In some cases, replacing the upholstery or evaluating the overall condition of an older boat is the more practical choice.
Frequently Asked Questions
Can I use Clorox wipes or bleach on boat seats?
No. Bleach and most household disinfecting wipes contain chlorine or quaternary compounds that can strip marine vinyl's protective finish. This leads to cracking, fading, and weakened stitching. Use a marine-specific vinyl cleaner or a mild soap approved for vinyl upholstery instead.
How often should I clean boat seats?
Quickly wipe seats after every outing and deep-clean monthly during boating season. If the boat sits unused, clean before storage and again at the start of the season. Seats exposed to heavy sunscreen, saltwater, or high humidity need more frequent attention to prevent staining and mildew growth.
Can I pressure wash boat seats?
Avoid it. High-pressure water forces moisture into seams and foam, which can cause mildew and slow-drying cushions. A gentle hose stream is acceptable for rinsing, but scrubbing with a soft brush and controlled rinsing from a spray bottle or damp towel is much safer.
What removes sunscreen stains from boat seats?
A vinyl-safe degreaser or marine upholstery cleaner works best. Apply it to a microfiber towel, work it into the affected area, and rinse thoroughly. For stubborn stains, use short dwell times and repeat the process rather than scrubbing aggressively. Protectant afterward helps future sunscreen wipe off more easily.
Will baking soda damage marine vinyl?
Baking soda is mildly abrasive and can dull the finish if scrubbed into vinyl. A paste of baking soda and water may help with light stains, but it should be rinsed thoroughly and tested on a hidden area first. It is not a long-term substitute for a proper marine vinyl cleaner.
Why do my boat seats feel sticky after cleaning?
Sticky seats are usually caused by cleaner residue left on the surface. Rinse more thoroughly after cleaning and dry with a clean microfiber towel. Sticky buildup can also come from too much protectant or from using a household cleaner that reacts with the vinyl.
Conclusion
A fresh, stain-free finish comes from a simple, repeatable system: identify the material, use the mildest cleaner that gets the job done, avoid harsh chemicals, and always rinse and dry completely. Protection is the final step that keeps vinyl supple and makes the next cleanup easier.
Start with a quick rinse and a microfiber wipe after your next outing. Build the habit first, then add a monthly deep clean. If you stay consistent, your boat seats will look better, smell fresher, and last longer without sticky residue or recurring mildew stains.