How to Replace RV Awning Fabric on Electric Awning Safely
Wondering how to replace rv awning fabric on electric awning without bending hardware, stripping screws, or ending up with a crooked roll? Yes, it’s a doable DIY job when they follow the right sequence, use basic safety controls, and keep the spring-loaded parts under control.
The core process is simple: secure power, lock the roller, remove the old fabric from the awning rail and tube, then slide in the new fabric and re-tension. The details matter, though. A missed set screw or an unsecured roller can turn a clean swap into a fast-moving mess.
They’ll learn how to:
- Identify their awning style and confirm fabric size before ordering
- Safely disable the motor and control the roller while fabric is removed
- Install, align, and tension new fabric so it tracks straight and seals well
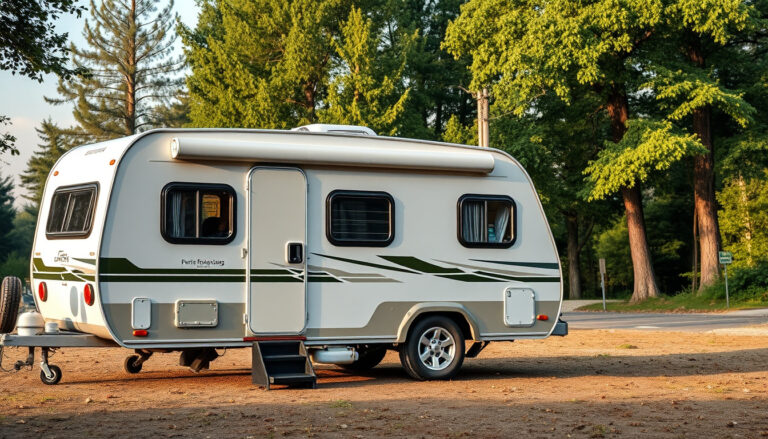
Example: a fifth-wheel owner notices frayed edges flapping at highway speed; after measuring the fabric width and ordering a matching vinyl, they replace it in a driveway with two helpers in under two hours, restoring tight roll-up and quieter travel.
Confirm Compatibility and Measure for the Correct Fabric
Now that the groundwork is set, they’ll want to confirm the replacement fabric actually matches the electric awning’s hardware. Electric awnings vary by brand, tube diameter, and how the fabric’s polycord (bead) feeds into the roller tube and lead rail. A “close enough” fabric is the fastest way to create wrinkles, binding, or a fabric that won’t track straight.
They should start by identifying the awning brand and model from the ID label on the roller tube, inside the front cover, or on the awning arm. If the label is missing, they can match by visual cues: arm style, end cap shape, and whether the fabric uses a standard 1/4-inch or 5/16-inch polycord. When ordering, they’ll confirm the fabric type (vinyl or acrylic) and whether it’s a direct replacement for that system.
Next comes measuring. They’ll measure the fabric width, not the “awning size” printed on the box. For most electric awnings, fabric width is measured from centerline of one awning arm to centerline of the other (or between end caps, depending on manufacturer guidance).
They should also measure fabric projection (how far it rolls out) to match the original coverage and valance drop if the awning uses one.
- Width: measure between arm centers or end-cap reference points per brand spec
- Projection: confirm extension length so coverage matches the patio area
- Polycord size: verify bead diameter for roller tube and lead rail channels
Practical example: a tech measures an “18-foot awning” and orders 18′ fabric, but the correct fabric width is 17’2″ because the arms and end caps take up space. The result is fabric that bunches at the ends and won’t tension evenly. Measuring the actual fabric span prevents that headache.
Gather Tools, Parts, and Safety Gear Before Starting
Look, fabric replacement goes smoothly when they stage everything first. Electric awnings add one key concern: stored spring tension and unexpected movement if power is restored. They’ll plan for control, stability, and clean handling of the new fabric.
They should gather the required parts before climbing a ladder. That includes the correct replacement fabric, new polycord (if not sewn in), and any wear items they don’t want to reuse. If the awning uses fabric retention screws at the roller tube or lead rail, they’ll have matching replacements ready in case the originals strip.
- Parts: replacement fabric, optional new valance, retention screws, polycord (if separate)
- Tools: cordless drill/driver with bits, hand screwdriver, hex keys, tape measure, utility knife, marker
- Handling aids: spring clamps, painter’s tape, silicone spray (for channels), clean drop cloth
Safety gear matters because they’ll be working overhead with sharp edges and pinch points. They’ll use safety glasses, cut-resistant gloves, and a stable ladder rated for the user’s weight plus tools. If the RV is on uneven ground, leveling blocks and wheel chocks reduce sway while they’re feeding fabric.
Common mistake: skipping a second set of hands. A helper can support the lead rail and keep fabric from dragging on the ground, which prevents grit from scratching vinyl and keeps acrylic from snagging. Pro tip: they should label small parts in a tray and take a quick photo of each side before disassembly so reassembly stays error-free.
Power Down and Secure the Electric Awning for Safe Work
Now that the correct fabric and tools are ready, they’ll want to make the awning safe before touching the roller. Electric awnings store energy in both the motor system and the spring-loaded tube, so a rushed start can bend arms or pinch fingers.
First, they should cut power to the awning at the source. Turn off the coach battery disconnect (or pull the awning fuse/breaker) and verify the wall switch no longer operates the awning. Zero power is the baseline, not a suggestion.
Next, they should position the awning for controlled access. Most techs work with the awning extended about 12–18 inches so the fabric is accessible without fully loading the arms. If wind is present, they should wait; a light gust can turn a stable job into a fight.

Then, secure the hardware so it can’t move unexpectedly:
- Lock the arms: engage travel locks if equipped, or use strap clamps to prevent arm swing.
- Support the roller: place step ladders near each end so the tube can’t drop if a bracket shifts.
- Stabilize the coach: set parking brake and deploy stabilizers to reduce rocking.
Look for the motor head and idler end. They should mark each end cap position with painter’s tape so reassembly aligns cleanly. They should also photograph wiring routing near the motor head; it prevents re-pinching wires during reinstallation.
Practical example: On a 30-foot Class C, a technician cut power at the battery but forgot the inline awning fuse near the control module. The switch still moved the awning an inch—enough to shift the roller while hands were on the fabric. A quick fuse pull eliminated the risk before continuing.
Common mistakes: leaving power on “just to test,” working in wind, and relying on one ladder instead of supporting both ends.
Remove the Old Awning Fabric from the Roller and Rail
With the awning immobilized, they can remove the old fabric methodically. The goal is simple: release the fabric from the coach rail and roller tube without twisting the tube, tearing the rail, or losing small fasteners.
They should start at the awning rail on the RV sidewall. Locate the fabric’s polycord (the bead) and find any stop screws at either end of the rail. Remove those screws and store them in a labeled container so they don’t get mixed with end-cap hardware.
Next, they should move to the roller tube channel and repeat the process. Many electric awnings use a second polycord track on the roller with one or two retaining screws. Once those are out, the fabric can slide rather than rip.
Now they’ll slide the fabric out, keeping it straight and supported:
- Pull evenly: one person guides at the rail while another supports at the roller.
- Use lubricant: a light spray of silicone in the track reduces binding.
- Protect edges: cover sharp bracket corners with tape to prevent snagging.
If the fabric won’t budge, they should inspect for hidden screws, old sealant, or a kinked track. A plastic trim tool can lift stubborn sealant without gouging painted aluminum.
Practical example: On a Dometic-style electric awning, the fabric jammed halfway due to a crushed section of roller track near the motor head. The installer backed the fabric out, gently opened the track with a flat punch, then re-lubed the channel—saving the roller from replacement.
Pro tips: keep the fabric rolled as it comes out to control debris, and note which side faced outward so they can match orientation when installing the new piece. Common mistakes: yanking the fabric, skipping track lubrication, and missing a single stop screw that tears the bead.
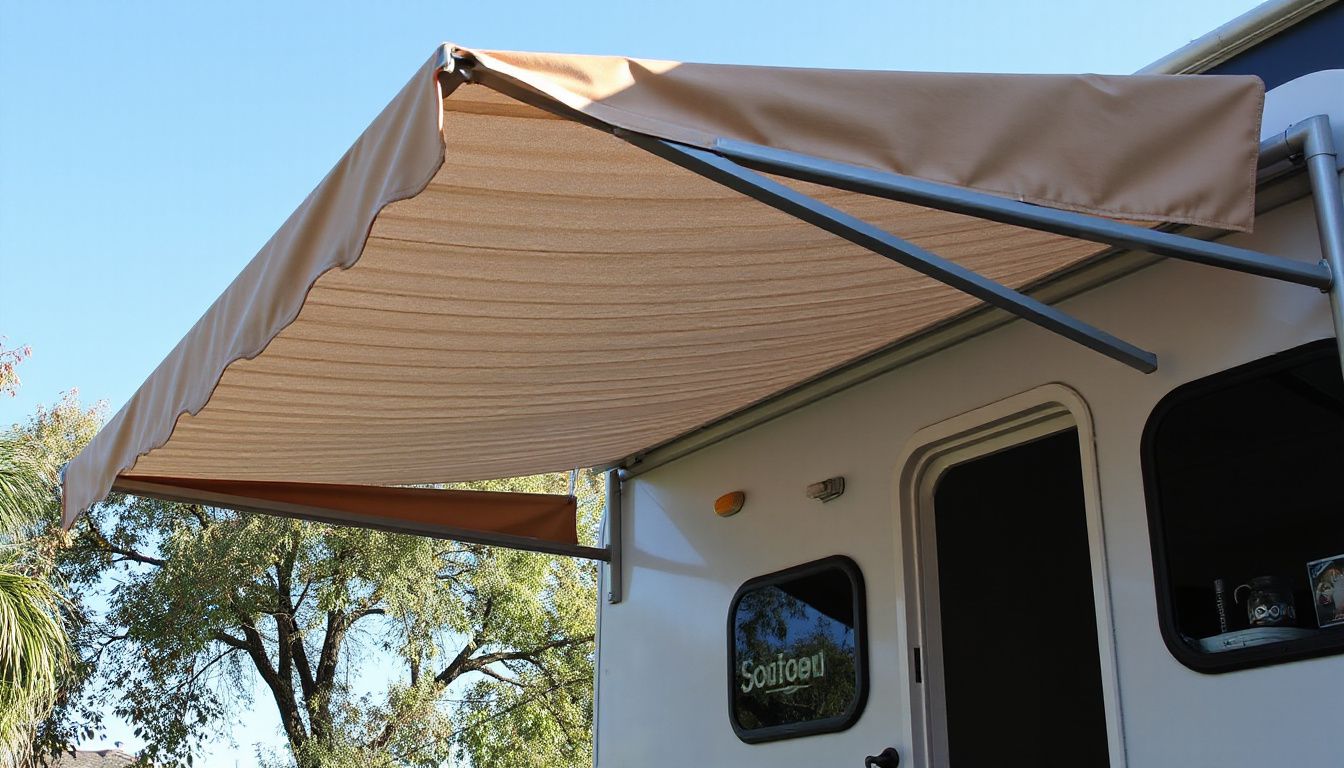
Install and Align the New Fabric on the Rail and Roller
Now the new fabric can go on, and this is where clean alignment prevents wrinkles, edge fray, and tracking issues later. They’ll work slowly, keeping the fabric square to both the awning rail and the roller tube.
They should first confirm the fabric’s orientation. Most replacements have a finished hem for the outer edge and a beaded edge (polycord) that slides into the rail and roller channels.
-
Feed the polycord into the awning rail at the coach side. If the rail has a stop screw, they’ll keep it removed until final positioning.
-
Slide the fabric a few feet, then start the second polycord into the roller channel. Keeping both engaged early reduces twisting.
-
Advance both channels together, alternating pushes so the fabric stays centered and doesn’t “walk” to one side.

-
Set the lateral position: equal overhang at both ends, or match the manufacturer’s end-cap clearance if specified.
Pro tip: a light mist of silicone spray on the channel (not the fabric) can help if the bead drags. Common mistake: pulling hard on one side to “make it go.” That can stretch the bead and cause permanent waves.
Practical example: if they’re installing a 15-foot fabric on a driveway that slopes, the roller will want to drift downhill. They can have a helper support the roller end while the installer feeds the bead, keeping the fabric square and preventing a diagonal start that later shows as a crooked valance line.
Before moving on, they’ll re-install any rail stop screws and confirm the fabric sits flat with no folds trapped in the channels.
Test Operation, Re-Tension, and Finish with Final Checks
With the fabric seated, they’ll verify movement before locking everything down. This is the safest time to catch misalignment, binding, or a loose bead before it tears.
They should restore power only after confirming hands, tools, and ladders are clear of the arms and roller. Then they’ll run the awning in short bursts, watching both ends of the roller for even tracking.
-
Extend 12–18 inches, stop, and check that the fabric rolls straight without drifting.
-
Extend halfway, inspect the top wrap for wrinkles, then retract and confirm it layers evenly.
-
Fully extend and verify the pitch and arm geometry look normal, with no fabric rubbing end caps.
If the fabric walks to one side, they’ll correct it by slightly shifting the fabric in the rail (and roller if needed), then retesting. Common mistake: trying to “fix” tracking by forcing the arms. Tracking is usually fabric centering, not arm alignment.
Re-tension comes next. They’ll follow the awning manufacturer’s method for setting spring or motor-side pre-load, keeping the roller controlled and never releasing it unexpectedly. Pro tip: mark the roller with tape before tensioning so they can count turns accurately.
Practical example: if the awning retracts but leaves a loose flap at the top, they likely need one more controlled turn of pre-load (per spec) so the fabric wraps tight instead of sagging.
Final checks: confirm all fasteners are reinstalled, seal any disturbed screw holes if required, verify the LED wiring (if present) isn’t pinched, and perform one last full extend/retract cycle while listening for clicking or binding.
Start Here
Now the job’s basically won or lost on follow-through. How to replace rv awning fabric on electric awning comes down to confirming the install behaves the way it should under real use, not just on the first cycle. They’ll want to watch the awning through a full extend-and-retract, then recheck alignment after it sits in the sun for a bit.
Look for these quick indicators that the replacement is truly “done”:
- Smooth tracking with no edge creep toward one arm
- Even roll across the tube, without a cone shape
- Quiet operation—no popping, binding, or motor strain
- Weather readiness with sealed end caps and secured fasteners
Real-world example: after a campsite setup, they can extend the awning for lunch, retract it, then check that the fabric edge still lines up with the rail mark. If it shifted, they should correct it before the next trip.
Next step: they should schedule a short recheck after the first drive day and log any adjustments for future maintenance.