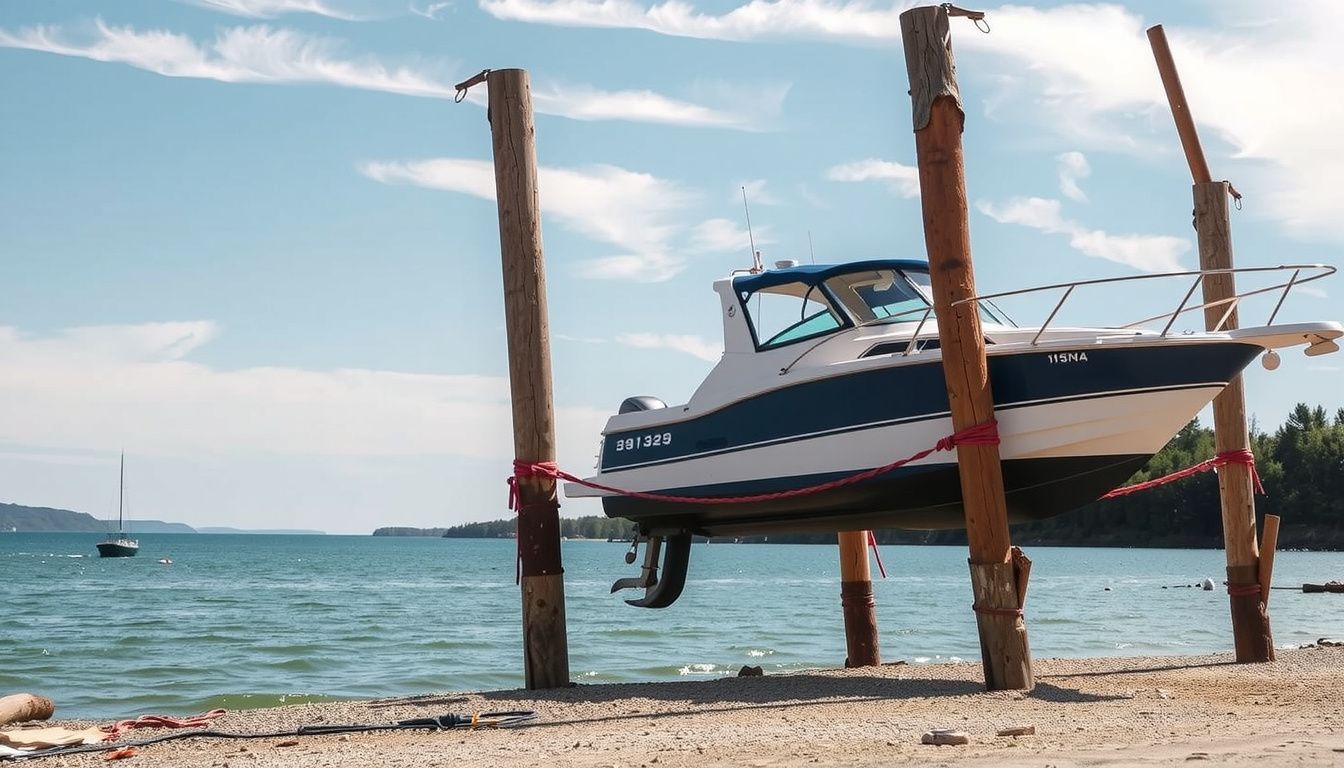
How to Tie a Boat to 4 Pilings for a Stable Docking
Wondering how to tie a boat to 4 pilings without waking up to a snapped line or a hull rubbing all night?
They can do it by building a simple, balanced mooring: four lines, correct angles, and just enough slack for tide and wake. Done right, the boat stays centered, the cleats aren’t overloaded, and the pilings share the load instead of fighting each other.
Look, the process isn’t complicated, but it is specific. This guide walks through the exact sequence for choosing the right dock lines, setting bow and stern leads, adding spring lines, and dialing in tension so the boat can rise and fall safely. It also covers quick checks that prevent chafe and reduce shock loading.
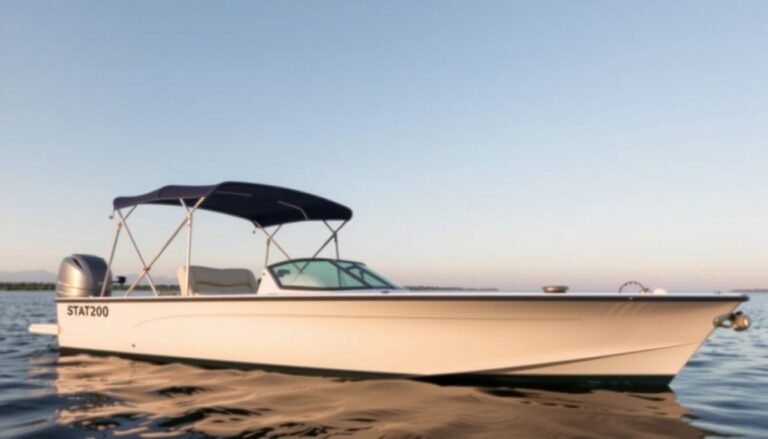
Example: a 24-foot center console in a tidal marina can be secured with two bow lines to the forward pilings and two stern lines to the aft pilings, leaving a controlled “box” that keeps the boat off the pilings even when a passing wake hits.
- Line selection by length, diameter, and stretch
- Knots and hitches that hold and release cleanly
- Spacing and slack for tide, wind, and traffic
Confirm the Dock Layout and Choose the Best Approach Angle
Now they’ll get better results by reading the dock before touching a line. Four pilings can be arranged as a rectangle, a straight row, or a skewed “diamond,” and each layout changes where the boat should sit and how lines will lead. A quick check prevents crossed lines, poor lead angles, and fenders that miss the contact points.
They should start by identifying which pilings will act as the “working pair” (usually the two closest to midship) and which will be the “stops” (one forward, one aft). Next, they’ll look at wind and current. The boat should approach from the side that gives the helmsman control at idle, not the side that forces a last-second burst of throttle.
They can walk the dock and confirm three things:
- Piling spacing: Is there enough beam clearance plus fender thickness?
- Water depth and obstructions: Are there shoals, steps, or cross-bracing near the pilings?
- Line leads: Will breast and spring lines run cleanly without chafe on caps, cleats, or rough wood?
Pro tip: they should aim for a shallow approach angle, roughly 10–20 degrees, so the boat can “kiss” into the fenders and stop with minimal momentum. Common mistake: approaching too parallel, which invites drifting sideways into a piling before a crew member can place a line.
Practical example: a 28-foot cruiser approaches a rectangular four-piling slip with a crosswind pushing off the dock. They choose an upwind approach, keep the bow slightly into the wind, and plan to secure a midship breast line first to the near piling, buying time to set the forward and aft lines without the boat sliding away.
Before You Start: Gather Lines, Fenders, and Assign Crew Roles
Look, a clean tie-up starts before the boat enters the pocket. They’ll stage gear so no one is hunting for a line while the hull drifts toward a piling. For how to tie a boat to 4 pilings reliably, preparation is the difference between controlled docking and improvised scrambling.
They should set out the right equipment on the side that will face the pilings. Lines should be flaked (not knotted), bitter ends accessible, and chafe gear ready if the pilings are rough. Fenders should be inflated and hung at the correct height so they hit pilings, not empty air above them.
A practical pre-dock checklist helps:
- Dock lines: two breast lines and two spring lines sized for the boat, plus a spare
- Fenders: at least three, with one “roving” fender for unexpected contact
- Protection: chafe guards or old fire hose where lines may rub
- Tools: boat hook, gloves, and a knife accessible (never buried)
They’ll also assign roles. One person handles the first line, one manages fenders/boat hook, and the helmsman calls distances and aborts early if alignment is off. Pro tip: they should agree on simple commands (“hold,” “slack,” “take up”) before entering.
Common mistake: letting crew step onto pilings or try to “catch” the boat with hands or feet. Practical example: on a two-person crew, the forward crew member is assigned the first midship breast line and a roving fender, while the helmsman holds the boat steady at idle; once that first line is on, the second person can calmly set springs to stop fore-and-aft movement.
Set Fenders and Pre-Rig Dock Lines for Four-Piling Control
Now they’ll set up the boat so it can “pause” safely while lines get made fast. With four pilings, the goal is controlled contact: the hull should meet fenders, not wood, and lines should already be staged to drop over caps quickly.
They’ll start with fenders. One fender goes near the forward third, one near the aft third, and a third can sit midships if the slip is tight or the pilings are rough. Common mistake: hanging fenders too high, so the rub rail hits the piling before the fender compresses.

Next, they’ll pre-rig dock lines so each has a clear job. For most boats, four lines are the baseline: a bow line, a stern line, and two springs (forward and aft). Each line should be run outside rails and lifelines, coiled cleanly, and placed where the assigned crew member can reach it without stepping off-balance.
- Bow line: staged at the bow, bitter end accessible, loop ready for a piling cap.
- Stern line: staged at the stern, long enough to reach the aft outboard piling.
- Forward spring: from midship cleat leading aft (controls forward motion).
- Aft spring: from midship cleat leading forward (controls reverse motion).
Look for chafe points before they matter. If a line will bear against a cap edge, they’ll add chafe gear or reroute the lead. Pro tip: keep one extra line flaked and ready as a “problem solver” if wind pins the boat.
Practical example: a 28-foot cruiser approaching a four-piling slip in a crosswind can pre-set three fenders on the windward side and stage a forward spring from the starboard midship cleat to be dropped on the aft windward piling first. That single prepared move buys time and prevents drift into the leeward pilings.
Land the Boat and Secure the First Two Lines to Stop Motion
With gear staged, they’ll bring the boat in slowly and commit to stopping motion with two lines before trying to “perfect” the position. The priority is simple: prevent forward-and-aft surge, then prevent sideways drift.
They’ll approach at idle, keeping the boat parallel to the pilings as it enters the box. The helm should aim to stop the boat where crew can reach the nearest two pilings without jumping. Common mistake: coming in too fast and relying on a last-second reverse burst, which can kick the stern sideways.
The first line is usually the one that stops the boat’s biggest risk. In current from ahead, that’s often the bow line. In wind pushing the bow off, it may be a forward spring to hold the boat alongside while the bow is controlled.
- Place the first loop over the easiest, closest piling cap (no lassoing under load).
- Snub the line on the cleat to check momentum, then make it fast.
- Set the second line to eliminate the remaining motion (often the opposite end or a spring).
- Only after motion is controlled, adjust length to center the boat between pilings.
Pro tip: they should “snub, then secure.” A brief controlled hold lets the helm keep the boat steady with minimal throttle while the crew finishes the cleat hitch.
Practical example: a 32-foot sedan bridge enters a four-piling slip with wind pushing the stern toward the outer piling. The crew drops the stern line first to the aft windward piling and snubs it to stop sideways slide. Immediately, they set the forward spring to the forward windward piling to stop forward creep.
With those two lines on, the boat can’t surge or skate, and the remaining bow and stern lines can be set calmly.
If the boat starts to drift while the first line is being placed, they’ll abort early, back out cleanly, and reset. Saving paint beats saving pride.
Add the Remaining Lines and Balance Tension Across All Pilings
Now they’ll turn two “stop-motion” lines into a four-point moor that holds position without grinding the hull against a piling. The goal is simple: each line shares load, and the boat sits centered in its pocket.
They should add the remaining two lines in a controlled order so the boat doesn’t surge while slack is being taken up. If the bow is already stable, they’ll run the stern lines next; if the stern is hunting side-to-side, they’ll finish the bow first.
-
Lead each line to the correct piling with clean angles that avoid crossing over other lines or rubbing on hardware.
-
Snug the new line by hand, then take up slack on the opposite corner so the boat stays centered.
-
Set working tension in small increments: quarter-turns on a cleat hitch or short pulls on a cam cleat, rotating around the boat.
-
Lock each line with proper cleat hitches and leave enough tail for inspection and re-tensioning.

Pro tip: they’ll get better balance by treating the four lines like a “tension square.” Tighten one corner, then adjust the diagonal corner, then the remaining two. That pattern reduces drift and prevents overloading a single piling.
Common mistakes include overtightening one stern line (pulls the transom into a piling), leaving one bow line slack (allows yaw), and running a line over a sharp chock edge without chafe gear.
Practical example: a 28-foot cruiser in a crosswind off the port side often needs the port bow and port stern lines slightly tighter than starboard. They should still keep all four lines engaged; the “windward” pair counters drift while the leeward pair prevents the boat from snapping back when gusts ease.
Test, Fine-Tune, and Monitor for Tide, Wind Shifts, and Chafe
With all four lines set, they should prove the setup before walking away. A quick test shows whether the boat will surge, rub, or overload a cleat when conditions change.
They’ll start with a controlled push-pull check. One crew member applies steady pressure at the bow, then stern, while another watches line stretch, cleat movement, and fender compression.
-
Check clearance: the hull should stay off pilings through the full range of movement.
-
Check angles: lines should lead fair, without sawing across chocks or lifelines.
-
Check load sharing: no single line should go bar-tight while others hang slack.
They should fine-tune by making small, paired adjustments. If the bow is too close to the forward pilings, ease both bow lines slightly and take up the stern lines evenly. If the boat yaws, they’ll tighten the line on the side it swings toward and re-center with the opposite corner.
Tide and wake matter. They should leave enough “give” for rise and fall, using springy dock lines or a touch of slack where vertical movement is expected. In areas with big tide swings, they’ll re-check within 30–60 minutes, then again at the next tide change.
Chafe control is non-negotiable. They should add chafe gear at chocks and piling contact points, then confirm it can’t slide out of position.
Practical example: if an afternoon sea breeze clocks from southwest to west, the load can move from the port-side lines to the stern-quarter line. They should inspect that line first, add extra chafe protection if it’s working over a rough piling cap, and re-balance tension so the boat stays centered overnight.
Start Here
Now they’re ready to make how to tie a boat to 4 pilings a repeatable routine, not a one-off win. The goal is simple: create a stable “box” around the boat so it sits centered, predictable, and protected when conditions change.
Look for these finish-line signals before they walk away:
- Even spacing from each piling, with no line doing all the work
- Controlled movement that’s limited, cushioned, and doesn’t build momentum
- Clean contact points where nothing rubs, saws, or pinches under load
Real-world example: if they leave for dinner and a late-afternoon breeze swings 20 degrees, the boat should shift slightly, then settle—without bumping a piling or snapping a line tight.
Next step: they should practice the full tie-up in calm conditions, then repeat it in light wind to build fast, confident muscle memory.
Related read: How to Dock a Boat Step-by-Step in Wind and Current